Monday, December 31, 2012

Chocolate Cherry Sable Cookies


Pin It!


At some point over the last few years, I decided that I really quite enjoy my own company. I mean, I'm really funny and clever, I have great taste in shoes, as evidenced by my wall-sized shoe rack (no, really, I may have a problem) and I'm always up for trying new things.


And being alone while I bake with my flour-dusted laptop and a cheesy Netflix/Hulu movie and/or murder mystery (not the really gruesome, scary kind, I'm more of a "Bones" and "Murder, She Wrote" fan) just gives me time to think and relax.


I only occasionally get distracted and burn trays of cookies (no timer in this apt here), but lucky for you, that's the hardest part! As long as you remember to take these puppies out of the oven, they're really simple and look so elegant!

Also, they're a kind of butter cookie, if that tells you anything...yum!

Chocolate Cherry Sable Cookies [click to print]
Makes about 4 dozen cookies
  • 4 oz butter, softened
  • 2 oz sugar
  • 1 egg, lightly beaten
  • 5 oz cake flour
  • 1-1/2 T. cocoa powder
  • 1/4 c. cherry jam
1) Preheat oven to 350 F. Line baking sheet with parchment paper and set aside. 

2) In stand mixer, beat butter for about 20-30 seconds until smooth-ish. Slowly add in the sugar. Slowly add the egg. Add a small scoop of flour and beat until ingredients just pull together. Add remaining flour all at once and mix until just combined, scraping sides of bowl as necessary. 

3) Fit piping bag with a large star tip (I used #3B). Pipe dough onto prepared sheet, spacing about 1-1/2" apart. Dip your finger, or the end of a wooden spoon, in cocoa powder and press a dent in the center of the piped cookies. 

4) Fill ziploc sandwich bag with jam and snip off a small corner. Squeeze small amount of jam into depression in cookies. Refrigerate about 5 minutes until firm then bake for 8-11 minutes. Allow cookies to cool on sheet about 3 minutes before removing to wire racks to cool completely. 

Source: Adapted from L'Academie de Cuisine

Thursday, December 6, 2012

Hazelnut Ripple Banana Bread


Pin It!

I had a jar of Nutella stashed in my pantry, staring me down. And then something happened to it and it disappeared. So...I didn't buy that stuff again until just recently due to my severe lack of self control. And now here it is, half a jar sitting all warm and creamy between layers of fluffy, moist banana bread, speckled with chunks of hazelnuts. Oh, my goodness.


I tried a few different recipes before getting this one down. Other versions swirl the Nutella through the top of the loaf, but that lets the chocolate overcook and get kind of dry and crumbly and burned before the bread is actually done baking. If you make a thick gooey layer in the middle, it stays exactly that way---thick and gooey. 


This is a perfect cold day sweet bread, especially if you eat it straight out of the oven with a glass of milk. Or in one hand on your way to work. Or for a light midday snack. It's pretty much good whenever. So yum.

Hazelnut Ripple Banana Bread [click to print]
Makes one loaf
  • 1/2 c. hazelnuts, coarsely chopped
  • 1-1/2 c. flour
  • 1 tsp. baking soda
  • 1/8 tsp. salt
  • 3 very ripe, extremely spotty bananas, mashed
  • 3/4 c. sugar
  • 1/3 c. unsalted butter, melted
  • 1 egg, slightly beaten
  • 1 tsp. vanilla extract
  • 1/2 c. hazelnut spread (i.e. Nutella)
1) Preheat oven to 350 F. Line 9x4 loaf pan with parchment paper, allowing 2-3" overhang on each side of pan, or coat generously with nonstick cooking spray and set aside.

2) On another baking sheet, spread hazelnuts in an even layer and toast in oven about 12-15 minutes; or until fragrant and just barely browned. Remove from oven and allow to cool. Whisk together with flour, soda and salt; set aside.

3) In large bowl, mix bananas, sugar, butter, egg and vanilla, beating until well combined. Add flour mixture, in about two additions, mixing until just incorporated. 

4) Pour about half of the banana batter into the pan. Heat hazelnut spread about 15 seconds in microwave to soften and spread evenly over batter. Scoop remaining batter over last layer and spread evenly. Bake 50-60 minutes. Allow to cool in pan about 10 minutes, then remove to wire rack to cool completely. 

Source: Adapted from Lovin From the Oven

Tuesday, December 4, 2012

Cranberry Almond Bread


Pin It!

There's just something about cranberries that make me think twice. They're just so red and tart and scary looking...especially when they're dried. They just look too much like raisins to be trusted. But almond, on the other hand, I am absolutely in love with. This recipe dares you to combine these two flavors into a delicate sweet bread that is so worth the almond flour. 


You really can substitute the almond flour for the regular old all-purpose kind but the flavor profile won't be quite the same. And put down that almond extract. If you add too much, it will start to taste more artificial than delicious. So now that we're over that little issue, please bake this up and save me a nice thick slice for breakfast.

Cranberry Almond Bread [click to print]
Makes 1 loaf
  • 1-1/4 c. flour
  • 1/4 c. almond flour
  • 1/2 tsp. salt
  • 1 tsp. baking powder
  • 1/2 c. cranberries, fresh, frozen or dried
  • 1/4 c. milk
  • 1 tsp. vanilla extract
  • 1 tsp. almond extract
  • 1/2 c. butter
  • 1 c. sugar
  • 2 eggs
1) Preheat oven to 350 F. Line loaf pan with parchment paper, allowing about 3 inches overhang on either side of pan, or coat generously with nonstick cooking spray; set aside.

2) Whisk together flours, salt and baking powder. Toss cranberries in flour mixture to coat and set aside. In another bowl, whisk together milk and extracts; set aside.

3) In bowl of stand mixer, cream sugar and butter. Add eggs one at a time, incorporating well between each addition. Alternately add flour and milk mixtures, beginning and ending with flour, in about about three additions.

4) Pour batter in prepared pan and bake for 55-60 minutes or until the top is golden and it springs back when lightly touched.

Source: Adapted from Sweet Posy Dreams

Monday, December 3, 2012

Chocolate Bon Bons and Truffles


Pin It!

I've been learning all kinds of fun things about chocolate the last few weeks. Remember how I'm taking that class at L'Academie de Cuisine? I wasn't ever very interested in chocolate or candy making. It always seemed difficult and gave me nightmares of nasty 3rd degree burns. Until now.


Chef Mark makes everything seem so easy, and it turns out, tempering chocolate still isn't my favorite thing but it's not so bad! And just look at all these beautiful candies we made! Anybody wanna get together for a candy making extravaganza?!

Tuesday, November 27, 2012

Cranberry Pistachio White Chocolate Bark


Pin It!

Sometimes when I come home from work in the winter and it's already depressingly dark outside, I just need a quick jolt to liven my senses. Homemade chocolate bark is a great solution. Believe me. It's easy peasy.

On top of that, with its deep red berries and brilliant green pistachios, it practically screams Christmas. And if that's not good enough for you, a few dear family members stared at a bag of this freshly made bark before even tasting the stuff...they claimed they didn't like white chocolate. But after one nibble, that claim no longer held true!

Cranberry Pistachio White Chocolate Bark [click to print]
  • 1 c. pistachios, shelled and coarsely chopped
  • 1 c. dried cranberries, coarsely chopped
  • 2 c. white chocolate chips
1) Line 13x9 pan with parchment paper and set aside. If you don't have parchment, heavily coat foil with nonstick cooking spray.

2) Combine nuts and berries in bowl and set aside.

3) Heat white chocolate in double boiler, stirring constantly, until only a few lumps remain. Remove from heat and continue stirring until smooth.

4) Stir chocolate into nut and berry mixture until all pieces are well coated. Press into prepared pan and spread as thinly as possible. It's okay if the mixture doesn't reach all the edges of the pan. Allow to set completely at room temperature or about 1 hour in the freezer. Break into pieces and serve or package as gifts!

Source: Adapted from Skinny Taste

Wednesday, November 21, 2012

Coconut Macaroons


Pin It!

We're gearing up for another round of The Biggest Loser at work. Last time we did it, I totally won! I've kept most of the weight off and even got in good enough shape to run a half marathon last fall! That was a great feeling. 

So maybe it's the wishful thought of running in the warm sunshine, slathered with a nice layer of Banana Boat, or craving whatever treat my dad says sounds kind of good, but I've had coconut on the brain! And these macaroons are surprisingly low in fat, although the sugar might get you if you indulge too many times. And the best part is, they really aren't that hard and they taste so good! Totally worth running that extra block.


Coconut Macaroons [click to print]
Makes about 2 dozen
  • 3 egg whites
  • 1-1/4 c. sugar
  • 14 oz. bag shredded coconut
  • 1 to 2 c. dark chocolate chips
1) Whisk together egg whites and sugar in heat proof bowl. Create a double boiler by placing bowl over pot with about an inch of boiling water. Whisk continuously until sugar dissolves. (Hint: Listen for the gritty, sandy sound to disappear and you're good to go!)

2) In large bowl, pour about half of egg white mixture over coconut. Stir well to completely distribute wet ingredients. Slowly add more egg white mixture, about a tablespoon or two at a time, until the coconut is wet enough to just hold together when scooped. You may not need all the egg whites, so stir well between each addition!

3) Pack mixture into cookie scoop or press firmly into ball about 2 T. in size. Place on cookie sheet, lined with parchment paper, and bake at 350 F for 10-15 minutes or until just barely golden. The cookies will be very fragile at this point. Carefully slide the entire sheet of parchment paper off the baking sheet and allow to cool completely.

4) In small bowl, microwave chocolate in 10 second intervals, stirring between each nuke. If the chocolate is still too thick after completely melted, add a teaspoon of butter or shortening and stir until incorporated. Dip macaroons into chocolate, wiping against edge of bowl to scrape off excess chocolate, and place on parchment paper to set.

Source: Adapated from L'Academie de Cuisine

Saturday, November 17, 2012

Coconut Banana Bread (butter and oil free!)


Pin It!

I know, you're rolling your eyes at me right now. As I type C-O-C-O-N-U-T you're quietly calling me a N-U-T under your breath. But I promise you, coconut is completely appropriate for the middle of fall when you mix it into a warm, moist loaf of banana bread!


I've just been in a coconut-craving, impatient sort of mood lately so my vote was for something quick and easy and delicious. And since the black bananas have been piling up in my freezer lately, Coconut Banana Bread was the logical choice. Plus, it doesn't even have any added butter or oil so you can easily rationalize that you're eating an entire fruit basket as you devour this loaf!

Coconut Banana Bread (butter and oil free!) [click to print]
Makes one loaf
  • 1/2 c. applesauce
  • 1 c. sugar
  • 2 eggs
  • 2-1/2 c. flour
  • 1-1/2 tsp. baking powder
  • 1 tsp. baking soda
  • 1/2 tsp. salt
  • 3 medium bananas, extremely ripe and mashed (about 1 c.)
  • 1 c. coconut milk
  • 2 tsp. vanilla extract
  • 1 c. sweetened shredded coconut
1) Preheat oven to 350 F. Line 9x5 loaf pan with parchment paper and set aside.

2) Stir together applesauce, sugar and eggs until smooth.

3) In separate bowl, whisk together flour, powder, soda and salt; set aside. In another bowl, whisk together bananas, milk and vanilla. Alternately add flour and banana mixtures to egg mixture, beginning and ending with flour. Stir in coconut.

4) Pour batter into prepared pan and bake 60-75 minutes or until top is golden and springs back lightly when touched. Cool about 10 minutes in pan before removing to wire rack to cool completely.

Source: Adapated from Fat Girl Trapped In a Skinny Body

Thursday, November 1, 2012

Monkey (Ginger)Bread


Pin It!

The first time I had monkey bread was during college. We were having a breakfast bash and my friend brought this hot, gooey mound of pull apart bread and I realized that I was in love. I've always gone a little weak at the knees over sticky, caramelized, breaded pastries and this stuff is no different.

Except for this isn't your ordinary monkey bread. This stuff tastes like the holidays and is packed with fragrant spices and molasses. And, it's really a lot easier than it sounds!

Monkey (Ginger)Bread [click to print]
makes 1-bundt

For bread
  • 3-1/4 c. flour
  • 2 T. pumpkin pie spice
  • 2-1/4 tsp. active dry yeast (or 1pkg)
  • 2 tsp. salt
  • 1 c. whole milk
  • 1/3 c. warm water
  • 1/4 c. molasses
  • 2 tsp. vanilla extract
For coating (prepare in separate bowls)
  • 3-4 T. unsalted butter, melted
  • 1 c. brown sugar
1) Generously coat bundt pan with nonstick cooking spray with flour (very important to use the kind with flour!). 

2) In bowl of stand mixer, whisk together flour, spice, salt and yeast. Add milk, water, molasses and vanilla. Continue mixing with hook until dough starts climbing the hook. 

3) Turn dough onto floured surface and knead until dough forms a smooth ball. Place in oiled bowl and cover with damp cloth and set in warm place to rise until doubled in size, about 1 to 1-1/2 hours. 

4) When risen, transfer dough to floured surface and gently punch down and shape into 8" square. Use a pizza cutter to dough into 64 pieces. Coat each ball in melted butter, then brown sugar and start piling into bundt, trying to distribute them somewhat evenly. 

5) Cover bundt with damp towel and place in warm area to rise about 1 hour; the dough balls should be puffy and about 1" below top edge of bundt pan. 

6) Preheat oven to 350 F. Bake 30-35 minutes or until the top is golden brown. Remove from oven and allow to cool in pan no more than 5 minutes. Turn out onto plate and allow to cool another 10 minutes before serving. 

Source: Adapted from Food 52

Wednesday, October 31, 2012

October Foodie PenPals Reveal!


Pin It!

Back when I was kinda nerdy (no comments, please), I remember reading the back of the Boys' Life magazine (I have three brothers) and begging my parents to let me send away for those quail eggs and incubator. I had a great plan...they would hatch in my dresser drawer and follow me around everywhere and stay on the back porch, that I cleaned up all by myself, while I was at school. It was going to be perfect. But, for some reason, my parents didn't like that idea so much.

They did, however, go for the penpals idea from National Geographic Kids. That was a ton of fun! I got to send letters back and forth with new friends in Argentina and Louisiana. And now, thanks to Lindsay at The Lean Green Bean, I have the chance to participate in her Foodie Penpals Project! Each month, we get matched up with two different people to send or receive a package of sweet and savory foodie items---one person to mail a package to and another to receive a package from.


During October, I got an awesome package from Sonia of The Mexigarian. It was packed full of fudgy brownies and macarons and caramel dip and curry mix and Bob's Red Mill pancake mix and sundried tomatoes and fancy natural peanut butter and even more stuff! So, thanks again, Lindsay for organizing this each month and to Sonia for such fun surprises!

Monday, October 29, 2012

Classic White Bread


Pin It!

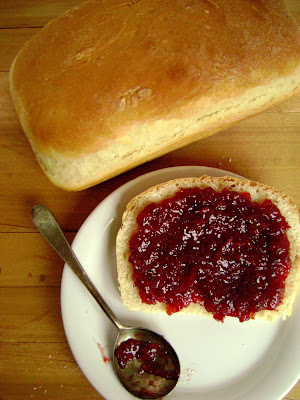
Years ago, when we visited my grandparents out in the boonies of Pennsylvania, Mama would always have loaves of homemade bread sitting on the counter (next to zucchini bread, of course), practically begging to be cut into nice thick slices. Then you could slather your piece with homemade jam or make a spaghetti sandwich with last night's leftovers or just eat it straight up. Followed by a second slice.


I've been feeling nostalgic lately, and with Hurricane Sandy currently hanging out in my parking lot and my entire life feeling like it's been swept up in a hurricane at times, I decided that today is the perfect day to whip up the softest, most delicious white bread ever. This bread is a little sweeter than your typical white bread, but who doesn't love sweet?

And besides, nothing says comfort quite like a mouthful of carbs.

Classic White Bread [click to print]
makes 2 - 9x5" loaves
  • 6 c. flour
  • 2/3 c. sugar
  • 1-1/2 T. dry active yeast
  • 1-1/2 tsp. salt
  • 2 c. warm water
  • 1/4 c. unsalted butter, melted
1) In bowl of stand mixer, whisk together flour, sugar, yeast and salt. 

2) Using dough hook, stir in water and butter. Continue kneading in mixer until dough climbs hook; it will still be pretty soft. 

3) Dump dough onto floured surface and knead gently until dough pulls together. Put dough into oiled (or nonstick-sprayed) bowl and cover with damp cloth (this will keep it from drying the dough out as it rises). Allow to sit in a warm place until doubled in size, about an hour. 

4) Punch dough down and knead about 3 minutes or until dough shapes into a smooth ball. Shape into loaves and put in loaf pans, coated generously with nonstick cooking spray or oil. Allow to rise until dough is about 1" above top edge of pans. 

5) Bake at 350 F for 30 minutes. 

Source: Adapted from All Recipes

Tuesday, September 18, 2012

Brown Butter Butterscotch Blondies


Pin It!

I've done brown butter before, and that was my first mistake. There's something almost intoxicating about the smell of caramelized brown butter wafting through the air. And baked into a blondie...somebody hold me back! No, seriously. I have issues with self control.


And to top it all off, these things are so easy to make and they don't have any weird ingredients so you can probably whip up a batch right now! Unless of course you don't keep bags of butterscotch chips stashed away in your freezer...


So go ahead and pour yourself a tall glass of icy cold milk to go along with your blondie stack. Just trust me on this one.


Brown Butter Butterscotch Blondies [click to print]
makes about 16 bars
  • 1/2 c. unsalted butter
  • 1/2 lb. brown sugar
  • 2 eggs
  • 1/2 tsp. vanilla extract
  • 1-1/4 c. flour
  • 1-1/4 tsp. baking powder
  • 1/2 tsp. salt
  • 1 c. butterscotch chips
1) Preheat oven to 350 F and line 9x9 pan with parchment paper or coat generously with nonstick cooking spray. 

2) Melt butter in small saucepan, stirring continuously, until browned. The butter will start off bubbly and loud, then quiet down. Watch closely as it turns to an amber color and starts smelling like caramel; immediately remove from heat and pour into mixing bowl. Allow to cool about 10 minutes. 

2) Add sugar, eggs and vanilla, beating well until completely combined. Add dry ingredients and mix well. Stir in butterscotch chips. Spread mixture into prepared pan and bake 30-35 minutes. Allow to cool and cut into squares. 

Monday, September 17, 2012

Croissants


Pin It!

I always thought laminated doughs were hard and tedious and overly difficult for the average human/baker. Turns out that's not exactly true, but they do require a lot of patience.


Last week in my L'Academie pastry class, we finished a batch of absolutely beautiful croissants and I just might be in love.


When you make them right, croissants have a richly-colored crust and a variety of textures; if you take one between your fingers and give it a gently squeeze, you can hear the outer shell crackle and sweet steam escapes and you can't help but peel off a layer and savor every bite.

Thursday, September 13, 2012

Big Fat Chocolate Chip Cookies


Pin It!

It started when I flipped through some old recipe cards and found one my friend gave me for her famous chocolate chip cookies my freshman year at BYU. Then I was surfing through recipes and blogs and came across 52 Kitchen Adventures' Chocolate Chip Cookie Challenge (deadline to contribute is tomorrow!). And then I was over at another friend's house whipping out a batch of choux pastry and she pulled out a giant Costco bag of chocolate chips and said I could have them, she didn't know what to do with that many chocolate chips.


Seriously? I got this.


I have dreamed for years about the biggest, fattest, chewiest with a hint of crisp crust around the edges, beautiful chocolate chip cookies for years. I know, I may have a problem.


Also, these make excellent ice cream sandwiches.

Big Fat Chewy Chocolate Chip Cookies [click to print]
makes about 16 cookies
  • 3/4 c. unsalted butter 
  • 2 c. plus 2 T. flour
  • 1/2 tsp. baking soda
  • 1/2 tsp. salt
  • 1 c. dark brown sugar, packed
  • 1/2 c. sugar
  • 1 egg, whole
  • 1 egg yolk
  • 2 tsp. vanilla extract
  • 1 c. mini semisweet chocolate chips
1) Preheat oven to 325 F and line cookie sheet with parchment paper or coat generously with nonstick cooking spray. 

2) Over medium low heat, melt butter and continue heating, stirring occasionally, until browned. It will start off really bubbly and loud and then quiet down. Pay close attention at this point and watch the butter; as soon as it turns a beautiful amber color and starts smelling like caramel, remove from heat. There will be little brown bits at the bottom of the pan and that's good, so stop worrying. 

3) Whisk together flour, soda and salt; set aside. Combine sugars and browned butter in mixing bowl and beat until well incorporated, about 1 to 2 minutes. Add egg, yolk and vanilla; continue beating until smooth again, about 30 seconds. 

4) Slowly add flour mixture and beat until just combined. Stir in chocolate chips. Chill at least 30 min. (Don't skip the chilling part like I did on the first pan, or you'll get flat cookies and that's no bueno.)

5) Scoop dough onto prepared pan and bake 15-20 minutes. Edges of cookies should be set and firm to touch while centers are puffy and soft still. Allow cookies to cool on pan about 10 minutes before removing to wire rack. 

Source: Adapted from America's Test Kitchen

Tuesday, September 11, 2012

Cherry Vanilla Compote


Pin It!

Breakfast is probably my favorite meal of the day...even though I usually just grab an apple or something on my way out the door. I guess it would be more accurate to say breakfast food is my favorite. Ever. And any time of the day. I don't discriminate like that.


A friend suggested getting together for brunch a week or so ago and I've had sweet and savory breakfast combos floating through my mind pretty much every day. Let's just say, I need to start getting up earlier if I'm going to eat everything I'm planning on making!


And everyone knows that any good breakfast food...waffles, croissants, birthday cake...has to be accompanied by a flavorful syrup of sorts. I opted for a compote here, which is basically a syrup made even more amazing by packing it with chopped fruit. I think that means it's healthy. You can go ahead and quote me on that.

Cherry Vanilla Compote [click to print]
makes about 2-1/2 cups
  • 1/2 c. sugar
  • 1 T. cornstarch
  • 1/2 c. water
  • 1 T. lemon juice
  • 3 c. dark cherries (pitted and halved; keep juice if using frozen!)
  • 2 tsp. vanilla extract
1) In large saucepan, whisk together sugar and cornstarch. Add water and lemon juice. Stir over medium-low heat until sugar is dissolved. Bring mixture to a boil and continue heating about 2-3 minutes or between 170-180 F.

2) Stir in cherries and bring back to a boil. Continue boiling about 3 minutes or until cherries are just softened. Remove from heat and stir in vanilla.  Let cool and smother waffles, ice cream or test out a Dark Cherry Truffle Cake (coming soon)!

Source: Adapted from A World of Cake and Closet Cooking

Monday, September 10, 2012

Dreaming of Brioche


Pin It!

I took an overly long nap this afternoon and dreamed about brioche. Seriously. I wouldn't lie to you about something so delicious.


I woke up with visions of dark-crusted loaves of parisienne brioche steaming as I pulled them from the oven. This bread is so rich, that you can stick a slice in the toaster and hear it sizzle...without buttering it first. It's the perfect dough for sweet rolls or grilled cheese or anything your heart desires.

Thanks for the dreams, L'Academie.

Thursday, September 6, 2012

Raspberry Almond Tart


Pin It!

Even though it's September and the roads are clogged with school-traffic and beaches are seemingly abandoned, I refuse to believe that Summer is over. And technically, it isn't. 


So this is my attempt at a slow transition into the rich, comforting desserts of Fall and Winter. I never made a baked tart...or at all---before L'Academie. And even though they look hard, as most pastries do, they aren't actually that difficult! Just whip up a batch of almond cream, spread in your pastry shell, add berries and bake. It really is that simple.


P.S. This is especially delicious served warm.

Raspberry Almond Tart [click to print]
makes about ten 4" tarts

For assembly
  • 1 pkg. pastry dough, rolled about 1/8" thick or a little less
  • 2-3 c. raspberries
  • 3-4 T. apricot jam or apple jelly
For the custard
  • 1 c. unsalted butter, softened
  • 1/2 lb. sugar
  • 1/2 lb. almond flour
  • 5 eggs
  • 1 T. vanilla extract
  • 1/4 tsp. almond extract
  • 1 T. lemon zest
  • 1-1/2 oz. flour
  • 1/8 tsp. salt
1) Preheat oven to 350 F and generously coat tart pans (preferably with removable base) with nonstick cooking spray and set aside. Press pastry dough into 4" tart shells. (You can also use a larger tart shell or pie pan but baking time will be different.)

2) Beat butter in stand mixer until smooth. Add sugar and continue beating until combined. 

3) Spoon in almond flour, scraping sides of bowl as needed.

4) Add four of the eggs, one at a time. Beat last egg with fork and add a little; add about half of all-purpose flour mixture then half of remaining egg. Beat in rest of flour, egg and salt. Add extracts and zest. Scrape sides as needed and mix until well combined. 

5) Spread almond cream into prepared tart shells, filling about 1/2 to 2/3 full. Arrange raspberries on top of cream. Bake about 20-25 minutes or until cream is puffed and golden. Use pastry brush to coat top of tart with warmed apricot jam and enjoy!

Source: Adapted from L'Academie de Cuisine

Monday, September 3, 2012

In Season: Plums


Pin It!

Growing up, my dad would come whistling into our bedrooms early on Saturday mornings and try to guilt us out of bed to weed-whack the yard (we didn't have much grass, okay?), make a grocery store run or do "something productive."


And now suddenly, the grass can wait and we have enough cereal but heaven forbid we don't get to the Farmer's Market early enough! It's like the weekend would cease to exist without a bear claw (or two) and more fresh fruit and vegetables than two or three people can possibly consume in seven days.


And guess what? Plums are in season right now, so dig on into a bushel of juicy sugar plums, red plums, italian plums, black diamonds...there's about a million different kinds! The best time of year to dig into plums is May through October. Craving more than a simple mouthful of plums? Check out these tasty recipes:

Friday, August 31, 2012

Ginger Plum Skillet


Pin It!


I'm gonna brag to you a little bit. I got this cast iron skillet for $2! Talk about a steal. I've been coveting these skillets for years and now I'm the proud owner of a perfectly seasoned 9-incher. My life is awesome.


The only bad part about it is the guilt trip I've been getting sent on every time I reach into the cupboard and merely glance in Skillet's direction. I'm sorry I've been avoiding you, but today is finally the day!


Just look at this beautiful cake...dark crust, tender plum slices sunken throughout a super moist cake layer and accented with just the right amount of spices. And if you don't have a cast iron skillet, you can bake this in a regular 9" cake pan, too, but the time will differ, so just be sure to check along the way!

Ginger Plum Skillet [click to print]
makes one 9" cake
  • 1 c. flour
  • 1 tsp. ground ginger
  • 1/2 tsp. baking powder
  • 1/4 tsp. baking soda
  • 1/4 tsp. salt
  • 1/4 tsp. white pepper
  • 1/2 c. buttermilk
  • 1 tsp. vanilla extract
  • 1/4 c. unsalted butter, softened
  • 3/4 c. sugar
  • 1 egg
  • 2 medium plums, pitted and thinly sliced
  • 2 T. coarse sugar
  • 2-3 T. candied ginger, finely chopped (optional)
  • 2-3 T. apple jelly
1) Preheat oven to 375 F.

2) Whisk together flour, ginger, powder, soda, salt and pepper; set aside. In a separate bowl, whisk together extract and milk; set aside. 

3) Cream butter and sugar. Add egg and beat until well combined. Alternately add flour and milk mixtures in about 3 additions, beginning and ending with flour mixture. 

4) Pour batter into skillet. Arrange plum slices on batter surface. Sprinkle coarse sugar and candied ginger over top and bake 30 minutes or until top is golden brown. Using a pastry brush, coat top of cake with this layer of apple jelly and allow to cool in skillet. 

Source: Adapted from Stacey Snacks Online

Thursday, August 30, 2012

L'Academie and Cream Puffs


Pin It!

Gimme a woot woot! I started my first-ever actual baking class a couple weeks ago at L'Academie de Cuisine and I am in love! I've been a butter-smelling, batter-tasting, brainstorming-recipe-combos-in-my-free-time crazy person for the last couple of years and I thought it would be fun. Right again, Molly. Thank you.


Each week Chef Mark, who worked at the White House and trained with Chef Mesnier (he's famous)---how cool is that?!---teaches us about all kinds of beautiful pastries and I take pages of tiny scribbled, yet ridiculously organized, notes on every detail that comes out of his mouth. It's fascinating!


These are some beautiful cream puffs, made out of choux pastry and filled with fresh whipped cream. Way better than the frozen store kind, fyi. The rich buttery pastry shell is just barely crisp and browned in the oven while wonderfully soft and flavorful on the inside. Then, when you bite into the little guy, it bursts open with chilled, silky cream and you have to close your eyes to let your mouth enjoy every bit of flavor!


I'm going to apologize right now for only sharing mouthwatering imagery of class projects and miscellaneous baking attempts. These projects are best explained with detailed step-by-step images and my camera/laptop can only handle so much flour/butter/eggs mixed in between the buttons.


So basically what I'm saying is you should probably invite me over to have a baking party. Oh yeah!
Related Posts Plugin for WordPress, Blogger...