Showing posts with label Caramel. Show all posts

Wednesday, January 23, 2013

Microwave Salted Butter Caramel


Pin It!

I'm not gonna lie to you. Every once in a while, I eat cheap store cookies. I'm not talking Oreos, here. I mean those really cheap $2 giant store brand packs that are so full of artificial ingredients that you can practically feel your body getting preserved with each bite. And yet, I still give in. But when you're craving something fast and good, you can't beat homemade. I don't think I need to convince you of that.


I'm sure at this point your eyes are rolling around in your head, totally unconvinced that something so delicious as homemade caramel could actually be fast and easy. But it's true, my dear friends! Take 10 minutes and give this a try. You, and everyone around you, won't be sorry!

Microwave Salted Butter Caramels [click to print]
Makes about 3 dozen caramels
  • 1/2 c. granulated sugar
  • 1/2 c. brown sugar
  • 1/2 c. corn syrup
  • 1/2 c. sweetened condensed milk
  • 1/4 c. salted butter, melted
  • 1/4 tsp. salt
  • 1 tsp. vanilla
  • 1/4 to 1/2 tsp. coarse salt
1) Line square pan with parchment paper, allowing at least 2" overhang on each side of pan. For normal caramels, use 8x8" pan, or 6x6 for thicker caramels. If you're going to sub foil for parchment, be sure to coat foil surface very generously with nonstick cooking spray.

2) In a large microwave safe bowl (emphasis on the large...this mixture will bubble up a lot as it's cooking so you'll want a bowl with taller sides), stir together sugars, syrup, milk, salt and butter until well combined.

3) Microwave on high for 6-8 minutes, stirring every 2 minutes for first six minutes, then each minute thereafter. For soft, chewy caramels, microwave 6-7 minutes. For firmer caramels (still chewy!) that hold their shape well, microwave 8 minutes.

3) Stir in vanilla and pour into pan. Sprinkle lightly with coarse salt and allow to cool until firm or place in refrigerator for about 1 hour. Remove caramel slab from pan by lifting parchment overhang. Use a sharp knife to cut caramel into small pieces and wrap in parchment paper or plastic wrap to store.

Source: Adapted from The Yummy Life

Wednesday, August 15, 2012

Salted Vanilla Bean Caramel Sauce


Pin It!

The first time I tried to make caramel sauce, it was a disaster. I wasn't sure how long and dark to cook the sugar but when it started smoking and suddenly going from golden to amber to blackness, I knew it was bad. So I grabbed my pot, ran out the door and dumped the mess in the bushes so it would cool off faster and not be stuck in my pot forever. Pouring hot, burning sugar onto little dry pieces of mulch is probably not the best choice. (No bushes were permanently harmed and no fires were started in the failure of this caramel sauce.)


But here's a trick I learned...don't start eating dinner while you're waiting for the sugar to cook because once it starts cooking, it cooks really fast! Also, I found that gently swirling the pan to distribute the heat more evenly was a lot more effective than stirring. That helped me ruin a few other batches after the bush incident.

Wondering what to do with all this fresh, sweet caramel? How about one of these ideas: 


Salted Vanilla Bean Caramel Sauce [click to print]
Makes about 1-1/2 cups
  • 1 c. sugar
  • 1/4 c. water
  • 1 c. heavy cream
  • 1 T. unsalted butter
  • 1 tsp. vanilla bean paste (OR seeds of 1 vanilla bean)
  • 1/2 tsp. vanilla extract
  • 1/4 tsp. salt
Heat cream and butter in small microwave safe dish until just warm and butter is melted; set aside.


Spread sugar in medium saucepan; add water. Heat on medium-low heat until mixture becomes mostly clear. Do not stir! This could cause the sugar to crystallize and get all chunky and non-caramely. Gently swirl the pan to prevent hot spots and burning.


Continue heating, about 10 minutes, until mixture turns medium amber and immediately remove from heat.
While whisking continuously, slowly pour in about half of cream mixture. Continue whisking until evenly combined. Whisk in remaining cream. Add vanilla bean paste, extract and salt. Stir well and allow to cool to room temperature. Store in airtight container in fridge.

Source: Adapted from Annie's Eats, previously Cook Like a Champion

Thursday, July 26, 2012

Salted Caramel Buttercream


Pin It!


Vanilla Bean Caramel Sauce makes me go weak at the knees. It's true. Just ask my mom, she's seen it happen. There's something perfectly heavenly about the aroma and creamy, rich flavor that gets me every time. You can make this buttercream without using homemade caramel sauce, but it will push it to the next level if you do...and I'll probably come over. Consider this your fair warning.


Plus, it's one of the easiest buttercreams to make. All you have to do is cream a batch of rich American Buttercream and whip in some salted caramel sauce. Mmmm.


Wondering what to do with this finger-licking good buttercream once it's whipped and ready? Here are some delicious suggestions:
Salted Caramel Buttercream [click to print]
Makes about 5 cups
  • 1-1/2 c. butter, softened
  • 6 to 7-1/2 c. powdered sugar*
  • 1-1/2 c. salted caramel sauce (if you're going totally homestyle, check out this recipe for Salted Vanilla Bean Caramel Sauce...yum!)
  • 1/2 c. cocoa powder
*For a thinner buttercream or to use as filling between cake layers, use 6 c. powdered sugar; for a spreadable buttercream that will hold its shape, use 7-1/2 c. 

Whip butter in large mixing bowl until smooth and creamy. Add about half of powdered sugar and half of caramel sauce. When well combined, add remaining sugar and, with mixer on low speed, beat in remaining caramel sauce until buttercream reaches desired consistency. Beat in cocoa powder until well combined. Eat by the spoonful. 

Source: Sugar Rush Original!

Tuesday, July 24, 2012

Homemade Snicker Bars


Pin It!


Several of my coworkers keep cute little dishes well-stocked with all kinds of candy. I guess I'm gonna need one soon, too, now that I have a desk! That's right. I have officially started my new position doing Development and Special Events and I'm so excited for a new challenge! And to decorate an office, but that's a matter for another time.


My favorite candy dish treat by far has gotta be mini Snickers bars. Those bite size things are so tiny it doesn't even count as eating anything and yet it fills your mouth with pure chocolate-caramel-peanuty goodness.


After eating more than I'd care to publicly admit, I had the thought, what if I made them myself? Very good and very bad idea all at the same time. And don't get scared off by the thought of making candy! The hardest part about this recipe is waiting for each layer to set. But it's oh so worth it!

Homemade Snicker Bars [click to print]
Makes one 9x13 pan


For Layer 1: bottom chocolate layer

  • 1-1/4 c. milk chocolate chips
  • 1/4 c. peanut butter chips
For Layer 2: nougat layer
  • 1 c. sugar
  • 1/4 c. milk
  • 1-1/2 c. marshmallow fluff
  • 1/4 c. peanut butter
  • 2 tsp. vanilla extract
  • 1-1/2 c. peanuts, chopped
For Layer 3: caramel layer
  • 14-16 oz. (1 bag) chewy caramels
  • 2 T. heavy cream
For Layer 4: top chocolate layer
  • 1-1/4 c. milk chocolate chips
  • 1/4 c. peanut butter chips
Line the bottom and sides of a 9x13" pan with parchment paper or plastic wrap. 

Layer 1: Combine chocolate and peanut butter chips in small heat proof bowl and melt over double boiler or in microwave until completely smooth. Pour into pan and spread to an even layer. Allow to set in refrigerator until firm. 

Layer 2: Combine sugar and milk in saucepan and heat on medium low until sugar is completely dissolved. Increase heat and bring mixture to a boil; continue boiling for 5 minutes. Remove from heat and add fluff, peanut butter and extract. Pour nougat over bottom chocolate layer and spread evenly. Sprinkle peanuts over nougat and allow to set and cool completely. 

Layer 3: Combine caramels and cream in saucepan. Heat until mixture is smooth and even. Pour over nougat layer and allow to set until firm. 

Layer 4: This is exactly the same as the first layer. Combine chocolate and peanut butter chips in small heat proof bowl and melt, stirring until completely smooth. Spread mixture evenly over caramel layer. Allow to set in refrigerator until completely firm.

Cut into bars or bites and enjoy!

Source: Adapted from Taste of Home

Tuesday, June 26, 2012

Easiest Fluffy Chocolate Butter Cake


Pin It!


It's like I fell off the face of the earth. But in reality, I didn't even fall off that ladder when I was perched at the tippy top clamping strings of lights to the roof of my parents new porch. That's talent. 


I got to go home for nearly a week and kick it with the entire fam! I know you're jealous because I had tons of fun, and probably because my family is so awesome. But we can't help it.


But in the meantime, I really have been baking like crazy and writing thousands of blog posts in my mind. Unfortunately, as far as I know, you dear blog readers are not also mind readers. So I'm getting back on track and have some great recipes for you!


I think I baked a version of this chocolate cake about 18 times over the last week. That may or may not be a slight exaggeration, but I have really had several requests for this recipe. I mean, who wouldn't want such a soft, fluffy, moist chocolate cake that is pretty much the easiest butter cake recipe of my life? And paired with a thick layer or Salted Caramel Buttercream (recipe coming soon, I promise!)...heavenly!


And for all of you who have nightmares about baking anything from scratch, trust me, this is probably the easiest recipe of your life, too.

Easiest Fluffy Chocolate Butter Cake [click to print]
Makes 12 cupcakes or 1-8" OR 9" cake layer
  • 1-1/2 c. flour
  • 3/4 c. sugar
  • 1/2 c. cocoa powder
  • 1 tsp. baking soda
  • 1/2 tsp. salt
  • 1/2 c. butter, softened
  • 1/2 c. sour milk
  • 1/2 c. warm water
  • 1 tsp. vanilla extract
  • 1 egg
Preheat oven to 350 F. Prepare muffin tin with liners or line cake pan with parchment paper and set aside. 

In large mixing bowl, whisk together flours, sugar, cooca, soda and salt. Add butter, milk, water, extract and egg. Mix just until no butter chunks remain and mixture looks even. Scoop batter into cupcake liners or spread into cake pan. Bake cupcakes for 20-25 minutes or cake layer for 32-38 minutes or until center springs back when lightly touched. 

Monday, February 27, 2012

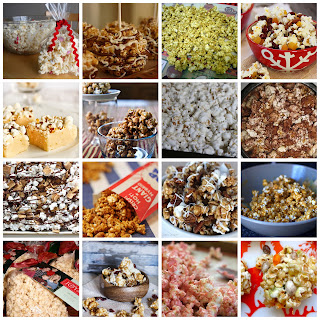
Sweet Sixteen: Popcorn


Pin It!
This east coast winter weather has been just plain crazy lately. I mean, seriously, it was in the 60's and looking like Spring with all the daffodils and snow drops popping out of the ground and then, bam! It's freezing cold again! I think it's time for a cozy movie night. Let's break out the popcorn!


(Left to Right, Top to Bottom)

Thursday, February 16, 2012

Fearless Dulce de Leche


Pin It!


The thought of Dulce de Leche was sweet and enticing, but the nightmares I had every time I thought about cooking an unopened can of sweetened condensed milk on my stovetop was a strong deterrent. Nobody wants to pick shards of aluminum can out of their rental apartment ceiling or spend hours scrubbing gooey, not-quite-cooked-through caramel sauce off the walls. Ew and no fun.

So the first time I made Dulce de Leche, I opted for the microwave version. It claimed to be fast and easy and relatively non-messy. Fibbers. I mixed the ingredients in the biggest bowl I had that would fit in my microwave but it still bubbled over repeatedly and turned into a huge, sticky, hot mess and by the time it was finally done, my feet had started to ache from standing around the microwave for so long and I only had about half the amount that the recipe promised I'd have! I'm sure the rest of it was stuck on some inner surface of the microwave. Oops.

Needless to say, I never wanted to make Dulce de Leche again. Until now.


A while ago, Cupcake Project taught me that I could crockpot Dulce de Leche by cooking a fully immersed can of unopened sweetened condensed milk for several hours. But I was still a little worried about explosions, despite her reassurance. Then I read about a version you can make in the crockpot, in glass jars so they're all ready to be gifted or stored in the fridge! Plus, I love that you can actually see how dark the sauce is getting instead of just guesstimating when it's done. Now that's my kind of Dulce.

Fearless Dulce de Leche [click to print]


If you want to make your dulce without any leftover milk, you'll need two 14oz. cans of sweetened condensed milk and three 1/2 pint canning jars with tight sealing lids. You can use fat-free sweetened condensed milk, too, and it tastes pretty great!


Step 1: Pour the sweetened condensed milk into the canning jars and screw the lids on tight. (I put rubber bands around two of my smaller jars because I was nervous about how tight the seal was.)


Step 2: Put the jars in the crockpot and cover with warm tap water so there's at least an inch of water above the top of the jars. (Hot water gets your dulce cooking faster.)


Step 3: Cook on low for 8-10 hours. Don't lift the lid during cooking! Every time you do, it adds about 30 minutes to the total cook time.

Step 4: At the 8 hour mark, peek in your crockpot and see how dark the dulce is getting. When it reaches a dark caramel color, remove from crockpot with tongs and allow to cool completely.


Source: Adapted from The Yummy Life

Tuesday, January 24, 2012

Heath Bar Blondies


Pin It!


My brother told me that the secret ingredients to every delicious recipe is lots of butter and lots of sugar. Well if that's true, and I'm pretty sure it is since my brother rarely lies about anything so important as dessert, then this recipe nailed it. And, yes, it's totally worth going for a run in the middle of winter just so you can indulge in these caramel scented heath bar blondies. Yummers!
 

Heath Bar Blondies [click to print]
Makes about 16-2x2" brownies


1/2 c. unsalted butter
1 c. brown sugar
1-1/4 c. flour
1-1/4 tsp. baking powder
1/2 tsp. salt
2 eggs
1 tsp. vanilla
1/2 c. walnuts, chopped
1/2 c. heath bar toffee bits

Line 8x8 pan with parchment paper or coat well with nonstick cooking spray. Preheat oven to 350.

First you're gonna brown that butter. And don't you dare use margarine or even think about skipping this step! Brown butter gives these blondies a tasty caramel flavor. So, put butter in saucepan and heat on low until it turns a light brown, caramel color. It will bubbly a lot and be noisy for a little bit, then watch carefully because butter can burn very quickly. Once it's browned, pour into mixing bowl and allow to cool about 10 minutes.


Whisk together flour, powder and salt; set aside. Add sugar and beat until combined. It will look kind of like wet sand at this point. Add vanilla. Add eggs, one at a time, incorporating well between each addition. Add flour mixture in two additions, mixing about 20 seconds between each addition.

Stir in nuts and heath bits. Pour into pan and bake 25-30 minutes.


Source: Adapted from my mom's Blonde Brownies

Monday, November 21, 2011

Thursday, November 10, 2011

Caramel Apple Pie Bites


Pin It!

These little bites look so fancy but they're really easy to make. Trust me. Just don't leave them on your kitchen table if you plan to take them anywhere besides your stomach. Each bite fits nicely in your mouth and it's quick to grab and go!

[Hint: Don't start the caramel sauce until the mini pies are out of the oven and on the cooling rack, otherwise, it won't be soft enough to dip the pies without damaging those flaky crusts!]


Caramel Apple Pie Bites   [click to print]
For the pie crust: 
2-1/2 c. flour
1 T. sugar
1 tsp. salt
2 sticks (8 oz.) butter, cold
1/2 c. water, ice cold

Whisk flour, sugar and salt together in large mixing bowl. Cut butter into 1/2 inch pieces and add to flour mixture. Using pastry blender, cut in butter until butter pieces are about the size of peas. It doesn't have to be perfectly even at this point. Drizzle water over mixture. Use a rubber spatula to gather the dough together until the mixture starts clumping together. Gently knead dough together with your fingertips; when it forms a lumpy ball, it's done. Be careful not to overwork, the heat from your hands can make the butter melt and that's what makes the crust so flaky and good! 

Divide dough and flatten to 1/2" disk; seal in plastic wrap and refrigerate for at least 1 hour. The colder the dough, the better, though, so leave it for 2 or more hours if you can. 

Source: Recipe files of Smitten Kitchen

For the filling: 
1 c. apple butter (check out this recipe!)
2 medium apples
1/2 tsp. cinnamon
1 T. brown sugar
2 T. whole milk

Chop apples into 1/4 inch pieces and add to large saucepan. Add apple butter, cinnamon, sugar and milk. Stir to combine. Bring mixture to a boil, then reduce heat and simmer for about 25 min. or until apple pieces become soft. Remove from heat and allow to cool. 

Source: Recipe files of Sugar Rush!

For the caramel dip and walnut coating: 
8 oz. caramels (about 30 pieces)
2 tsp. apple cider
2 c. walnuts, chopped and toasted. 

Heat caramels and cider in small saucepan on med-low heat until melted. Pour into deep bowl and set aside.   Chop walnuts into small pieces and spread on wax paper. 

To assemble: 
Roll out the pie crust dough between two pieces of plastic wrap until it's no more than 1/8 inch thick. Cut 2-1/2 inch circles of dough using a floured cookie cutter, or, one of my personal favorites, the end of a plastic cup. Lightly coat mini muffin pan with nonstick spray. Set dough circles over muffin openings and gently press into muffin cup using the end of a floured spice jar.


Fill each crust with  T. apple butter. Gently scrunch overhanging dough to edges of cup. Bake at 350 for 20-25 minutes or until crust is light golden in color. Allow mini pies to cool to room temperature.


Dip half of pie in warm caramel dip, tap off any excess caramel. Roll edges in chopped, toasted walnuts on wax paper. Place on cooling rack over piece of wax paper and allow caramel to harden. If your caramel hardens too much to easily dip pies, just microwave at 15 second intervals, stirring well between each nuke, until soft and pourable.

Wednesday, September 21, 2011

Brown Butter Cupcakes with Pumpkin Pie Frosting


Pin It!
After forgetting my fries under the broiler, making extra toasty enchiladas and burning my soup...in a crockpot...I realized something. I'm pretty good at burning things. Normally, this would not be good news, but when I came across Cupcake Project's Browned Butter Cupcakes, I knew I had to give them a try.

I tested this recipe using margarine and then again with real butter. Believe me, browned margarine tastes absolutely nothing like browned butter. Definitely worth the extra $2 for real butter to get that delicious caramely flavor. 

When you're browning the butter, use a pan with a light colored finish so you can keep track of how dark your butter is getting. It can happen pretty quickly. And if you don't have cake flour on hand, substitute the cake flour with 1-1/2 c. all-purpose flour plus 2 T. potato (or corn) starch.

And to top it all off, these cupcakes deserved more than just a boring old spiced buttercream. These babies were covered with pumpkin pie. Yes, I said it. Actual pumpkin pie. You just prepare and bake pumpkin pie filling/custard stuff as normal, without the crust. Once it's done baking and has cooled, stir it up until smooth and pipe it onto your cupcakes. Thanks for that idea, too, Cupcake Project! These were delicious and perfect for the start of fall!

Saturday, September 17, 2011

Ultimate Chocolate Oreo Brownie Doomsday


Pin It!
I don't know how else to make you understand that you may die if you eat these. They are so deadly delicious and rich that the first time I saw a picture of them on Kevin and Amanda's blog, my eyes bugged out of my head and my jaw dropped to the floor. I used to not really like eating chocolate much at all. But oh how things have changed. Obviously.


Feast your eyes on this baby. Aren't these the most ooey gooey, decadently rich brownies you've ever seen? If you decide to whip up a batch, just make sure you have friends to share them with, or a lot of self control. Your arteries will thank you.

In addition to the cookie and brownie batter recipes below, you'll need a package of Double Stuf Oreos. Sounds good already, huh?

Chocolate Chip Bar Cookies   [click to print recipe]
Okay fine, this is actually a recipe for Blonde Brownies, it just seemed like overkill having another kind of brownie as the base for these. I like this recipe especially since it's designed to spread easily in a baking dish. If you ever want to make them as just bar cookies and not deadly brownies, simply double the recipe below for a 15x10 jelly roll pan and bake at 350 for 30-35 minutes.

1/2 c. butter
1 c. brown sugar, packed
2 eggs
1-1/4 c. flour
1-1/4 tsp. baking powder
1/2 tsp. salt
1/2 tsp. vanilla
6 oz. chocolate chips (about 1/2 bag or 3/4 c.)

Melt butter in saucepan; add brown sugar and blend well. Remove from heat and cool about 10 minutes. In a separate bowl, combine dry ingredients and whisk. Pour butter/sugar mixture and vanilla in mixing bowl. On low speed, add eggs, one at a time, beating well after each addition. Beat in flour mixture in 2-3 additions. Mix well. Add chocolate chips and mix well.

Source: my mom

Rich Chocolate Brownies
These brownies are really thick and fudgy and rich. To make these as just brownies, bake in a 7x11 pan at 325 for 25 minutes. My sister-in-law likes to double the recipe below for a 9x13 pan and use two 12 oz. bags of chocolate chips, one semisweet and one dark chocolate.

3/4 c. butter
11 oz. chocolate chips
3 eggs
1/2 c. sugar
1/2 tsp. salt
1 tsp. vanilla
1/2 c. flour

In a double boiler (bowl set over a pot of simmering water) or microwave safe bowl, melt the butter and chocolate, stirring until well combined. Allow to cool. In a mixing bowl, beat the eggs, sugar, salt and vanilla until frothy. Slowly add the chocolate/butter mixture until completely combined. Fold in flour but don't overmix.

Source: Adapted from "Baking" by James Peterson

Assembly of the Ultimate Chocolate Brownie Doomsday
Line 9x9 baking pan (or a bit larger if you prefer thinner brownies) with parchment or wax paper; you really want to do this, it will save you a huge headache when you're ready to cut and eat. Spread the cookie dough in the bottom of the pan. Cover with a single layer of Double Stuf Oreos. Pour brownie batter over Oreos and cookie dough. Bake at 350 for 40-50 minutes or until done. When cool, lift brownies from pan by parchment paper and slice into squares. These are great served with ice cream or whipped cream and topped with Vanilla Caramel Sauce!

Tuesday, August 23, 2011

BYOC: Vanilla Caramel Sauce


Pin It!
(Bring Your Own Cake...or apple slices...or ice cream...)

Today a 5.9-ish earthquake rocked our city. Okay, so I think it started as a 5.9 in Virginia and then we felt it rumble along several states on the east coast. Here in Washington, DC, I thought it was our independent residents getting into zumba in the gym above the charting room, until I realized the noise was getting stronger and longer and the walls were kind of moving. So I ran out to check on our dear residents and the quake stopped. People were a bit shaken up but there wasn't really much damage throughout the area. Nothing at our place, really, my apt pictures were a little crooked and a few chimneys fell and the top of the spires of the Washington, DC Temple will need to be repaired, but nothing major.

And all afternoon I had traumatic visions of flattened cakes running through my mind. Just imagine the horror if I'd had a delicate butter cake slowly baking in the oven and another rude earthquake or aftershock came along? It would be nothing but a giant pancake!

So to save my sanity, I opted for something a little different this week, a delightfully creamy vanilla caramel sauce! This is great on top of apple slices and I'm sure on top of ice cream, I just unfortunately did not have any on hand at 10pm.


Vanilla Caramel Sauce

1 c. sugar
1-1/4 c. heavy cream
1/4 tsp. coarse salt
1/2 tsp. vanilla extract

Spread sugar in the bottom of a heavy pot, a stainless steel one is best so you can see the color of the sugar as you go. Turn the heat on to medium-high and start stirring your sugar. Allow the sugar to sit for a few seconds until you see it beginning to melt, then stir until it gets clumpy and it doesn't look like it's melting anymore. Let it sit for a few seconds until it starts melting and repeat. As the sugar becomes more liquidy, it will change in color to a shade of amber (dark yellowish). Now you want to stir fast and constant until those last clumps of sugar melt and remove from heat.

Slowly pour in half of the heavy cream, mixing constantly and quickly! (It was far easier for me using the buddy system; I stirred and my dear roomie poured the cream.) Stir until the cream is well combined and add the last half. Once this is incorporated, add the salt and vanilla, still stirring.

Keep refrigerated in an air tight container.

Source: adapted from Annie's Eats
Related Posts Plugin for WordPress, Blogger...