Showing posts with label cookies. Show all posts

Wednesday, January 2, 2013

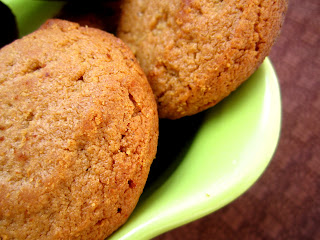
Thick and Chewy Brown Butter Oatmeal Cookies


Pin It!

Unfortunately for my waist line, I have the bad habit of feeding my feelings with delicious (and occasionally average) desserts. My family has been struggling with some sad, hard things lately, so cookies are kind of a staple.


Last month when I was home for a visit, my mom reminded me how much she loved my Big Fat Chocolate Chip Cookies, made with a generous serving of brown butter, and gently suggested that an oatmeal cookie version would probably be one of the tastiest things in the world.


Oh, mom. You are right again!

Thick and Chewy Brown Butter Oatmeal Cookies [click to print]
Makes a lot...I let some ravenous friends/family start devouring before I counted...I'll update you when I have more self control!
  • 1 c. unsalted butter
  • 1 c. brown sugar, packed
  • 1 c. granulated sugar
  • 2 eggs, large, lightly beaten
  • 3 c. old-fashioned oats
  • 1-1/2 c. flour
  • 1/2 tsp. baking powder
  • 1/2 tsp. salt
  • 1/2 tsp. nutmeg
  • 1/4 tsp. cinnamon
1) Preheat oven to 350 F. Line baking sheet with parchment paper or coat with nonstick cooking spray and set aside. 

2) Brown the butter. To do this, heat butter in saucepan over low heat, stirring continuously, until the butter turns a golden brown color. It's totally normal for it to hiss and bubble a lot in the first few minutes, but then it will calm down and look a little frothy on the surface. Watch closely at this point, and keep heating until the butter turns a dark gold color. This will take about 15-20 minutes. Remove from heat and allow to cool to room temperature.

3) Combine butter and sugars in mixing bowl and cream until well combined. Slowly add eggs, in about two additions, mixing well between each addition. Whisk together remaining ingredients and slowly add in about three to four additions, scraping sides as needed. 

4) Scoop dough by heaping teaspoons onto baking sheet, spacing about 1-1/2" apart. Bake 7-8 minutes or until tops of cookies are no longer shiny. Or...you can go for gigantic cookies and scoop by 1/4 c. dough but you'll definitely be baking them longer, so keep an eye on them until the tops aren't shiny and the edges are just barely set. Allow to cool on baking sheet about 1-2 minutes before transferring to a wire rack to cool. 

Source: Adapted from Tracey's Culinary Adventures

Thursday, May 10, 2012

Chocolate Chip Magic Bars


Pin It!
It's official. My parents are moving! They just heard back from the bank (finally!) and they're approved and will hopefully be loading a truck next week! And the really cool thing is, they'll be moving to a house where they'll actually have a yard and trees, which I wished for pretty much forever growing up, and nobody hooked to the side of the house and, drumroll please...a pool! What! There are so many reasons to go home.


And so, in the midst of finding out this exciting tidbit and my currently unexplained overemotional state, I find myself reminiscing an awful lot lately. I'm pretty lucky because my family is so awesome. When I was little, my brother and I would hang a sheet over the front of our bunkbeds to create a curtain-like backdrop, distribute tickets to all our family and steal cushions from the living room couch (seats for our spectators, of course). We'd line them up along the wall and perform the greatest magic shows on earth!


I'm sure no one ever figured out that the reason we disappeared through the toy refrigerator is that it didn't actually have a back to it and we could slide up onto the top bunk sneakily without giving away our position. We got skills in the magic department.


Doesn't it just seem perfect to end an evening of magic with Magic Bars? Oh, but these aren't your ordinary bar cookies. These are amped up with a chocolate chip cookie layer beneath all that Magic Bar goodness...oh, yeah!

Chocolate Chip Magic Bars [click to print]
Makes about 40 squares


For the cookie crust*
  • 1/2 c. unsalted butter
  • 1 c. brown sugar
  • 1-1/4 c. flour
  • 1-1/4 tsp. baking powder
  • 1/2 tsp. salt
  • 1 tsp. cinnamon
  • 1 tsp. vanilla 
  • 2 eggs
  • 1/2 c. chocolate chips
For assembly
  • 1 c. chocolate chips
  • 1 c. butterscotch chips
  • 1 c. toffee bits
  • 1 c. sweetened coconut flakes
  • 1 can (14 oz) sweetened condensed milk
*For this deadly concoction, store-bought cookie dough is also totally fine. Just smoosh it all out flat and press into baking dish and skip the cookie dough instructions below. But just so you know, these cookies are delicious so you probably wanna make them.


Preheat oven to 350 F. Coat 9x13 pan with nonstick cooking spray and set aside. 

Melt butter in saucepan; add brown sugar and mix well. Remove from heat and cool about 10 minutes. Meanwhile, in a separate bowl, whisk together dry ingredients and set aside. 

Pour butter mixture and vanilla in mixing bowl. On low speed, add eggs one at a time, incorporating well between each addition. Add flour mixture in 2-3 additions. Mix well. Stir in chocolate chips and spread batter evenly in baking dish. 

Bake crust about 10 minutes and remove from oven. Evenly sprinkle chocolate chips, butterscotch chips, toffee bits and coconut over top. Drizzle sweetened condensed milk over everything. Bake 16-20 minutes until lightly browned. Allow to cool completely before cutting...or dig in with a spoon right away!

Source: Cookie dough from my dear mother; Inspired by Cookies and Cups

Tuesday, May 8, 2012

90 Second Peanut Butter Honey Cookies (Gluten, Dairy Free!)


Pin It!
I'm not gonna lie. I'm kind of addicted to peanut butter.

Creamy, crunchy, natural, preservative-laden. It doesn't matter to my tastebuds. Just load me up, please.


I'm sure all of you have had those days where you just need a quick peanut butter fix. (Unless you are unfortunately allergic to my blessed peanut buttery spread, in which case, I'm sorry you'll have to ignore this post.) And I mean a really quick fix. Like it would be perfect if someone could infuse your entire body with a steady stream of peanut butter.


These cookies are that fast. And good. You can whip up a batch in less than two minutes, eat a few spoons of dough while they bake for a mere 12 minutes and then enjoy steaming hot cookies! Complete with milk, thank you.


90 Second Peanut Butter Honey Cookies (Gluten, Dairy Free!) [click to print]
Makes about 2 dozen large cookies


1-1/4 c. peanut butter
1/2 c. brown sugar
1/2 c. regular sugar
2 T. honey
1 egg

Preheat oven to 350 F. Line cookie sheet with parchment paper and set aside.

Combine all ingredients and stir until the dough clumps together. (It will still be soft but scoopable.) Drop heaping tablespoons of dough onto parchment paper. Bake 12-14 minutes or until edges are just golden.

Source: Adapted from Babble

Monday, March 26, 2012

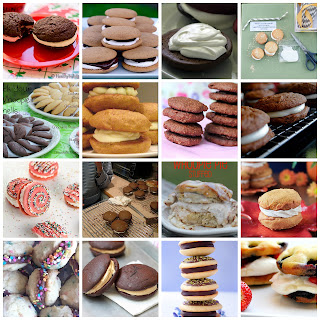
Sweet Sixteen: April Fool's!


Pin It!
The more I hang out with people from different countries, the more I realize that people really are very much alike. We all need food and water to stay alive, we all want to contribute to society, we all love playing practical jokes on our unsuspecting friends and family. And you're in luck today, because if you haven't already planned and prepped your own fool-worthy desserts, here are a few great ideas!

Oh, and if you just can't get enough of the jokes, check out Delish for some extreme food pranks that businesses pulled in the past. Hilarious!


(Left to Right, Top to Bottom)

Tuesday, February 7, 2012

Almond Swirl Sugar Cookies


Pin It!

I admit it, I've eaten my fair share of those store bought sugar cookies. You know the kind. Perfect cookie circles taunting you with thick, rich frosting. I was always disappointed, though, by that cookie. Even though it's soft, it's also dry and crumbly. Not my favorite. 


The secret in this recipe is sour cream. It keeps these cookies nice and soft and moist. 
Just change up your choice of food coloring and sprinkles to make these cookies perfect for any holiday!


Almond Swirl Sugar Cookies [click to print]
Makes about 3 dozen cookies


2-3/4 c. flour
1 tsp. baking soda
1 tsp. nutmeg
1/2 tsp. salt
1/2 c. unsalted butter, softened
1 c. sugar
1 eggs
2 tsp. vanilla extract
1 tsp. almond extract
1/2 c. sour cream
10-15 drops red food coloring

Whisk together flour, soda, nutmeg and salt; set aside. Cream butter and sugar. Add eggs and vanilla. Add sour cream and extract. Add dry ingredients and mix until well combined. Scoop about half of dough into separate bowl and set aside. Add food coloring to remaining dough and mix well.

Press each half of dough onto a separate piece of parchment paper, flattening to a rectangle about 1/4 inch thick. Slide parchment and dough onto baking sheets and chill about 30 minutes.


Remove chilled dough slabs from refrigerator. Run a rolling pin over each slab to even out the surface. Peel parchment off red dough and stack directly on top of white dough. Use a pizza cutter or knife to trim edges to make even rectangle. Beginning at one end, tightly roll dough like a cinnamon roll. If there's an open space in the center, gently press and rock the dough back on forth on the counter until it seals as shown below.

Generously coat outside with red sugar sprinkles. Cover entire dough roll with plastic wrap and refrigerate about 30 minutes. Preheat oven to 375.


Remove dough from plastic wrap and slice cookies about 1/4 to 1/3 inch thick. Place on baking sheet lined with parchment paper about 2 inches apart. Bake at 375 for 6-8 minutes. They won't look done! They should still be pale but puffy in the center and look just a tiny bit wet still. Allow to cool about 5 minutes on baking sheet, then move to wire rack to complete cooling.

These cookies taste great with thick buttercream frosting!


Source: Adapted from Peppermint Plum

Monday, February 6, 2012

Sweet Sixteen: Valentine's Day


Pin It!
Ah, yes. The holiday of love. I had a bunch of friends in college that absolutely hated V-day. Instead they'd celebrate SAD (Singles Awareness Day), which is somewhat depressing in its own right. I see nothing wrong with pink and red and hearts all over the place. And so, despite my current singleness, take a look at this week's photo roundup, and by all means, feel free to test out a recipe and drop it by my door!


Tuesday, January 10, 2012

No Bake Energy Bites


Pin It!

Normally, the battle to eat health food is a losing battle. The siren call of sweet treats is steady and constant. But with these little no-bake energy bites, you get the best of both worlds! These chewy little cookie bites are packed with so many good-for-you things, with a few chocolate chips...but, hey! Chocolate is good for you, too, these days! 


No Bake Energy Bites [click to print]
Makes about 24 bites


1 c. oatmeal
1 c. coconut flakes
1/2 c. peanut butter
1/2 c. chocolate chips
1/2 c. ground flaxseed
1/3 c. honey
1 tsp. vanilla
1 tsp. cinnamon

Combine all ingredients in large bowl and mash with your hands until everything is well combined. Chill for 1 hour. Scoop into 1" balls and enjoy! Store in airtight container in fridge for up to a week...if they last that long!


Source: Slightly adapted from Smashed Peas and Carrots

Thursday, January 5, 2012

Snowball Cookies


Pin It!
It started flurrying yesterday and my sister immediately starting yelling "No! NO! I hate snow!" A few minutes later, it stopped. I guess the weather gods are liking her better than me right now, because I always love a good sledding hill or snowball fight! Oh, well. I'm sure more snow is on the way at some point.


 For now I'll just have to make do with these edible snowball cookies and a mug of hot chocolate! [Update 01/09/2012: I was invited to post these cookies on Sweet as Sugar Cookies! How fun!]


Snowball Cookies [click to print]
Makes about 30 cookies


1 c. unsalted butter, softened
1/2 c. sugar
1 tsp. vanilla extract
2-1/4 c. flour
1 c. pecans or walnuts, chopped
1/4 tsp. salt
1 c. powdered sugar (for rolling)

Cream butter and sugar until fluffy. Add vanilla. Whisk together flour, nuts and salt; mix until just combined.

Line baking sheet with parchment paper or coat with nonstick cooking spray. Scoop cookie dough by the tablespoon (or use my favorite OXO cookie scoop!) and roll into balls. Place on baking sheet about 1" apart. Bake at 350 for 15 minutes.

Allow cookies to cool on sheet until you can handle them with bare hands, about 10 minutes. Pour powdered sugar in a small bowl and gently roll cookies in powdered sugar. Place on wire rack until completely cooled. Roll in powdered sugar again. You can store them in an airtight container for up to 3 days or freeze for up to a month.


Source: Adapted from My Baking Addiction

Saturday, December 31, 2011

New Year's Chocolate Confetti Cookies


Pin It!

New Year's 2012 is almost here! I'm planning our Happy New Year's event at my parents' house this year and just knew confetti had to be involved. I mean, really, how can you possible have a party without confetti? You can't. But I love eating a lot more than vacuuming, so I decided on these chocolate kissed confetti cookies! It combines so many delicious things...chocolate, hershey kisses, sprinkles. Bring it on 2012!


Chocolate Kiss Confetti Cookies [click to print]
Makes about 30 cookies

2/3 c. unsalted butter, softened
1/2 c. brown sugar
1 tsp. vanilla
1 egg
1-1/4 c. flour
1/4 c. cocoa powder
1/4 tsp. baking soda
1/4 tsp. salt
1 c. sprinkles (rainbow, chocolate or round confetti!)
30 Hershey Kisses, unwrapped

Whisk together flour, cocoa, soda and salt; set aside. Cream butter and sugar. Add vanilla and egg, mixing until combined. Add dry ingredients in about 3 additions. Continue mixing until well incorporated. Batter should be thick enough to roll into balls, if not, chill for an hour.


Line cookie sheet with parchment paper or coat with nonstick cooking spray. Shape dough into 1" balls and roll in sprinkles. Place dough on cookie sheet about 2" apart. Bake at 375 for 7-8 minutes.


When done baking, immediately press a kiss on the center of each cookie. Place on wire rack to cool.

Source: Adapted from The Curvy Carrot

Thursday, December 29, 2011

Golden Sparkle Cookies


Pin It!
I was sitting here, thinking about the coming new year and I kept thinking: Shiny! Glitter! Sparkles! It may have something to do with my bright red pj's with shiny gold stripes running through them, but mostly I think it's the fact that those things signify New Year's perfectly. Send out the old and ring in the new shiny somethings!


These golden sparkle cookies will shimmer and shine right along with your party shoes as you ring in the New Year! They are also great to dress up a dessert table at a wedding reception or other fancy event where sparkles are required.


Golden Sparkle Cookies [click to print]
Makes about 3-1/2 dozen cookies

2-3/4 c. flour
1 tsp. baking soda
1 tsp. nutmeg
1/2 tsp. salt
1/2 c. unsalted butter, softened
1 c. sugar
1 eggs
2 tsp. vanilla
1/2 c. sour cream
3/4 to 1 c. coarse gold sprinkles (I used about 3/4 of a 5.25 oz bottle of Wilton Gold Pearlized Sprinkles)

Whisk together flour, soda, nutmeg and salt; set aside. Cream butter and sugar together in large mixing bowl. Add eggs and vanilla; beat until well combined. Add sour cream and mix well. With mixer on low speed, add flour mixture in about 3 additions and continue beating until well combined. Cover and chill for 1 hour.

Line baking sheet with parchment paper or coat with nonstick cooking spray. Shape dough into 1" balls and roll in sprinkles. Place on baking sheet about 2" apart; lightly press the end of a glass on dough ball to flatten slightly.

Bake at 375 for 5-6 minutes; cookies will not look done, but this is how they'll stay nice and soft so resist the urge to bake longer! Leave cookies on the tray for about a minute, then remove to wire rack to cool.

Source: Adapted from Peppermint Plum

Tuesday, December 27, 2011

Gingerbread House Cookies


Pin It!
Every year near the holidays, my elementary school would host a gingerbread house decorating night in the cafeteria. My mom and all the PTO ladies would hand out baggies of royal icing and we'd set out our extensive array of colorful candies and get to work. My siblings and I were ambitious little artists/mess-makers so our graham cracker mansions were constructed with only royal icing for glue, none of that hot glue stuff that our friends Kate and Kelsey tried to pull! However, their house was always standing at the end of the evening and ours undoubtedly had a few collapsed roofs, fallen turrets and tears.

Hard at work, squeezing that bag!
The only sad thing about graham cracker houses is that they don't taste as good as real gingerbread and they get stale just sitting around on the mantel for weeks on end. I would much rather have something I can sink my teeth into, without the added sugar rush and expense of mountains of candy decorations.


So when I heard that my brother and his cute family were coming for a visit this Christmas, I just had to make these cookies for my nieces to decorate! They are quite the budding artists, after all. Not only do these cookies taste delicious, but they don't take too long to prepare and they are a great project for kids and (a little) less messy than your traditional graham cracker house. We put all the white icing in plastic squeeze bottles and it was much easier for little hands to manage. If we had another bottle we would have put the red in one, too, so plan ahead a little better than me!

This cookie artwork was eaten by Santa!
Store these cookies, undecorated or extravagant, in an airtight container and they'll stay nice and soft for several days...if they last that long!

And a little help from cousin Sarah!
Gingerbread House Cookies [click to print]
Makes about 4 dozen cookies

3/4 c. butter, softened
1 c. sugar
1 c. molasses
1/4 c. sour cream
1 egg
4 c. flour
1 tsp. salt
1-1/2 tsp. baking powder
1/2 tsp. baking soda
2 tsp. cinnamon
2 tsp. cloves
2 tsp. ginger
1 tsp. nutmeg

Whisk together dry ingredients and set aside. Cream together butter and sugar. Add molasses, sour cream and egg; beat until well blended. Gradually add dry ingredients in about 3 additions. Cover and chill at least 1 hour.


Roll out dough between two sheets of wax paper. Use a cookie cutter to cut out house shapes or create your own. I made mine out of a piece of wax paper and used a pizza cutter, smoothing out any cutter nicks with my finger. Line cookie sheet with parchment paper. Place cookies 2 inches apart. Bake at 350 for about 10 minutes. Allow to cool on wire racks.

Source: Adapted from Meet the Dubiens

Royal Icing [click to print]
2 egg whites, large
2 tsp. vanilla
1/2 tsp. brown food coloring
3 c. powdered sugar

Beat egg whites, vanilla and food coloring until frothy. Add powdered sugar and continue beating on low until smooth. The mixture should be kind of thick, but pipeable, at this point. Scoop about 1/3 of the icing into a squeeze bottle or piping bag and set aside. Add water to remaining icing, about 1/2 tsp. at a time, until it is flooding consistency. If you make it too thin, just mix in a little more powdered sugar. Pour icing in another squeeze bottle (a piping bag will be much trickier, but still possible, for this consistency) and set aside.


Using the thicker icing, outline each house shape and allow to harden about 10 minutes. Using the thinner icing, flood each shape to fill in the outlines and allow to harden a few hours. Be careful not to get any water on them as they harden or they'll have lighter colored spots.

Once the cookies are well set, let your decorators go to work!

Source: Adapted from Joy of Cooking

Thursday, December 22, 2011

Chocolate Sugar Cookies


Pin It!
I enjoy a sugar cookie every now and then, but chocolate? Yummers! These cookies look great with a little bit of bright frosting to outline their shapes! If you take them out of the oven before they look completely done, they'll stay nice and soft, plus they have a rich chocolate flavor that you're gonna love!


Chocolate Sugar Cookies [click to print]
Makes about 2-1/2 dozen

2-1/4 c flour
1 c cocoa powder
1/4 tsp salt
1 c butter, unsalted
1-1/4 c. sugar
1 egg
1/4 c. sour cream
1 tsp vanilla

Whisk together flour, cocoa and salt; set aside. Combine butter and sugar in separate bowl and beat until just barely combined. With mixer on low speed, add egg, vanilla and sour cream. Scrape sides of bowl as needed.

Scoop dough onto large sheet of wax paper. Cover with another sheet of wax paper and roll out about 1/4" thick. Place entire thing on baking sheet and chill at least one hour.

Remove top sheet of wax paper. Press cookie cutters into dough to create desired shapes. If dough is too sticky (to cutters or bottom layer of wax paper), dust with a little cocoa powder. Place cutouts on cookie sheet, about 1/2" apart, and refrigerate 30 minutes; this will help cookies maintain sharper edges.

Bake at 350 for 8-10 minutes.

Source: Adapted from Sprinkle Bakes

Monday, November 21, 2011

Thursday, November 17, 2011

Pumpkin Gingersnap Parfaits


Pin It!
The other day at work, my friend Taci mentioned that she made this pumpkin mousse a while ago that she served with some sort of multi-course fancy dinner. As my mouth started watering, I asked her for the recipe, which she happily shared, and my mind started going and just wouldn't quit. Then I had a brilliant idea. Layers of pumpkin mousse, fresh whipped cream and gingersnaps...parfait, anyone? Mais, oui!

Parfait is french for perfect. Not a bad choice to describe that light dessert, the marriage between fluffy whipped cream, rich filling and crunchy topping. This dessert is perfect for a no-baking kind of day. Delicious, fragrant, (tastes) very light and simple. The dreamy descriptive words could go on and on.

Pumpkin Gingersnap Parfait   [click to print]
For the pumpkin mousse: 
1 can (15 oz.) pumpkin puree
1/2 c. cream cheese
1/2 c. sugar
2 tsp. cinnamon
1/4 tsp. nutmeg
1 tsp. allspice
1-1/2 tsp. vanilla extract

Combine all ingredients in medium mixing bowl and beat until well combined. Set aside.

For the whipping cream: 
1 c. heavy whipping cream
2 T. powdered sugar
1 tsp. vanilla extract

Combine all ingredients in mixing bowl and beat on high speed until cream is fluffy and forms stiff peaks. If it starts to look at all curdled or clumpy, stop! You're going to overmix and it turn your cream into butter!


To assemble:
2 c. crushed gingersnaps (about 3 dozen small cookies)

Divide half of pumpkin mixture into four cups. Spoon about half of gingersnaps over pumpkin. Cover with whipped cream, reserved about 1/4 cup. Spoon remaining gingersnaps over whipped cream. Divide remaining pumpkin between cups to create the top layer. Garnish with a sprinkle of gingersnaps, a dollop of whipped cream and a whole gingersnap cookie.

Source: Inspired by my friend Taci and The Gourmand Mom

Thursday, October 13, 2011

Spooky Ghost Cake


Pin It!
Remember those little ghost meringue cookies from earlier this week? Well it's time for them to creep out of the shadows and claim their rightful place as delicate toppers to a most deadly cake...


Ever since I got my 6lbs of deep chocolate cocoa powder in the mail, I've been up to my eyeballs in chocolate cakes and treats! Seriously, my eyeballs. And I'm not that short, either. I'm still experimenting to develop my go-to chocolate cake recipe, so this go around, just use your old stand by chocolate cake recipe and bake in round pans as directed. And remember, a box mix is fair game!


Once your layers are cooled, frost and fill with Almond Buttercream and smother top with Semisweet Chocolate Ganache, allowing it to drip down the sides of the cake. Gently arrange several of your ghosties on top of the ganache while still soft and drippy. 


Almond Buttercream   [click to print]
3 c. powdered sugar
1/4 c. butter, softened
1/4 tsp. salt
1/4 tsp. almond extract
2-3 T. whole milk

Combine sugar, butter, salt and extract in mixing bowl. Turn mixer on low speed and gradually add milk, one tablespoon at a time, until frosting reaches desired consistency. For this cake, you want the frosting to be stiff enough that when you lift the beaters, stiff peaks form. If it droops back into the bowl, it will be too soft to hold its shape on the cake. To fix that, just add a little more powdered sugar until it stiffens.

Chocolate Ganache   [click to print]
3/4 c. chocolate chips (milk or semi-sweet)
2/3 c. heavy whipping cream

Measure chocolate chips in small mixing bowl; it should hold about 4-6 cups to allow for stirring room. Heat cream in saucepan until it begins to get frothy. Immediately remove from heat and pour over chocolate chips. Allow mixture to sit for two minutes then stir until well combined and smooth. Allow ganache to cool about 15 minutes or until it is the consistency of thick molasses and mounds slightly when dropped from a spoon.

Related Posts Plugin for WordPress, Blogger...