Showing posts with label Brown Butter. Show all posts

Wednesday, January 2, 2013

Thick and Chewy Brown Butter Oatmeal Cookies


Pin It!

Unfortunately for my waist line, I have the bad habit of feeding my feelings with delicious (and occasionally average) desserts. My family has been struggling with some sad, hard things lately, so cookies are kind of a staple.


Last month when I was home for a visit, my mom reminded me how much she loved my Big Fat Chocolate Chip Cookies, made with a generous serving of brown butter, and gently suggested that an oatmeal cookie version would probably be one of the tastiest things in the world.


Oh, mom. You are right again!

Thick and Chewy Brown Butter Oatmeal Cookies [click to print]
Makes a lot...I let some ravenous friends/family start devouring before I counted...I'll update you when I have more self control!
  • 1 c. unsalted butter
  • 1 c. brown sugar, packed
  • 1 c. granulated sugar
  • 2 eggs, large, lightly beaten
  • 3 c. old-fashioned oats
  • 1-1/2 c. flour
  • 1/2 tsp. baking powder
  • 1/2 tsp. salt
  • 1/2 tsp. nutmeg
  • 1/4 tsp. cinnamon
1) Preheat oven to 350 F. Line baking sheet with parchment paper or coat with nonstick cooking spray and set aside. 

2) Brown the butter. To do this, heat butter in saucepan over low heat, stirring continuously, until the butter turns a golden brown color. It's totally normal for it to hiss and bubble a lot in the first few minutes, but then it will calm down and look a little frothy on the surface. Watch closely at this point, and keep heating until the butter turns a dark gold color. This will take about 15-20 minutes. Remove from heat and allow to cool to room temperature.

3) Combine butter and sugars in mixing bowl and cream until well combined. Slowly add eggs, in about two additions, mixing well between each addition. Whisk together remaining ingredients and slowly add in about three to four additions, scraping sides as needed. 

4) Scoop dough by heaping teaspoons onto baking sheet, spacing about 1-1/2" apart. Bake 7-8 minutes or until tops of cookies are no longer shiny. Or...you can go for gigantic cookies and scoop by 1/4 c. dough but you'll definitely be baking them longer, so keep an eye on them until the tops aren't shiny and the edges are just barely set. Allow to cool on baking sheet about 1-2 minutes before transferring to a wire rack to cool. 

Source: Adapted from Tracey's Culinary Adventures

Tuesday, September 18, 2012

Brown Butter Butterscotch Blondies


Pin It!

I've done brown butter before, and that was my first mistake. There's something almost intoxicating about the smell of caramelized brown butter wafting through the air. And baked into a blondie...somebody hold me back! No, seriously. I have issues with self control.


And to top it all off, these things are so easy to make and they don't have any weird ingredients so you can probably whip up a batch right now! Unless of course you don't keep bags of butterscotch chips stashed away in your freezer...


So go ahead and pour yourself a tall glass of icy cold milk to go along with your blondie stack. Just trust me on this one.


Brown Butter Butterscotch Blondies [click to print]
makes about 16 bars
  • 1/2 c. unsalted butter
  • 1/2 lb. brown sugar
  • 2 eggs
  • 1/2 tsp. vanilla extract
  • 1-1/4 c. flour
  • 1-1/4 tsp. baking powder
  • 1/2 tsp. salt
  • 1 c. butterscotch chips
1) Preheat oven to 350 F and line 9x9 pan with parchment paper or coat generously with nonstick cooking spray. 

2) Melt butter in small saucepan, stirring continuously, until browned. The butter will start off bubbly and loud, then quiet down. Watch closely as it turns to an amber color and starts smelling like caramel; immediately remove from heat and pour into mixing bowl. Allow to cool about 10 minutes. 

2) Add sugar, eggs and vanilla, beating well until completely combined. Add dry ingredients and mix well. Stir in butterscotch chips. Spread mixture into prepared pan and bake 30-35 minutes. Allow to cool and cut into squares. 

Thursday, September 13, 2012

Big Fat Chocolate Chip Cookies


Pin It!

It started when I flipped through some old recipe cards and found one my friend gave me for her famous chocolate chip cookies my freshman year at BYU. Then I was surfing through recipes and blogs and came across 52 Kitchen Adventures' Chocolate Chip Cookie Challenge (deadline to contribute is tomorrow!). And then I was over at another friend's house whipping out a batch of choux pastry and she pulled out a giant Costco bag of chocolate chips and said I could have them, she didn't know what to do with that many chocolate chips.


Seriously? I got this.


I have dreamed for years about the biggest, fattest, chewiest with a hint of crisp crust around the edges, beautiful chocolate chip cookies for years. I know, I may have a problem.


Also, these make excellent ice cream sandwiches.

Big Fat Chewy Chocolate Chip Cookies [click to print]
makes about 16 cookies
  • 3/4 c. unsalted butter 
  • 2 c. plus 2 T. flour
  • 1/2 tsp. baking soda
  • 1/2 tsp. salt
  • 1 c. dark brown sugar, packed
  • 1/2 c. sugar
  • 1 egg, whole
  • 1 egg yolk
  • 2 tsp. vanilla extract
  • 1 c. mini semisweet chocolate chips
1) Preheat oven to 325 F and line cookie sheet with parchment paper or coat generously with nonstick cooking spray. 

2) Over medium low heat, melt butter and continue heating, stirring occasionally, until browned. It will start off really bubbly and loud and then quiet down. Pay close attention at this point and watch the butter; as soon as it turns a beautiful amber color and starts smelling like caramel, remove from heat. There will be little brown bits at the bottom of the pan and that's good, so stop worrying. 

3) Whisk together flour, soda and salt; set aside. Combine sugars and browned butter in mixing bowl and beat until well incorporated, about 1 to 2 minutes. Add egg, yolk and vanilla; continue beating until smooth again, about 30 seconds. 

4) Slowly add flour mixture and beat until just combined. Stir in chocolate chips. Chill at least 30 min. (Don't skip the chilling part like I did on the first pan, or you'll get flat cookies and that's no bueno.)

5) Scoop dough onto prepared pan and bake 15-20 minutes. Edges of cookies should be set and firm to touch while centers are puffy and soft still. Allow cookies to cool on pan about 10 minutes before removing to wire rack. 

Source: Adapted from America's Test Kitchen

Thursday, May 24, 2012

Dark Chocolate Whoopie Pies with Chocolate Chip Cookie Butter Filling


Pin It!


Ever have one of those days (or weeks) where you just need to curl up on your bed with a fluffy pillow and a big fat spoonful of cookie dough and watch a couple episodes of The Biggest Loser or The Next Food Network Star? Yeah, I totally understand. Life's been a little rough around here, lately.


But good things have been happening, yes. Jars of cookie butter. Mountains of whoopie pies. Discovering the existence of white chocolate cocoa powder (what!). Getting a new position at work. All very good and exciting!


But other life issues have been stressing me out, so it was a lucky thing that I got these whoopie pies out of the house before I finished them off on my own! It was very tempting. And to you skinny minnies who eat two cookies and moan about overdoing it, you have no idea who you're dealing with.


The whoopie shells are nice and soft and moist and not overly sweet, striking a perfect balance with the thick layer of cookie butter stuffed between them. Yummers!

Dark Chocolate Whoopie Pies with Chocolate Chip Cookie Butter Filling [click to print]
Makes about 24 pies
  • 1-2/3 c. flour
  • 1/2 c. cocoa powder
  • 2 T. plus 1-1/2 tsp. black onyx cocoa powder*
  • 1-1/2 tsp. baking soda
  • 1/2 tsp. salt
  • 1/2 c. unsalted butter, softened
  • 1 c. brown sugar
  • 1 egg
  • 1 tsp. vanilla
  • 1 c. sour cream
  • 1-1/2 c. Chocolate Chip Cookie Butter
*I realize normal people don't have black onyx in their pantry (or bookshelf shoved back behind their dining room table, in my case), so you can use 2/3 c. total cocoa powder instead of the combination of cocoa and black onyx, they just won't be as dark.

Preheat oven to 375 F. Line baking sheet with parchment paper or coat generously with nonstick cooking spray; set aside.

Whisk together flour, cocoas, soda and salt; set aside. In another bowl, cream butter and sugar until fluffy, about 5 minutes. Add egg and vanilla, beating until completely incorporated. Alternately add flour mixture and sour cream in about 3 additions, beginning and ending with flour. Continue mixing until just combined.

Scoop tablespoons of batter onto prepared sheet, spacing each batter blob two inches apart. Bake about 10 minutes or until cake springs back when lightly pressed.

Allow cakes to cool about five minutes on baking sheet before transferring to wire rack to cool completely. Spread flat side of half of cakes with cookie butter and sandwich with remaining cakes.

Source: Adapted from The Novice Chef

Tuesday, May 15, 2012

Chocolate Chip Cookie Butter


Pin It!

Remember how I told you before that I used to not like chocolate? And how I've changed my ways? Well, this is a glorious day...Happy National Chocolate Chip Day!


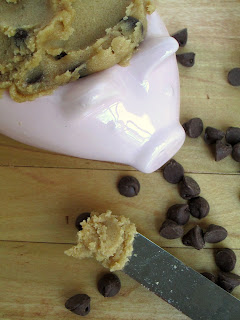
I'm sitting here, trying to exercise self-restraint, to avoid diving directly into this jar of creamy, dreamy Chocolate Chip Cookie Butter. It has so many of my favorite ingredients...sugar, browned butter, vanilla, chocolate...oh man! I'm gonna have to finish this post in the other room.


Okay. Like I said, a key ingredient in this recipe is browned butter. Don't let that scare you! Even though it sounds all fancy, it's not that difficult to make. And the resulting fragrance and flavor is absolutely intoxicating. No, really. Remember how I had to leave the room a minute ago? 


While you guys all try this recipe out, I'm gonna remind myself that I just worked out for nearly an hour this afternoon and that it is now time to exercise something called self-restraint. If you're at a loss for how to use cookie butter, here are a few suggestions, courtesy of me and my friend Pinterest:
  • Frosting for your favorite cupcakes
  • Swimming pool for Teddy Grahams (or spread it on graham crackers, but aren't bears and cookie butter much more appealing?)
  • Sandwich cookie filling
  • Bake some Cookie Butter Funfetti Triple Chip Bars
  • Whip up a batch of homemade Cookie Butter Cups
  • Spread a layer on your sandwich
  • Swirl it into Cheesecake
  • Devour by the spoonful
Enjoy!


Chocolate Chip Cookie Butter [click to print]
Makes about 2 cups
  • 1/2 c. unsalted butter
  • 2/3 c. brown sugar
  • 1/2 c. granulated sugar
  • 1 tsp. vanilla extract
  • 1-1/3 c. flour
  • 1/2 tsp. salt
  • 1/4 c. plus 2 T. heavy cream
  • 1/2 c. chocolate chips
Heat butter in heavy bottomed saucepan over medium-low heat until melted. Continue heating, stirring occasionally, until butter turns a golden brown color and smells kind of caramely. The butter will start out with really big, loud bubbles sizzling all over the place, then gradually calm down (about 10-15 minutes) and brown. Remove from heat and scrape browned butter into mixing bowl and allow to come to room temperature. 

Add sugars to butter and cream until light and fluffy, about 3 minutes. Add flour, vanilla and salt and mix until well combined. Mix in cream and chocolate chips; add additional cream, one tablespoon at a time, if you want a thinner consistency. 

Source: Inspired by Cupcake Project; Recipe adapted from David Lebovitz

Thursday, January 26, 2012

Brown Butter Vanilla Bean Rice Crispy Treats


Pin It!

My Poppie always said that a good home always has marshmallows stocked in the cupboards. Let's just say my new fascination with gourmet rice crispy treats are only helping my cramped apartment become a cozy little home. With my new found love for all things browned butter, this idea seemed like the perfect way to jazz up an old favorite.


Brown Butter Vanilla Bean Rice Crispy Treats [click to print]
Makes about 16 super thick squares or 3 dozen normal size

4 T. unsalted butter
1 T. vanilla bean paste (OR seeds of 1 vanilla bean)
1/4 tsp. salt
10 oz. (one bag) marshmallows
5-1/2 c. rice crispies (or other puffed rice cereal)

For really thick squares, line 6x6" pan with parchment paper. For normal treats, line 8x8" pan. Pour rice crispies in large mixing bowl and set aside. 

First things first. Brown the butter, and no skimping here! Margarine won't give these treats a caramely flavor so use real butter, please! So, heat butter in saucepan on low until it turns a light brown, caramel color. It will bubble a lot and be noisy for a bit before it reaches a deep caramel color. Immediately add marshmallows and stir until well combined. Add salt and vanilla. 


Pour marshmallow mixture over rice crispies and turn with rubber scraper until evenly coated. Press into prepared pan with greased fingers and allow to cool. Cut into squares and enjoy!

Source: Adapted from Zoe Bakes

Tuesday, January 24, 2012

Heath Bar Blondies


Pin It!


My brother told me that the secret ingredients to every delicious recipe is lots of butter and lots of sugar. Well if that's true, and I'm pretty sure it is since my brother rarely lies about anything so important as dessert, then this recipe nailed it. And, yes, it's totally worth going for a run in the middle of winter just so you can indulge in these caramel scented heath bar blondies. Yummers!
 

Heath Bar Blondies [click to print]
Makes about 16-2x2" brownies


1/2 c. unsalted butter
1 c. brown sugar
1-1/4 c. flour
1-1/4 tsp. baking powder
1/2 tsp. salt
2 eggs
1 tsp. vanilla
1/2 c. walnuts, chopped
1/2 c. heath bar toffee bits

Line 8x8 pan with parchment paper or coat well with nonstick cooking spray. Preheat oven to 350.

First you're gonna brown that butter. And don't you dare use margarine or even think about skipping this step! Brown butter gives these blondies a tasty caramel flavor. So, put butter in saucepan and heat on low until it turns a light brown, caramel color. It will bubbly a lot and be noisy for a little bit, then watch carefully because butter can burn very quickly. Once it's browned, pour into mixing bowl and allow to cool about 10 minutes.


Whisk together flour, powder and salt; set aside. Add sugar and beat until combined. It will look kind of like wet sand at this point. Add vanilla. Add eggs, one at a time, incorporating well between each addition. Add flour mixture in two additions, mixing about 20 seconds between each addition.

Stir in nuts and heath bits. Pour into pan and bake 25-30 minutes.


Source: Adapted from my mom's Blonde Brownies

Wednesday, September 21, 2011

Brown Butter Cupcakes with Pumpkin Pie Frosting


Pin It!
After forgetting my fries under the broiler, making extra toasty enchiladas and burning my soup...in a crockpot...I realized something. I'm pretty good at burning things. Normally, this would not be good news, but when I came across Cupcake Project's Browned Butter Cupcakes, I knew I had to give them a try.

I tested this recipe using margarine and then again with real butter. Believe me, browned margarine tastes absolutely nothing like browned butter. Definitely worth the extra $2 for real butter to get that delicious caramely flavor. 

When you're browning the butter, use a pan with a light colored finish so you can keep track of how dark your butter is getting. It can happen pretty quickly. And if you don't have cake flour on hand, substitute the cake flour with 1-1/2 c. all-purpose flour plus 2 T. potato (or corn) starch.

And to top it all off, these cupcakes deserved more than just a boring old spiced buttercream. These babies were covered with pumpkin pie. Yes, I said it. Actual pumpkin pie. You just prepare and bake pumpkin pie filling/custard stuff as normal, without the crust. Once it's done baking and has cooled, stir it up until smooth and pipe it onto your cupcakes. Thanks for that idea, too, Cupcake Project! These were delicious and perfect for the start of fall!
Related Posts Plugin for WordPress, Blogger...