Showing posts with label Chocolate. Show all posts

Tuesday, April 9, 2013

Banana Bread Truffles


Pin It!

Sometimes I buy too many bananas. And sometimes I forget about them and then realize they're all brown and spotty and have to bake up something tasty. My mom told me the other day that I should move beyond the dark chocolate and try some new ideas...I may or may not have a slight dark-chocolate-addiction at the moment. And sometimes I also have very limited self-control


So bite-size truffles seemed like the perfect dessert! I can eat a few and, hopefully, share most of them! And you're gonna love the banana filling--it's pretty much an extremely moist banana bread combined with a brown butter (anyone else going weak at the knees?) glaze and smothered in dark chocolate and topped with toasted walnuts. Seriously delicious.

Banana Bread Truffles [click to print]
Makes about 5 dozen

  • 1 c. sugar
  • 1/3 c. unsalted butter, softened
  • 2 eggs
  • 3-4 bananas, mashed (about 1 c.)
  • 1/3 c. water
  • 1-1/2 tsp. vanilla extract
  • 1-2/3 c. flour
  • 1 tsp. cinnamon
  • 1 tsp. baking soda
  • 1/2 tsp. salt
  • 1/4 tsp. baking powder
For brown butter glaze
  • 1/4 c. browned butter
  • 1-1/2 c. powdered sugar
  • 3 T. milk or water
For dipping
  • 2 pkgs. (12 oz) dark chocolate chips
  • 1/2 c. walnuts, chopped and toasted
1) Preheat oven to 350 F. Line 8x8 baking dish with parchment paper or coat generously with nonstick -cooking spray; set aside. 

2) In bowl of stand mixer, cream sugar and butter. Add eggs, one at a time, incorporating well between each addition. Stir in bananas, water and vanilla. 

3) In separate bowl, whisk together flour, cinnamon, soda, salt and powder. With mixer on low speed, gradually add to banana mixture in about 3 additions. Pour batter in prepared dish and bake 30-40 minutes or until top springs back. Allow to cool completely in pan. 

4) For glaze, heat butter in small saucepan over medium heat until it turns a golden brown color. Remove from heat and allow to cool to room temperature. Stir butter and milk/water into powdered sugar until well combined and no lumps of powdered sugar remain. 

5) When bread is completely cool, crumble with a fork or your fingers into pea size crumbs. Pour glaze over crumbs and stir until evenly moistened. Using a cookie scoop or spoon, scoop 2 or 3 teaspoons of truffle filling at a time onto lined cookie sheet. 

6) In deep bowl, melt chocolate at 30 second intervals in the microwave, stirring well between each nuke. Using a fork, dip each filling in melted chocolate, gently tapping fork on edge of bowl to get off excess chocolate. Place on cookie sheet, top with a sprinkle of chopped nuts and allow to set. Note: If your filling doesn't hold together very well while dipping, chill in freezer about 15 minutes before dipping. 

Source: Inspired by Vanilla Kitchen

Saturday, March 30, 2013

Peep S'mores


Pin It!

It seems like the holidays come earlier and earlier every year, which is kind of depressing when the stores are rushing me through life! I kind of prefer a leisurely pace. But I would never hold it against our dear retailers for rushing to get those brightly colored Easter Peeps on the shelves!


I know, some of you are rolling your eyes and wondering how in the world I could love something that is basically an animal-shaped piece of sugar coated in neon sugar with eyeballs. I ask you, how could you not?! But if you're going to hold onto your Peep-hatred, just think of the children! Would it really be Easter for them without a small overdose of sugary goodness? I think not.

Happy Easter!

Peep S'mores [click to print]
Makes 6-7 individual servings

  • 1 pkg mini graham cracker crusts (I used Keebler Ready Crust Minis)
  • 1 brownie recipe (the kind for an 8" or 9" pan)
  • 12-14 mini Hershey bars
  • 6-7 Peeps
1) Prepare brownie batter and preheat oven as instructed in recipe or on box/pouch. Scoop about 3 Tablespoons of batter into each crust and bake for 18-22 minutes. Note, time will vary based on recipe used, so stick a toothpick in the center to check doneness and when it comes out clean, you're good!

2) Lay two mini chocolate bars across top of mini brownie and allow chocolate to melt. If the brownies are too cool to melt the chocolate, place them in a warm oven for 2 or 3 minutes until the chocolate is shiny and soft. 

3) Top chocolate with a Peep and serve warm! Or cold, they're still fudgy and rich and delicious the next day...if they last that long! 

Tuesday, March 26, 2013

Chocolate Yogurt Cake


Pin It!

I made this cake for the first time a while ago, but it somehow disappeared before I ever got a chance to take pictures. Hm. I guess that just goes to show that it really is perfect for snacking.


This cake has a beautiful dark chocolate color and is very moist, thanks to the yogurt, and, on top of that, it's really fast and easy to make!

Chocolate Yogurt Cake [click to print]
Makes one 8" square cake
  • 6 T. unsalted butter, softened
  • 1/3 c. granulated sugar
  • 1/3 c. dark brown sugar
  • 1 egg
  • 2/3 c. vanilla yogurt
  • 1 tsp. vanilla extract
  • 3/4 c. plus 2 T. flour
  • 1/4 c. plus 2 T. cocoa powder
  • 3/4 tsp. baking soda
  • 1/8 tsp. salt
1) Preheat oven to 350 F. Line bottom of 8" square baking pan with parchment paper or coat generously with nonstick cooking spray; set aside. 

2) In bowl of stand mixer, combine butter and sugars. Cream until well combined. Add egg and vanilla; mix until completely incorporated. Stir in yogurt and milk. 

3) In separate bowl, whisk together flour, cocoa and salt. Gradually add to batter in about 3 additions, mixing until just blended. Pour batter into prepared pan and bake 20-25 minutes or until cake pulls away from sides of pan just slight and top of cake springs back when lightly touched.

4) Allow cake to cool about 10 minutes in pan before removing to serving dish. Dust with powdered sugar and serve warm. (P.S. This is still good cold, but who doesn't love warm cake?!)

Tuesday, March 19, 2013

Choco-nana Crunch Bread


Pin It!

I'll be honest. I was a little skeptical about the success-ability of another version of the old banana bread. But with spotty bananas, a new bag of granola and a hankering for chocolate, what else was I supposed to do? I obviously had no choice.


With dark chocolate morsels and clusters of crunchy granola packed into every bite, this stuff is like a dream. The banana flavor isn't really strong, so don't worry about being overwhelmed by fruitiness. And even more good news, even after a couple days this bread is still awesomely moist.

Choco-Nana Crunch Bread [click to print]
Makes one loaf
  • 1/2 c. applesauce
  • 1 c. sugar
  • 2 eggs
  • 2-1/2 c. flour
  • 1/4 c. plus 2 T. cocoa powder
  • 1-1/2 tsp. baking powder
  • 1 tsp. baking soda
  • 1/2 tsp. salt
  • 3 medium bananas, mashed (about 1 c.)
  • 1 c. whole milk
  • 2 tsp. vanilla extract
  • 1 c. granola (I used some Open Nature Dark Chocolate Hazelnut Heaven)
  • 1/2 c. dark chocolate chips
1) Preheat oven to 350 F. Generously coat 9x5 loaf pan with nonstick cooking spray and set aside. 

2) In bowl of stand mixer, beat applesauce, sugar and eggs until smooth. In separate bowl, whisk together flour, cocoa, powder, soda and salt. In another bowl, whisk together bananas, milk and vanilla. Beat in half of flour mixture, then all of banana mixture, then remaining flour mixture, stirring until well combined. Stir in granola and chocolate chips.

3) Pour batter into prepared pan and bake 60-75 minutes or until top springs back lightly when touched. Cool about 10 minutes in pan before removing to wire rack to cool completely. 

Wednesday, January 16, 2013

Chocolate Peppermint Sugar Cookie Bars


Pin It!

I went for a run after work today wearing my hot pink jacket. Normally, hearing the radio announce that it is a bitter 33 degrees outside would keep me cozied up inside, but I found determination and got my rear in gear.


And then I baked. Mostly because I've been stressed and baking seems to help, but also because the second I stopped running I got really cold and then found out that my heater was broken. Boo.


So here's to a well-earned pan of chocolate and peppermint deliciousness! These bar cookies are fast and easy and very moist. If you're not big on frosting, first of all, I feel sorry for you, and second of all, you can skip it and you'll probably be survive.

Chocolate Peppermint Cookie Bars [click to print]

For cookies: 
  • 1-1/2 c. flour
  • 1/3 c. cocoa powder
  • 1/2 tsp. salt
  • 1/4 tsp. baking powder
  • 1/2 c. unsalted butter, softened
  • 1/2 c. granulated sugar
  • 1/4 c. brown sugar
  • 1 egg, large
  • 1 tsp. vanilla extract
  • 1/2 c. peppermint bark, coarsely chopped
For frosting: 
  • 1 c. unsalted butter, softened
  • 4 c. powdered sugar
  • 1/4 tsp. salt
  • 3-4 T. heavy cream
  • 1 tsp. peppermint extract
  • 1 tsp. vanilla extract
  • gel food coloring (optional)
1) Preheat oven to 350 F. Line 9x13 cake pan with parchment paper, allowing about 2" overhang on each side of pan, or coat with nonstick cooking spray, and set aside. 

2) Whisk together flour, cocoa, salt and powder; set aside. In mixing bowl, beat butter, sugars, egg and vanilla until well combined. Gradually add flower mixture, in about three additions, and continue mixing until smooth.

3) Press dough into prepared sheet pan and sprinkle peppermint bark over top of dough. Bake for 13-15 minutes or until the cookie surface is no longer shiny and the edges look dry. Allow cookies to cool in pan about 10 minutes. Pulling on parchment overhang, lift cookies from pan and allow to cool completely on wire rack. 

4) For frosting, whip butter in stand mixer until smooth. Add about half the powdered sugar and 2 T. cream. Add remaining powdered sugar and gradually add cream, mixing well between each addition until desired consistency is reached. You want it to form soft peaks. Add extracts and food coloring then frost cookies when completely cool. Cut into bars and serve!

Source: Adapted from Mountain Mama Cooks

Monday, December 31, 2012

Chocolate Cherry Sable Cookies


Pin It!


At some point over the last few years, I decided that I really quite enjoy my own company. I mean, I'm really funny and clever, I have great taste in shoes, as evidenced by my wall-sized shoe rack (no, really, I may have a problem) and I'm always up for trying new things.


And being alone while I bake with my flour-dusted laptop and a cheesy Netflix/Hulu movie and/or murder mystery (not the really gruesome, scary kind, I'm more of a "Bones" and "Murder, She Wrote" fan) just gives me time to think and relax.


I only occasionally get distracted and burn trays of cookies (no timer in this apt here), but lucky for you, that's the hardest part! As long as you remember to take these puppies out of the oven, they're really simple and look so elegant!

Also, they're a kind of butter cookie, if that tells you anything...yum!

Chocolate Cherry Sable Cookies [click to print]
Makes about 4 dozen cookies
  • 4 oz butter, softened
  • 2 oz sugar
  • 1 egg, lightly beaten
  • 5 oz cake flour
  • 1-1/2 T. cocoa powder
  • 1/4 c. cherry jam
1) Preheat oven to 350 F. Line baking sheet with parchment paper and set aside. 

2) In stand mixer, beat butter for about 20-30 seconds until smooth-ish. Slowly add in the sugar. Slowly add the egg. Add a small scoop of flour and beat until ingredients just pull together. Add remaining flour all at once and mix until just combined, scraping sides of bowl as necessary. 

3) Fit piping bag with a large star tip (I used #3B). Pipe dough onto prepared sheet, spacing about 1-1/2" apart. Dip your finger, or the end of a wooden spoon, in cocoa powder and press a dent in the center of the piped cookies. 

4) Fill ziploc sandwich bag with jam and snip off a small corner. Squeeze small amount of jam into depression in cookies. Refrigerate about 5 minutes until firm then bake for 8-11 minutes. Allow cookies to cool on sheet about 3 minutes before removing to wire racks to cool completely. 

Source: Adapted from L'Academie de Cuisine

Monday, December 3, 2012

Chocolate Bon Bons and Truffles


Pin It!

I've been learning all kinds of fun things about chocolate the last few weeks. Remember how I'm taking that class at L'Academie de Cuisine? I wasn't ever very interested in chocolate or candy making. It always seemed difficult and gave me nightmares of nasty 3rd degree burns. Until now.


Chef Mark makes everything seem so easy, and it turns out, tempering chocolate still isn't my favorite thing but it's not so bad! And just look at all these beautiful candies we made! Anybody wanna get together for a candy making extravaganza?!

Friday, August 17, 2012

Frozen Cherry Ganache Cake


Pin It!

Boys/Men are the hardest to come up with gifts for. Every year at Christmas, it's a no-brainer that my Dad and little brother (who's no longer that little) get at least one box each of chocolate covered cherries. They practically inhale those things with their minds.


But what do you do when their birthdays fall earlier in the year, when you're wishing for something slightly refreshing but still packed with that decadent chocolate-cherry combination? Frozen ganache cake, that's what.


This is another one of those ice cream-esque cakes that melts a little differently than regular ice cream but is so rich and creamy. The cherries cut beautifully in the center layer, making for a very eye-catching presentation. Perfect to wow the birthday boy!

Plus, this is one of the easiest cakes of your life! The hardest part is exercising self-control as you wait for the layers to set!

Frozen Cherry Ganache Cake [click to print]
makes 3 mini loaves

  • 2/3 c. heavy cream 
  • 2 c. semisweet chocolate chips
  • 2 c. cherry pie filling
1) Line mini loaf pans with parchment paper, or one regular loaf pan, and set aside. 

2) Heat the cream in a small saucepan until hot but not boiling. Pour over chocolate and allow to sit about 30 seconds. Stir chocolate mixture until smooth. 

3) Divide chocolate among loaf pans, filling each about 1/3. Carefully spoon cherry filling over chocolate layer. Top each loaf with remaining chocolate and chill in freezer until firm. To serve, cut with a knife dipped in hot water. 

Tuesday, July 24, 2012

Homemade Snicker Bars


Pin It!


Several of my coworkers keep cute little dishes well-stocked with all kinds of candy. I guess I'm gonna need one soon, too, now that I have a desk! That's right. I have officially started my new position doing Development and Special Events and I'm so excited for a new challenge! And to decorate an office, but that's a matter for another time.


My favorite candy dish treat by far has gotta be mini Snickers bars. Those bite size things are so tiny it doesn't even count as eating anything and yet it fills your mouth with pure chocolate-caramel-peanuty goodness.


After eating more than I'd care to publicly admit, I had the thought, what if I made them myself? Very good and very bad idea all at the same time. And don't get scared off by the thought of making candy! The hardest part about this recipe is waiting for each layer to set. But it's oh so worth it!

Homemade Snicker Bars [click to print]
Makes one 9x13 pan


For Layer 1: bottom chocolate layer

  • 1-1/4 c. milk chocolate chips
  • 1/4 c. peanut butter chips
For Layer 2: nougat layer
  • 1 c. sugar
  • 1/4 c. milk
  • 1-1/2 c. marshmallow fluff
  • 1/4 c. peanut butter
  • 2 tsp. vanilla extract
  • 1-1/2 c. peanuts, chopped
For Layer 3: caramel layer
  • 14-16 oz. (1 bag) chewy caramels
  • 2 T. heavy cream
For Layer 4: top chocolate layer
  • 1-1/4 c. milk chocolate chips
  • 1/4 c. peanut butter chips
Line the bottom and sides of a 9x13" pan with parchment paper or plastic wrap. 

Layer 1: Combine chocolate and peanut butter chips in small heat proof bowl and melt over double boiler or in microwave until completely smooth. Pour into pan and spread to an even layer. Allow to set in refrigerator until firm. 

Layer 2: Combine sugar and milk in saucepan and heat on medium low until sugar is completely dissolved. Increase heat and bring mixture to a boil; continue boiling for 5 minutes. Remove from heat and add fluff, peanut butter and extract. Pour nougat over bottom chocolate layer and spread evenly. Sprinkle peanuts over nougat and allow to set and cool completely. 

Layer 3: Combine caramels and cream in saucepan. Heat until mixture is smooth and even. Pour over nougat layer and allow to set until firm. 

Layer 4: This is exactly the same as the first layer. Combine chocolate and peanut butter chips in small heat proof bowl and melt, stirring until completely smooth. Spread mixture evenly over caramel layer. Allow to set in refrigerator until completely firm.

Cut into bars or bites and enjoy!

Source: Adapted from Taste of Home

Thursday, July 12, 2012

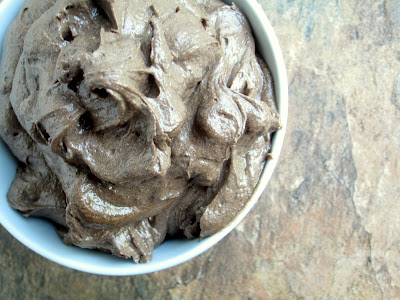
Double Chocolate Cookie Butter


Pin It!


Ah, yes. Cookie butter. It just may be my downfall. Curse upon you, Trader Joe's, for popularizing the stuff and practically forcing me to create and taste a variety of homemade flavors, thereby consuming a far more than healthy amount of delicious, creamy sweetness. 


I don't think I'll need to wear a belt this week.


I originally made up this recipe to sandiwch between a layer of dark chocolate cake and rich, semisweet ganache. Oh, my goodness. I think that made a heavenly birthday cake.


It's also quite possible that I ate the extra little leftover bit without sharing. Oops.


Maybe I'll start exercising self control this week.


Double Chocolate Cookie Butter [click to print]
Makes about 3 cups
  • 1/2 c. unsalted butter
  • 2/3 c. brown sugar
  • 1/2 c. granulated sugar
  • 1-1/3 c. flour
  • 1/2 c. cocoa powder
  • 1 tsp. vanilla extract
  • 1/2 tsp. salt
  • 1/4 c. plus 2 T. whole milk
  • 1/2 c. chocolate chips
Cream butter and sugars in mixing bowl until light and fluffy, about 3 minutes. Add flour, cocoa, vanilla and salt and mix until well combined. Beat in milk and chocolate chips. Store in airtight container in refrigerator until ready to use. 

Source: Adapted from Chocolate Chip Cookie Butter

Tuesday, June 26, 2012

Easiest Fluffy Chocolate Butter Cake


Pin It!


It's like I fell off the face of the earth. But in reality, I didn't even fall off that ladder when I was perched at the tippy top clamping strings of lights to the roof of my parents new porch. That's talent. 


I got to go home for nearly a week and kick it with the entire fam! I know you're jealous because I had tons of fun, and probably because my family is so awesome. But we can't help it.


But in the meantime, I really have been baking like crazy and writing thousands of blog posts in my mind. Unfortunately, as far as I know, you dear blog readers are not also mind readers. So I'm getting back on track and have some great recipes for you!


I think I baked a version of this chocolate cake about 18 times over the last week. That may or may not be a slight exaggeration, but I have really had several requests for this recipe. I mean, who wouldn't want such a soft, fluffy, moist chocolate cake that is pretty much the easiest butter cake recipe of my life? And paired with a thick layer or Salted Caramel Buttercream (recipe coming soon, I promise!)...heavenly!


And for all of you who have nightmares about baking anything from scratch, trust me, this is probably the easiest recipe of your life, too.

Easiest Fluffy Chocolate Butter Cake [click to print]
Makes 12 cupcakes or 1-8" OR 9" cake layer
  • 1-1/2 c. flour
  • 3/4 c. sugar
  • 1/2 c. cocoa powder
  • 1 tsp. baking soda
  • 1/2 tsp. salt
  • 1/2 c. butter, softened
  • 1/2 c. sour milk
  • 1/2 c. warm water
  • 1 tsp. vanilla extract
  • 1 egg
Preheat oven to 350 F. Prepare muffin tin with liners or line cake pan with parchment paper and set aside. 

In large mixing bowl, whisk together flours, sugar, cooca, soda and salt. Add butter, milk, water, extract and egg. Mix just until no butter chunks remain and mixture looks even. Scoop batter into cupcake liners or spread into cake pan. Bake cupcakes for 20-25 minutes or cake layer for 32-38 minutes or until center springs back when lightly touched. 

Tuesday, June 5, 2012

Chocolate Pound Cake with Dulce de Leche Buttercream Glaze


Pin It!

Wow, that's a long title, but at least you know what to expect with this cake! It is certainly not for the faint of heart. I was originally going to make it into a layer cake and frost the entire thing, but I decided it might kill me. And probably several of my friends. For real. And that's not really what I'm going for here, so instead, I went with a single layer, glazed version.


Because of the high butter content (don't let that scare you away!) of pound cake, it can dry out pretty fast. So don't store it in your refrigerator and try to enjoy it the day you make it! Even better, while it's still warm.

Sorry for such a short post today and a general lack of wit, I'm just mostly exhausted but I promise to do better next time!

Chocolate Pound Cake with Dulce de Leche Buttercream Glaze [click to print]
Makes two 8" round layers

For the cake: 
  • 2-1/4 c. flour
  • 3/4 c. cocoa powder
  • 3/4 tsp. baking soda
  • 1/2 tsp. salt
  • 1 c. unsalted butter, softened
  • 1 c. sugar
  • 3 eggs
  • 2 tsp. vanilla
  • 1 c. sour cream
  • 1 c. semisweet chocolate chips
For the buttercream
  • 2 c. powdered sugar
  • 1/4 c. unsalted butter, softened
  • 1/4 c. dulce de leche (try the easiest homemade Dulce de Leche of your life!)
  • 1/4 tsp. salt
  • 3-6 T. milk
Preheat oven to 350 F. Line pans with parchment paper or coat with nonstick cooking spray. 

Whisk together flour, cocoa, soda and salt; set aside. In large mixing bowl, cream butter and sugar on medium-high speed until light and fluffy. Reduce speed to medium-low and add eggs, one at a time, incorporating well between each addition. Add vanilla.

Alternately add flour mixture and sour cream in 3 separate additions, beginning and ending with flour. Add chocolate chips and continue mixing until combined. Pour batter into prepared pans and bake for about 32-38 minutes or until done. Allow cakes to cool in pan about 10 minutes, then transfer to wire rack to cool.

In mixing bowl, combine sugar, butter, dulce de leche and salt. Gradually beat in milk, one tablespoon at a time, until reaching desired consistency. Pour over slightly warm cake layers. 
Source: Adapted from The Curvy Carrot

Thursday, May 24, 2012

Dark Chocolate Whoopie Pies with Chocolate Chip Cookie Butter Filling


Pin It!


Ever have one of those days (or weeks) where you just need to curl up on your bed with a fluffy pillow and a big fat spoonful of cookie dough and watch a couple episodes of The Biggest Loser or The Next Food Network Star? Yeah, I totally understand. Life's been a little rough around here, lately.


But good things have been happening, yes. Jars of cookie butter. Mountains of whoopie pies. Discovering the existence of white chocolate cocoa powder (what!). Getting a new position at work. All very good and exciting!


But other life issues have been stressing me out, so it was a lucky thing that I got these whoopie pies out of the house before I finished them off on my own! It was very tempting. And to you skinny minnies who eat two cookies and moan about overdoing it, you have no idea who you're dealing with.


The whoopie shells are nice and soft and moist and not overly sweet, striking a perfect balance with the thick layer of cookie butter stuffed between them. Yummers!

Dark Chocolate Whoopie Pies with Chocolate Chip Cookie Butter Filling [click to print]
Makes about 24 pies
  • 1-2/3 c. flour
  • 1/2 c. cocoa powder
  • 2 T. plus 1-1/2 tsp. black onyx cocoa powder*
  • 1-1/2 tsp. baking soda
  • 1/2 tsp. salt
  • 1/2 c. unsalted butter, softened
  • 1 c. brown sugar
  • 1 egg
  • 1 tsp. vanilla
  • 1 c. sour cream
  • 1-1/2 c. Chocolate Chip Cookie Butter
*I realize normal people don't have black onyx in their pantry (or bookshelf shoved back behind their dining room table, in my case), so you can use 2/3 c. total cocoa powder instead of the combination of cocoa and black onyx, they just won't be as dark.

Preheat oven to 375 F. Line baking sheet with parchment paper or coat generously with nonstick cooking spray; set aside.

Whisk together flour, cocoas, soda and salt; set aside. In another bowl, cream butter and sugar until fluffy, about 5 minutes. Add egg and vanilla, beating until completely incorporated. Alternately add flour mixture and sour cream in about 3 additions, beginning and ending with flour. Continue mixing until just combined.

Scoop tablespoons of batter onto prepared sheet, spacing each batter blob two inches apart. Bake about 10 minutes or until cake springs back when lightly pressed.

Allow cakes to cool about five minutes on baking sheet before transferring to wire rack to cool completely. Spread flat side of half of cakes with cookie butter and sandwich with remaining cakes.

Source: Adapted from The Novice Chef

Tuesday, May 22, 2012

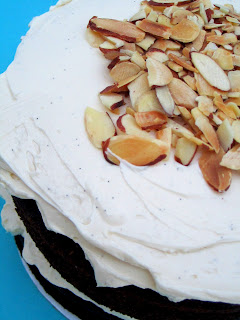
Chocolate Almond Cake with Vanilla Bean Buttercream


Pin It!
I'm watching The Biggest Loser online as I soften butter and scoop sugar and bake for hours on end. Definitely one of my favorite hobby combinations. 


Just a warning about this buttercream, the recipe below makes waaaay more than you need and the flavor is rich and buttery perfect. It also freezes really well if you're not in the mood to cuddle up with your mixing bowl. And it is kind of a pain to make in small batches, so go for the whole big thing! You won't be sorry, unless of course you have no self-control. In which case, I can relate.


I mean, do you see those gorgeous vanilla bean flecks throughout all that oozing, fluffy buttercream? Probably you'll only use about 2-3 cups for the layer cake and maybe a little more than that if you smother cupcakes like I do. Awesome. And the toasted almonds on top give the perfect little crunch, so don't skip those!


Chocolate Almond Cake with Vanilla Bean Buttercream [click to print]
Makes one 2-layer 6" cake or about 12 cupcakes


For the Cake
  • 1 c. plus 2 T. all-purpose flour
  • 1/4 c. plus 2 T. almond flour*
  • 3/4 c. sugar
  • 1/2 c. cocoa powder
  • 1 tsp. baking soda
  • 1/2 tsp. salt
  • 1/2 c. butter, softened
  • 1/2 c. sour milk
  • 1/2 c. warm water
  • 1 tsp. almond extract
  • 1 egg
  • 1/2 c. almond slices, toasted
For the Buttercream (makes about 8 cups)

  • 10 egg whites (about 1 cup)
  • 2 c. sugar, granulated not powdered!
  • 2 c. unsalted butter, softened
  • 1/4 tsp. salt
  • 1 T. vanilla bean paste (OR seeds from one vanilla bean OR 1 T. vanilla extract)

*If you don't have almond flour, you can just use all-purpose flour instead, the almond flavor won't be quite as strong but will definitely still be delicious!

Preheat oven to 350 F. Prepare two 6" cake pans with parchment paper or coat bottom with nonstick cooking spray. Alternately, prepare muffin tin with liners or coat generously with nonstick cooking spray and set aside.

In large mixing bowl, whisk together flours, sugar, cocoa, soda and salt. Add butter, milk, water, extract and egg. Mix just until no butter chunks remain and mixture looks even. Spread batter into cake pans or scoop into cupcake liners. Bake cake layers for 32-38 minutes or cupcakes for 20-25 minutes or until center springs back when lightly touched.


Meanwhile, get working on that buttercream! You can make this ahead of time, too, if you want. It keeps great in the refrigerator or freezer.

Fill a saucepan with a couple inches of water and nest a heat safe bowl (like ceramic or glass) on top, but don't let that bowl touch the water! Whisk together egg whites and sugar until well combined and bring water to a simmer. Continue whisking until the sugar melts completely and the mixture reaches 160 F and the sugar is completely melted. Test this by rubbing a drop between your fingers and if it's still gritty, keep heating and whisking.

Once smooth, remove from double boiler and whisk in salt. Pour mixture into bowl of stand mixer and mix on high speed with whisk attachment. Once the mixture comes to room temperature, about 10-15 minutes, you'll have a beautiful meringue.

Change to the paddle attachment, if you have one, and add butter to the meringue, about 2 Tablespoons at a time. Make sure each chunk is fully incorporated before adding the next bit. Continue adding butter until all chunks are fully incorporated and mixture is smooth and creamy. Add extract and mix to combine. 

Troubleshooting woes...At this point, you may be getting nervous because your buttercream is looking a little strange, but don't give up! If it's runny or soupy...stick the whole bowl in the fridge for about 10-15 minutes to firm up and then whip on medium-high speed until it gets smooth. If it's curdled and sick-looking...just keep mixing! It will smooth out and look delicious again.


Source: Cupcake recipe adapted from Oh SO Delicioso; Buttercream adapted from Lemon Ombre Cake with Vanilla Swiss Meringue Buttercream

Tuesday, May 15, 2012

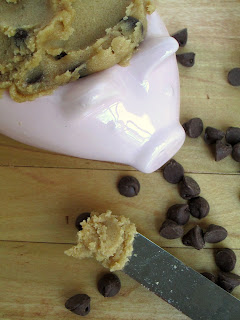
Chocolate Chip Cookie Butter


Pin It!

Remember how I told you before that I used to not like chocolate? And how I've changed my ways? Well, this is a glorious day...Happy National Chocolate Chip Day!


I'm sitting here, trying to exercise self-restraint, to avoid diving directly into this jar of creamy, dreamy Chocolate Chip Cookie Butter. It has so many of my favorite ingredients...sugar, browned butter, vanilla, chocolate...oh man! I'm gonna have to finish this post in the other room.


Okay. Like I said, a key ingredient in this recipe is browned butter. Don't let that scare you! Even though it sounds all fancy, it's not that difficult to make. And the resulting fragrance and flavor is absolutely intoxicating. No, really. Remember how I had to leave the room a minute ago? 


While you guys all try this recipe out, I'm gonna remind myself that I just worked out for nearly an hour this afternoon and that it is now time to exercise something called self-restraint. If you're at a loss for how to use cookie butter, here are a few suggestions, courtesy of me and my friend Pinterest:
  • Frosting for your favorite cupcakes
  • Swimming pool for Teddy Grahams (or spread it on graham crackers, but aren't bears and cookie butter much more appealing?)
  • Sandwich cookie filling
  • Bake some Cookie Butter Funfetti Triple Chip Bars
  • Whip up a batch of homemade Cookie Butter Cups
  • Spread a layer on your sandwich
  • Swirl it into Cheesecake
  • Devour by the spoonful
Enjoy!


Chocolate Chip Cookie Butter [click to print]
Makes about 2 cups
  • 1/2 c. unsalted butter
  • 2/3 c. brown sugar
  • 1/2 c. granulated sugar
  • 1 tsp. vanilla extract
  • 1-1/3 c. flour
  • 1/2 tsp. salt
  • 1/4 c. plus 2 T. heavy cream
  • 1/2 c. chocolate chips
Heat butter in heavy bottomed saucepan over medium-low heat until melted. Continue heating, stirring occasionally, until butter turns a golden brown color and smells kind of caramely. The butter will start out with really big, loud bubbles sizzling all over the place, then gradually calm down (about 10-15 minutes) and brown. Remove from heat and scrape browned butter into mixing bowl and allow to come to room temperature. 

Add sugars to butter and cream until light and fluffy, about 3 minutes. Add flour, vanilla and salt and mix until well combined. Mix in cream and chocolate chips; add additional cream, one tablespoon at a time, if you want a thinner consistency. 

Source: Inspired by Cupcake Project; Recipe adapted from David Lebovitz

Thursday, May 10, 2012

Chocolate Chip Magic Bars


Pin It!
It's official. My parents are moving! They just heard back from the bank (finally!) and they're approved and will hopefully be loading a truck next week! And the really cool thing is, they'll be moving to a house where they'll actually have a yard and trees, which I wished for pretty much forever growing up, and nobody hooked to the side of the house and, drumroll please...a pool! What! There are so many reasons to go home.


And so, in the midst of finding out this exciting tidbit and my currently unexplained overemotional state, I find myself reminiscing an awful lot lately. I'm pretty lucky because my family is so awesome. When I was little, my brother and I would hang a sheet over the front of our bunkbeds to create a curtain-like backdrop, distribute tickets to all our family and steal cushions from the living room couch (seats for our spectators, of course). We'd line them up along the wall and perform the greatest magic shows on earth!


I'm sure no one ever figured out that the reason we disappeared through the toy refrigerator is that it didn't actually have a back to it and we could slide up onto the top bunk sneakily without giving away our position. We got skills in the magic department.


Doesn't it just seem perfect to end an evening of magic with Magic Bars? Oh, but these aren't your ordinary bar cookies. These are amped up with a chocolate chip cookie layer beneath all that Magic Bar goodness...oh, yeah!

Chocolate Chip Magic Bars [click to print]
Makes about 40 squares


For the cookie crust*
  • 1/2 c. unsalted butter
  • 1 c. brown sugar
  • 1-1/4 c. flour
  • 1-1/4 tsp. baking powder
  • 1/2 tsp. salt
  • 1 tsp. cinnamon
  • 1 tsp. vanilla 
  • 2 eggs
  • 1/2 c. chocolate chips
For assembly
  • 1 c. chocolate chips
  • 1 c. butterscotch chips
  • 1 c. toffee bits
  • 1 c. sweetened coconut flakes
  • 1 can (14 oz) sweetened condensed milk
*For this deadly concoction, store-bought cookie dough is also totally fine. Just smoosh it all out flat and press into baking dish and skip the cookie dough instructions below. But just so you know, these cookies are delicious so you probably wanna make them.


Preheat oven to 350 F. Coat 9x13 pan with nonstick cooking spray and set aside. 

Melt butter in saucepan; add brown sugar and mix well. Remove from heat and cool about 10 minutes. Meanwhile, in a separate bowl, whisk together dry ingredients and set aside. 

Pour butter mixture and vanilla in mixing bowl. On low speed, add eggs one at a time, incorporating well between each addition. Add flour mixture in 2-3 additions. Mix well. Stir in chocolate chips and spread batter evenly in baking dish. 

Bake crust about 10 minutes and remove from oven. Evenly sprinkle chocolate chips, butterscotch chips, toffee bits and coconut over top. Drizzle sweetened condensed milk over everything. Bake 16-20 minutes until lightly browned. Allow to cool completely before cutting...or dig in with a spoon right away!

Source: Cookie dough from my dear mother; Inspired by Cookies and Cups
Related Posts Plugin for WordPress, Blogger...