Showing posts with label cake. Show all posts

Wednesday, May 22, 2013

Ginger Carrot Cake


Pin It!

It's finally been feeling like spring and I'm loving it! The sunshine is beautiful, the trees are ultra green and gigantic full blooms are showing up all over the place. Now, if only I had a window to view all this during the workday...but maybe I wouldn't actually do much work if that were the case.


But window or not, I think you'd all agree that if the seasons were a cake, it would totally be packed with carrots. And some ginger. Because it's like a little surprise inside and adds a new dimension to that regular old carrot thing.


I used a vanilla German buttercream to frost this cake and it tasted delicious, although it is really flavorful and moist on its own. Please try it!

(And invite me over.)

Ginger Carrot Cake [click to print]
Makes one 9x13" cake or two 9" layers

For the cake
  • 1 c. unsalted butter, softened
  • 1-1/2 c. sugar
  • 4 eggs
  • 2 tsp. vanilla extract
  • 2-1/2 c. flour
  • 1 T. baking powder
  • 1 tsp. baking soda
  • 1 tsp. salt
  • 1 tsp. ground ginger
  • 1/4 tsp. white pepper
  • 2/3 c. whole milk
  • 4 c. carrots, shredded or pulsed in food processor to approx. same size
  • 1/2 c. crystallized ginger, finely chopped
For the buttercream
  • 2 c. whole milk
  • 1-1/4 c. granulated sugar
  • 1 T. cornstarch
  • 1/4 tsp. salt 
  • 2 eggs
  • 2 egg yolks
  • 2 tsp. vanilla bean paste (OR seeds from 2 bean pods)
  • 2 c. unsalted butter, softened
1) Preheat oven to 350 F. Line 9x13 pan with parchment paper or coat generously with nonstick cooking spray; set aside. 

2) In bowl of stand mixer, cream butter and sugar. Add eggs, one at a time, incorporating well between each addition. In medium bowl, whisk together flour, powder, soda, salt and ground ginger; set aside. Cream butter and sugar in mixing bowl. Add eggs and vanilla, continuing to mix until well incorporated. If your batter looks a little curdled at this point, it's okay, just keep going with the next steps!

3) In separate bowl, whisk together flour, powder, soda, salt, ground ginger and pepper. With mixer on low speed, alternately add flour mixture and milk to batter in about 3 additions, beginning and ending with flour mixture.

4) Stir in chopped ginger and carrots until evenly distributed. Pour batter in prepared pan and bake for 30-35 minutes or until top is golden and springs back when touched lightly. Allow to cool completely in pan.

5) Frost as desired and enjoy!

Source: Adapted from Sweetapolita

Thursday, May 2, 2013

Strawberry Lemon Roulade


Pin It!

I have two things to tell you. First, I totally ran out of flour. Like not even a teaspoon left in the bottom of my 5 gallon bucket. And second, I have an even better excuse for why I've been apparently slacking in my blog posting duties. But I can't tell you what that second excuse is yet because it's a surprise!


So, in the meantime, I hope you'll accept my humble apologies in the form of Lemon Berry Pavlova. If you've ever tasted such a thing before, you'll know this is more than acceptable. The mousse is flavored with sweet lemon curd and is so thick and creamy but feels so light and fluffy all at the same time. And the meringue base has a beautifully shiny shell and a bit of chewiness when you bite into it. So good.


P.S. If you need to apologize to me for any reason while lemons and berries are in season, feel free to bring this little guy on over!


Strawberry Lemon Roulade [click to print]
Makes one roll
  • 4 eggs, separated
  • 1/2 c. sugar
  • 1 tsp. vanilla extract
  • 3-1/2 oz. cake flour
For assembly
  • 1-1/2 to 2 c. lemon curd
  • 2 c. sliced strawberries
1) Preheat oven to 375 F and line jelly roll pan with parchment paper; set aside. 

2) In bowl of stand mixer, whip egg whites with a pinch of sugar. When whites begin holding soft peaks, gradually whip in sugar. Continue whipping until medium-stiff peaks form. In separate bowl, break up yolks with a fork and mix into whites with vanilla. 

3) Fold in flour mixture in about 3 additions. Pour batter into pan and spread evenly. Drag thumb around perimeter of baking sheet to create a small gap between batter and edge of pan. These last two steps will help prevent the edges from cooking too fast or from cooking unevenly. 

4) Bake 10-12 minutes. Surface of cake should appear dry and spring back when touched lightly. If edges start browning before it is done cooking, reduce temperature. Immediately remove cake, still attached to parchment paper, from pan and allow to cool completely on wire rack. 

4) When cool, remove parchment paper and evenly spread a thin layer of lemon curd across surface. Press berry slices into lemon curd. With the long edge of the cake in front of you, carefully roll the cake up. Tightly wrap rolled cake with plastic wrap. Store in refrigerator at least 1 hour or until ready to serve. 

Source: Roulade adapted from L'Academie de Cuisine

Tuesday, March 26, 2013

Chocolate Yogurt Cake


Pin It!

I made this cake for the first time a while ago, but it somehow disappeared before I ever got a chance to take pictures. Hm. I guess that just goes to show that it really is perfect for snacking.


This cake has a beautiful dark chocolate color and is very moist, thanks to the yogurt, and, on top of that, it's really fast and easy to make!

Chocolate Yogurt Cake [click to print]
Makes one 8" square cake
  • 6 T. unsalted butter, softened
  • 1/3 c. granulated sugar
  • 1/3 c. dark brown sugar
  • 1 egg
  • 2/3 c. vanilla yogurt
  • 1 tsp. vanilla extract
  • 3/4 c. plus 2 T. flour
  • 1/4 c. plus 2 T. cocoa powder
  • 3/4 tsp. baking soda
  • 1/8 tsp. salt
1) Preheat oven to 350 F. Line bottom of 8" square baking pan with parchment paper or coat generously with nonstick cooking spray; set aside. 

2) In bowl of stand mixer, combine butter and sugars. Cream until well combined. Add egg and vanilla; mix until completely incorporated. Stir in yogurt and milk. 

3) In separate bowl, whisk together flour, cocoa and salt. Gradually add to batter in about 3 additions, mixing until just blended. Pour batter into prepared pan and bake 20-25 minutes or until cake pulls away from sides of pan just slight and top of cake springs back when lightly touched.

4) Allow cake to cool about 10 minutes in pan before removing to serving dish. Dust with powdered sugar and serve warm. (P.S. This is still good cold, but who doesn't love warm cake?!)

Tuesday, March 12, 2013

Sour Cream Peppermint Petits Fours


Pin It!

I somehow survived DC's Snowquester last week and made the treacherous journey to and from work. I know, you're impressed. But instead of getting all cozy and sipping hot chocolate once I finally got home, I grabbed a few sticks of butter and got baking.


When it's cold and slushy outside, something about peppermint just warms me up from the inside out! These cute little petits fours are the perfect size for an individual serving. Nothing looks more elegant than a mini bundt dusted with a light coating of powdered sugar. But what? Your mom didn't give you this cute little pan from Nordicware? You can bake these as cupcakes, too, they just won't look as fancy.

Sour Cream Peppermint Petits Fours [click to print]
Makes 16 mini bundts or regular cupcakes (I used the Nordicware Mini Bundt pan)
  • 1/2 c. unsalted butter, softened
  • 1 c. sugar
  • 1/4 c. sour cream
  • 2 eggs, large
  • 1 tsp. vanilla extract
  • 1 tsp. peppermint extract
  • 1-1/4 c. flour
  • 1/4 tsp. baking soda
  • 1 tsp. baking powder
  • 1/4 tsp. salt
1) Preheat oven to 350 F. Generously coat mini bundt pan with nonstick cooking spray---use the kind with flour! Seriously, I can't tell you how big of a difference this makes.

2) Combine butter and sugar in mixing bowl and beat until well combined. Add sour cream, eggs, vanilla and peppermint extracts and mix well. In separate bowl, whisk together remaining ingredients and stir into batter until just combined.

3) Spoon batter into prepared pan and bake for 12-15 minutes or until top is slightly golden and springs back when touched lightly. Allow to cool completely. Dust with powdered sugar to serve.

Source: Adapted from The Sweet Art

Friday, August 31, 2012

Ginger Plum Skillet


Pin It!


I'm gonna brag to you a little bit. I got this cast iron skillet for $2! Talk about a steal. I've been coveting these skillets for years and now I'm the proud owner of a perfectly seasoned 9-incher. My life is awesome.


The only bad part about it is the guilt trip I've been getting sent on every time I reach into the cupboard and merely glance in Skillet's direction. I'm sorry I've been avoiding you, but today is finally the day!


Just look at this beautiful cake...dark crust, tender plum slices sunken throughout a super moist cake layer and accented with just the right amount of spices. And if you don't have a cast iron skillet, you can bake this in a regular 9" cake pan, too, but the time will differ, so just be sure to check along the way!

Ginger Plum Skillet [click to print]
makes one 9" cake
  • 1 c. flour
  • 1 tsp. ground ginger
  • 1/2 tsp. baking powder
  • 1/4 tsp. baking soda
  • 1/4 tsp. salt
  • 1/4 tsp. white pepper
  • 1/2 c. buttermilk
  • 1 tsp. vanilla extract
  • 1/4 c. unsalted butter, softened
  • 3/4 c. sugar
  • 1 egg
  • 2 medium plums, pitted and thinly sliced
  • 2 T. coarse sugar
  • 2-3 T. candied ginger, finely chopped (optional)
  • 2-3 T. apple jelly
1) Preheat oven to 375 F.

2) Whisk together flour, ginger, powder, soda, salt and pepper; set aside. In a separate bowl, whisk together extract and milk; set aside. 

3) Cream butter and sugar. Add egg and beat until well combined. Alternately add flour and milk mixtures in about 3 additions, beginning and ending with flour mixture. 

4) Pour batter into skillet. Arrange plum slices on batter surface. Sprinkle coarse sugar and candied ginger over top and bake 30 minutes or until top is golden brown. Using a pastry brush, coat top of cake with this layer of apple jelly and allow to cool in skillet. 

Source: Adapted from Stacey Snacks Online

Tuesday, July 31, 2012

Raspberry Almond Bundt Cake


Pin It!
Summer brings some of the most beautiful fruit! Deep red raspberries, dark purple blackberries, juicy blueberries...and all bursting with sweet, juicy flavor! 


So finally, berry-picking season is upon us. Okay, fine. I guess it's been upon us for quite a while, but I'm finally acknowledging it with a beautiful recipe! And if you're not all into the picking action, there were piles upon piles of plump berries at the grocery store last time I went.  


Ever since I started my first-ever pastry class about two weeks ago (more on that to come for sure!), I decided that I really like making individual-size desserts. There's just something so fun about a fresh pastry or cakelet handcrafted with a single person in mind. Or several single persons.


Could there be anything more perfect than a moist almond butter cake topped with a thin raspberry glaze? Not really. So please feel free to enjoy the most perfect mini cake of the season!


P.S. Frozen berries work great, too. 
P.P.S. You can make a regular bundt cake instead of the minis by increasing the total bake time if you aren't a fan of the minis.
P.P.P.S. Be sure to check out Domestic Goddess' raspberry seasonal posting, too!

Raspberry Almond Bundt Cake [click to print]
makes 6 mini bundts


For the cake
  • 2 tsp. sugar
  • 2/3 to 1 c. raspberries, roughly chopped
  • 2 c. flour
  • 1/2 c. almond flour
  • 1 T. baking powder
  • 1/4 tsp. salt
  • 3/4 c. sugar
  • 2 eggs
  • 1-1/4 c. buttermilk
  • 1/4 c. unsalted butter, melted
  • 2 tsp. vanilla extract
  • 2 tsp. almond extract
For the glaze
  • 2 to 3 c. powdered sugar
  • 1/2 c. raspberries, crushed with all their juices
Preheat oven to 350 F and generously coat with nonstick cooking spray (the kind with flour in it is best for bundts, I think). Sprinkle bottom of bundt pans with sugar, about 1/3 tsp. per pan. Divide berries evenly among pans and set aside. 

Whisk together flours, powder and salt; set aside. In separate bowl, whisk together sugar and eggs. Stir in buttermilk, butter and extracts. Stir in flour mixture until evenly combined. Pour batter into bundt pans and bake about 20-25 minutes or until top springs back when touched lightly. Allow to cool in pans about 10 minutes before turning turning out on wire rack to cool completely.

If the berries stick in the pan, just scoop them back onto the top of your bundt before glazing. To make the glaze, whisk together berries and sugar. Pour over cakes and garnish with toasted almond slivers.

Source: Adapted from Nook & Pantry

Thursday, July 19, 2012

Cherry Limeade Cupcakes


Pin It!

I never even saw a Sonic in my life until I hung out with my AZ cousins one summer. Sure, I'd seen commercials, but I never went to one.


But, Rachel and Sarah were convinced that Cherry Limeade is the absolutely best drink in the world and you can only get it from Sonic. So of course we made a pit stop there one night.


They were right, Cherry Limeade is pretty good, but I wanted a stronger lime flavor and maybe in more of a desserty combination. Oh, yeah, it's cupcake time!


I love the flecks of neon red chopped maraschino cherries in the cupcakes and frosting. And the lime curd flavored filling really packs a refreshing punch!


Aren't cherries and lime a great summer combination?


Cherry Limeade Cupcakes [click to print]
Makes about 2 dozen


For the cupcakes
  • 2 c. flour
  • 1 tsp. baking powder
  • 1/2 tsp. salt
  • 1/4 tsp. baking soda
  • zest from 1 lime (about 1-1/2 T.)
  • 1/2 c. whole milk
  • 1-1/2 tsp. lime juice
  • 1/4 c. maraschino cherry juice
  • 1 tsp. vanilla
  • 1-1/2 c. sugar 
  • 1/2 c. unsalted butter, softened
  • 4 egg whites
  • 1/2 c. maraschino cherries, chopped
For the filling
For the buttercream
  • 4 c. vanilla buttercream (French Buttercream is a great choice))
  • remaining maraschino juice and cherries, chopped (from 16 oz. jar; about 1/2 c. juice and 1/3 c. chopped cherries)
Preheat oven to 350 F. Line cupcake tin or coat generously with nonstick cooking spray; the kind with flour in it would be great for these.

Whisk together flour, powder, salt, soda and zest; set aside. In another bowl, whisk together buttermilk, cherry juice and vanilla and set aside. 

Cream sugar and butter in mixing bowl until light and fluffy. Add egg whites, one at a time, incorporating well between each addition. Alternately add flour and buttermilk mixture, begging and ending with flour and beating between each addition until just combined. Stir in chopped cherries. 

Scoop batter into prepared cupcake tin, filling each liner about 2/3 full. Bake 15-18 minutes or until top springs back when lightly touched. When cool enough to handle, transfer cupcakes to wire rack to cool completely.

For the filling, beat cream on medium high speed until stiff peaks form. Gently fold in curd until evenly combined. Scoop filling into pastry bag fitted with large plain decorating tip. To fill cupcakes, poke tip into top of cupcake, about 1/2 inch deep, and squeeze small amount of filling. You'll see the top of the cupcake rise slightly.

For buttercream, whip vanilla buttercream and chopped cherries/juice in mixing bowl until fluffy and cherries are well distributed. Generously frost each cupcake and dig in!

Source: Cupcakes adapted from Gimme Some Oven

Thursday, July 12, 2012

Double Chocolate Cookie Butter


Pin It!


Ah, yes. Cookie butter. It just may be my downfall. Curse upon you, Trader Joe's, for popularizing the stuff and practically forcing me to create and taste a variety of homemade flavors, thereby consuming a far more than healthy amount of delicious, creamy sweetness. 


I don't think I'll need to wear a belt this week.


I originally made up this recipe to sandiwch between a layer of dark chocolate cake and rich, semisweet ganache. Oh, my goodness. I think that made a heavenly birthday cake.


It's also quite possible that I ate the extra little leftover bit without sharing. Oops.


Maybe I'll start exercising self control this week.


Double Chocolate Cookie Butter [click to print]
Makes about 3 cups
  • 1/2 c. unsalted butter
  • 2/3 c. brown sugar
  • 1/2 c. granulated sugar
  • 1-1/3 c. flour
  • 1/2 c. cocoa powder
  • 1 tsp. vanilla extract
  • 1/2 tsp. salt
  • 1/4 c. plus 2 T. whole milk
  • 1/2 c. chocolate chips
Cream butter and sugars in mixing bowl until light and fluffy, about 3 minutes. Add flour, cocoa, vanilla and salt and mix until well combined. Beat in milk and chocolate chips. Store in airtight container in refrigerator until ready to use. 

Source: Adapted from Chocolate Chip Cookie Butter

Tuesday, July 10, 2012

Strawberry Banana Cupcakes


Pin It!

When I was little, we didn't really do milkshakes. I loved them, yes, we just didn't have them much. My favorite kind has gotta be oreo, packed with so many cookies there's just a little ice cream to help things slide down your throat. The only place fruit had in frozen treats/drinks was in a smoothie. And even then I was quite picky. 


My mom made an awesome strawberry banana smoothie. And so, instead of whipping up a blender full of that, I turned on the oven and baked in our 103 degree humid summer weather. Great idea, Molly.


But, I did promise I'd get my act together and whip up a batch of these babies! Plus they're really fast and easy. Please just tell me you still have some of that creamy French Strawberry Buttercream? A nice heaping mound of buttercream is perfect with these cupcakes since they're a little less sweet than most. Enjoy!


Strawberry Banana Cupcakes [click to print]
Makes about 24 cupcakes
  • 1/2 c. unsalted butter, softened
  • 1 c. brown sugar
  • 2 eggs
  • 2 tsp. vanilla extract
  • 2 c. flour 
  • 1 c. vanilla yogurt
  • 1 T. baking soda
  • 3/4 tsp. salt
  • 2 brown spotty bananas, about 1/2 c. mashed
  • 3 to 4 c. French Strawberry Buttercream
Preheat oven to 350 F and prepare muffin tin with liners or coat with nonstick cooking spray and set aside. 

In large mixing bowl, cream butter and sugar. Add eggs and extract, beating until well combined. Beat in flour, yogurt, soda and salt. Add mashed banana and mix until batter is well combined. 

Scoop batter into muffin tin and bake for 18 minutes or until top springs back when touched lightly.

Source: Adapted from Cupcake Project

Tuesday, June 26, 2012

Easiest Fluffy Chocolate Butter Cake


Pin It!


It's like I fell off the face of the earth. But in reality, I didn't even fall off that ladder when I was perched at the tippy top clamping strings of lights to the roof of my parents new porch. That's talent. 


I got to go home for nearly a week and kick it with the entire fam! I know you're jealous because I had tons of fun, and probably because my family is so awesome. But we can't help it.


But in the meantime, I really have been baking like crazy and writing thousands of blog posts in my mind. Unfortunately, as far as I know, you dear blog readers are not also mind readers. So I'm getting back on track and have some great recipes for you!


I think I baked a version of this chocolate cake about 18 times over the last week. That may or may not be a slight exaggeration, but I have really had several requests for this recipe. I mean, who wouldn't want such a soft, fluffy, moist chocolate cake that is pretty much the easiest butter cake recipe of my life? And paired with a thick layer or Salted Caramel Buttercream (recipe coming soon, I promise!)...heavenly!


And for all of you who have nightmares about baking anything from scratch, trust me, this is probably the easiest recipe of your life, too.

Easiest Fluffy Chocolate Butter Cake [click to print]
Makes 12 cupcakes or 1-8" OR 9" cake layer
  • 1-1/2 c. flour
  • 3/4 c. sugar
  • 1/2 c. cocoa powder
  • 1 tsp. baking soda
  • 1/2 tsp. salt
  • 1/2 c. butter, softened
  • 1/2 c. sour milk
  • 1/2 c. warm water
  • 1 tsp. vanilla extract
  • 1 egg
Preheat oven to 350 F. Prepare muffin tin with liners or line cake pan with parchment paper and set aside. 

In large mixing bowl, whisk together flours, sugar, cooca, soda and salt. Add butter, milk, water, extract and egg. Mix just until no butter chunks remain and mixture looks even. Scoop batter into cupcake liners or spread into cake pan. Bake cupcakes for 20-25 minutes or cake layer for 32-38 minutes or until center springs back when lightly touched. 

Thursday, May 31, 2012

Rhubarb and Strawberry Gingered Shortcake


Pin It!

But I'm getting braver and my tastebuds are becoming more adventurous, so when my new blogger buddies (Yes! I have food blogger friends!) over at I Wanna Be a Domestic Goddess and Diary of a Messy Kitchen told me that the In Season challenge ingredient this month was Rhubarb. Weird, was my first thought. 


I didn't know people actually ate rhubarb. Sure, I saw it in the grocery store occasionally, but really? There's just something in me that never really loved the idea of eating a vegetable that looks like bright red celery, but with a poisonous, leafy upgrade. 

But trust me, this shortcake is a game changer. 


The rhubarb adds a hint of tart that punches up the strawberries to a new level of deliciousness. And the shortcake biscuits are just barely sweet with a touch of ginger that adds a depth of flavor without the intense heat.


Seriously. I just might eat rhubarb again.

Rhubarb and Strawberry Gingered Shortcake [click to print]
Makes 8-10 servings


For the sauce

  • 1 lb. strawberries, quartered (about 3 cups) plus 2 T. sugar 
  • 1/2 c. sugar
  • 1/3 c. water
  • 1-1/2 c. rhubarb, cleaned and chopped 
  • 1/2 T. lemon juice
For the shortcake
  • 2 c. flour
  • 1 T. sugar
  • 4 tsp. baking powder
  • 1 tsp. ground ginger
  • 3/4 tsp. salt
  • 4 T. butter, slightly softened
  • 3/4 c. whole milk
  • 2-3 T. coarse sugar (i.e. turbinado)
First make the whipped cream by combining cream and sugar in a medium mixing bowl. Whip on high speed until the mixture thickens and forms stiff peaks. Set in refrigerator to chill. 

In another bowl, combine strawberries with 2 T. sugar and set aside to macerate for about 1 hour while you work on the next steps. (P.S. Macerate means the sugar will start to pull out the juices from the berries and make an awesome all-natural sauce.)

Combine remaining sugar and water in saucepan and heat until sugar dissolves. Add rhubarb and bring to a simmer; cook for about 20 minutes until rhubarb is softened and mushable. Remove from heat, stir in lemon juice and allow to cool for room temperature. Stir in strawberries and any berry juices. 

Preheat oven to 400 F. 

Whisk together flour, sugar, powder, ginger and salt. Cut in butter. Stir in milk until just combined. Scoop large spoonfuls of dough onto prepared baking sheet, spacing about 2 inches apart; I used a 3 T. cookie scoop (and I'm in love with cookie scoops!). Sprinkle tops of dough balls with a coarse sugar and bake for 15 minutes or until lightly golden brown. 

Allow shortcakes to cool until you can handle them. Slice each cake in half and fill with a mound of fresh whipped cream and a generous scoop of sauce. 

Source: Adapted from Food Network...here and here

Tuesday, May 22, 2012

Chocolate Almond Cake with Vanilla Bean Buttercream


Pin It!
I'm watching The Biggest Loser online as I soften butter and scoop sugar and bake for hours on end. Definitely one of my favorite hobby combinations. 


Just a warning about this buttercream, the recipe below makes waaaay more than you need and the flavor is rich and buttery perfect. It also freezes really well if you're not in the mood to cuddle up with your mixing bowl. And it is kind of a pain to make in small batches, so go for the whole big thing! You won't be sorry, unless of course you have no self-control. In which case, I can relate.


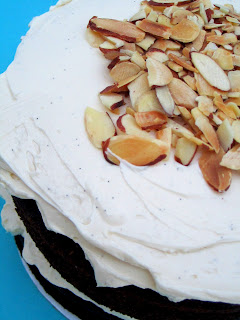
I mean, do you see those gorgeous vanilla bean flecks throughout all that oozing, fluffy buttercream? Probably you'll only use about 2-3 cups for the layer cake and maybe a little more than that if you smother cupcakes like I do. Awesome. And the toasted almonds on top give the perfect little crunch, so don't skip those!


Chocolate Almond Cake with Vanilla Bean Buttercream [click to print]
Makes one 2-layer 6" cake or about 12 cupcakes


For the Cake
  • 1 c. plus 2 T. all-purpose flour
  • 1/4 c. plus 2 T. almond flour*
  • 3/4 c. sugar
  • 1/2 c. cocoa powder
  • 1 tsp. baking soda
  • 1/2 tsp. salt
  • 1/2 c. butter, softened
  • 1/2 c. sour milk
  • 1/2 c. warm water
  • 1 tsp. almond extract
  • 1 egg
  • 1/2 c. almond slices, toasted
For the Buttercream (makes about 8 cups)

  • 10 egg whites (about 1 cup)
  • 2 c. sugar, granulated not powdered!
  • 2 c. unsalted butter, softened
  • 1/4 tsp. salt
  • 1 T. vanilla bean paste (OR seeds from one vanilla bean OR 1 T. vanilla extract)

*If you don't have almond flour, you can just use all-purpose flour instead, the almond flavor won't be quite as strong but will definitely still be delicious!

Preheat oven to 350 F. Prepare two 6" cake pans with parchment paper or coat bottom with nonstick cooking spray. Alternately, prepare muffin tin with liners or coat generously with nonstick cooking spray and set aside.

In large mixing bowl, whisk together flours, sugar, cocoa, soda and salt. Add butter, milk, water, extract and egg. Mix just until no butter chunks remain and mixture looks even. Spread batter into cake pans or scoop into cupcake liners. Bake cake layers for 32-38 minutes or cupcakes for 20-25 minutes or until center springs back when lightly touched.


Meanwhile, get working on that buttercream! You can make this ahead of time, too, if you want. It keeps great in the refrigerator or freezer.

Fill a saucepan with a couple inches of water and nest a heat safe bowl (like ceramic or glass) on top, but don't let that bowl touch the water! Whisk together egg whites and sugar until well combined and bring water to a simmer. Continue whisking until the sugar melts completely and the mixture reaches 160 F and the sugar is completely melted. Test this by rubbing a drop between your fingers and if it's still gritty, keep heating and whisking.

Once smooth, remove from double boiler and whisk in salt. Pour mixture into bowl of stand mixer and mix on high speed with whisk attachment. Once the mixture comes to room temperature, about 10-15 minutes, you'll have a beautiful meringue.

Change to the paddle attachment, if you have one, and add butter to the meringue, about 2 Tablespoons at a time. Make sure each chunk is fully incorporated before adding the next bit. Continue adding butter until all chunks are fully incorporated and mixture is smooth and creamy. Add extract and mix to combine. 

Troubleshooting woes...At this point, you may be getting nervous because your buttercream is looking a little strange, but don't give up! If it's runny or soupy...stick the whole bowl in the fridge for about 10-15 minutes to firm up and then whip on medium-high speed until it gets smooth. If it's curdled and sick-looking...just keep mixing! It will smooth out and look delicious again.


Source: Cupcake recipe adapted from Oh SO Delicioso; Buttercream adapted from Lemon Ombre Cake with Vanilla Swiss Meringue Buttercream

Monday, May 7, 2012

Sweet Sixteen: Mom You Rock!


Pin It!
Mother's Day is just around the corner, and doesn't Mom deserve the best? If your Mom is anything like mine, she deserves a million cakes, a thousand brownies, a jillion scoops of homemade ice cream and a vat overflowing with cookie dough. (Although she'll probably only get one or two of those things for real...sorry, mom.) So in case you're looking for something to whip up for that special lady, take a look at this week's roundup!


(Left to Right, Top to Bottom)

Thursday, May 3, 2012

Red Hot Velvet Cupcakes with Whipped Ganache


Pin It!

It's true. I quite literally turn up my nose at Red Velvet cake. I mean, really, who does that cake think it is? Kinda chocolate? Electric red? Let's be honest with ourselves here. Beyond looks, your typical Red Velvet Cake isn't a strong competitor. Plus it's usually coated with thick cream cheese frosting, which I adamantly despise.


Enter Red Hot Velvet. Now this cake's got it going on.


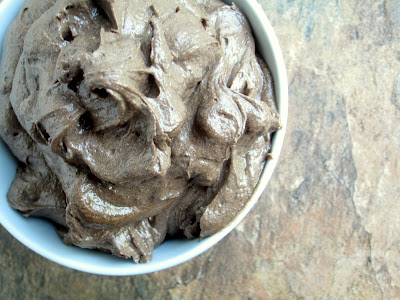
Imagine a moist and tender chocolate cake speckled with spices and crushed red hots. Seriously. Look at that beautiful texture! And then to finish things off, these little babies are topped with a thick pillow of Whipped Ganache Frosting. Oh. My. Goodness. Somebody get the rest of those cupcakes out of my kitchen asap.


So in honor of Cinco de Mayo and my (slightly) Mexican heritage, let's bring on the heat!


Red Hot Velvet Cupcakes with Whipped Ganache [click to print]
Makes about 12 cupcakes


For the Cake
  • 1-1/2 c. flour
  • 3/4 c. sugar
  • 1/2 c. cocoa powder
  • 1 tsp. baking soda
  • 1/2 tsp. salt
  • 1/2 tsp. cayenne pepper
  • 1/2 tsp. chipotle chili powder
  • 1/2 c. butter, softened
  • 1/2 c. sour milk
  • 1/2 c. warm water
  • 1 tsp. vanilla extract
  • 1 egg
  • 1/2 c. red hot candies, crushed
For the Whipped Ganache
  • 1-1/3 c. semisweet chocolate chips
  • 1/3 c. heavy cream
  • 2-3 T. heavy cream
Preheat oven to 350 F. Prepare muffin tin with liners or coat generously with nonstick cooking spray.

Whisk together flour, cocoa, soda, salt, pepper and chili powder. Add butter, milk, water, vanilla and egg. Mix just until no butter chunks remain. Stir in red hots. Scoop batter into cupcake liners and bake for 20-25 minutes or until center springs back when lightly touched.

While cooling, prepare ganache. Put chocolate chips in small, deep bowl and set aside. Heat 1/3 c. cream in small saucepan until just simmering. Immediately pour over chocolate chips and allow to sit for one minute. Stir until mixture is smooth and allow to cool until just firm. Whip with a handheld mixer until fluffy, adding an additional 2-3 T. cream until reaching the desired consistency. This stuff will firm up nicely so frost your cupcakes immediately. Devour.

Source: Cupcake recipe adapted from Oh SO Delicioso
Related Posts Plugin for WordPress, Blogger...