Showing posts with label white chocolate. Show all posts

Saturday, March 9, 2013

Cranberry White Chocolate Chunk Pistachio Cookies


Pin It!

So I may or may not have gone to two or three separate cookie exchanges around Christmas last year...and these cookies just about knocked my socks off. Every single bite is packed with chewy flavor and bits of nut or berry or chocolate...so good!


And while the red and green mix-in combo looks especially gorgeous for the holidays, I've decided that these are year-round cookies. Also, I am now officially in love with pistachios.

Cranberry White Chocolate Chunk Pistachio Cookies [click to print]
  • 3/4 c. unsalted butter, softened
  • 3/4 c. brown sugar
  • 1/4 c. granulated sugar
  • 1 egg, large
  • 1-1/2 tsp. vanilla extract
  • 2 c. cake flour*
  • 1 tsp. baking soda
  • 1/2 tsp. salt
  • 1/2 c. pistachios, shelled (and salted is great, too!)
  • 1/2 c. white chocolate chunks
  • 1/2 c. dried cranberries
*Note: If you don't have cake flour on hand, substitute 2 c. all-purpose flour plus 2 tsp. cornstarch.

1) Line cookie sheet with parchment paper and set aside. 

2) Cream butter and sugars until well combined. Beat in egg and vanilla, scraping sides of bowl as needed. In separate bowl, whisk together flour, soda and salt; with mixer on low speed, gradually beat in flour mixture in about 2-3 additions. Stir in pistachios, chocolate and cranberries. 

3) Cover dough with plastic wrap and chill for at least 30 minutes or up to 3 days. 

4) Preheat oven to 350 F. Drop dough by heaping tablespoons onto prepared cookie sheet. Bake 9-10 minutes or until the edges are just golden brown. Allow cookies to set on pan about 1-2 minutes before transferring to a wire rack to cool completely.

Source: Adapted from my friend Jordan's recipe files!

Tuesday, November 27, 2012

Cranberry Pistachio White Chocolate Bark


Pin It!

Sometimes when I come home from work in the winter and it's already depressingly dark outside, I just need a quick jolt to liven my senses. Homemade chocolate bark is a great solution. Believe me. It's easy peasy.

On top of that, with its deep red berries and brilliant green pistachios, it practically screams Christmas. And if that's not good enough for you, a few dear family members stared at a bag of this freshly made bark before even tasting the stuff...they claimed they didn't like white chocolate. But after one nibble, that claim no longer held true!

Cranberry Pistachio White Chocolate Bark [click to print]
  • 1 c. pistachios, shelled and coarsely chopped
  • 1 c. dried cranberries, coarsely chopped
  • 2 c. white chocolate chips
1) Line 13x9 pan with parchment paper and set aside. If you don't have parchment, heavily coat foil with nonstick cooking spray.

2) Combine nuts and berries in bowl and set aside.

3) Heat white chocolate in double boiler, stirring constantly, until only a few lumps remain. Remove from heat and continue stirring until smooth.

4) Stir chocolate into nut and berry mixture until all pieces are well coated. Press into prepared pan and spread as thinly as possible. It's okay if the mixture doesn't reach all the edges of the pan. Allow to set completely at room temperature or about 1 hour in the freezer. Break into pieces and serve or package as gifts!

Source: Adapted from Skinny Taste

Monday, February 27, 2012

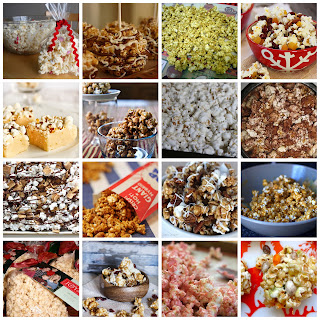
Sweet Sixteen: Popcorn


Pin It!
This east coast winter weather has been just plain crazy lately. I mean, seriously, it was in the 60's and looking like Spring with all the daffodils and snow drops popping out of the ground and then, bam! It's freezing cold again! I think it's time for a cozy movie night. Let's break out the popcorn!


(Left to Right, Top to Bottom)

Tuesday, November 1, 2011

Modeling Chocolate


Pin It!
I have a love-hate relationship with fondant. I love the vibrant colors, I love the shapes you can form and I love that it smooths over a cake so beautifully. But the eating part? Not so much my favorite. If you aren't sure what fondant is, just think back to the last wedding reception you went to...remember the cake? Chances are it was covered with something overly sweet and smooth that most people peeled off. Yeah, that's fondant.


Enter Modeling Chocolate. This stuff is a great alternative to fondant and is pretty easy to make, too. It can be colored just as vibrantly and sculpted and smoothed into whatever shape you want. (I haven't tried covering an entire cake with this yet, so I'm not sure how that works...) Plus, it tastes just like chocolate because it's made from chocolate!


Just to be clear...

Molding Chocolate: pure chocolate or chocolate made with vegetable solids and/or cocoa butter, like Wilton Candy Melts; this stuff is great for pouring into candy molds (get it? molding chocolate?)
Modeling Chocolate: this is chocolate mixed with syrup (in our case, corn syrup) to make it pliable


Modeling Chocolate   [click to print]
14 oz. Chocolate or Candy Melts
1/3 c. Light Corn Syrup

Melt chocolate in 15-30 second bursts in the microwave. Stir very well between each nuke, white chocolate melts very easily and also burns very easily. If you notice any graininess, it's probably already burned and you'll be better off just starting fresh.

Once the chocolate is melted and smooth, warm the corn syrup in the microwave for 45-60 seconds and add to melted chocolate. Immediately stir mixture but do not overmix! According to Chef Talk, "You will notice that as you stir, the chocolate will seize into a thick gooey mass and will clean the sides of the bowl. Look closely to make sure you don't have any streaks of unincorporated chocolate...this unincorporated chocolate will become lumpy grain later and you don't want that. The mass will seem a little oily, that's OK. But the more you stir, the oilier it gets and you don't want oil dripping off it either. It's a delicate balance."

When your done mixing, pour modeling chocolate onto large piece of plastic wrap. Flatten chocolate to about 1/4 in. thick and cover completely with plastic wrap. Refrigerate for a few hours until chocolate sets; it will be hard at this point.

To use modeling chocolate, remove from refrigerator and allow it to come to room temperature. Break off a small piece and begin kneading it in your hands. It will be crumbly and rough and seem unkneadable at first but keep going! It will get softer and smoother as you continue to work with it. If it seems lumpy, the chocolate probably wasn't melted completely before adding the syrup; just try to pick out those lumps and knead until smooth. If it's your first time making this stuff, I suggest you use pre-colored candy melts, but if you prefer custom colors, add a little powdered food coloring until you read the desired color. If the chocolate gets too soft while you're working with it, set aside to return to room temperature or stick in the fridge for a few minutes.

Source: Adapted from Wilton and ChefTalk
Related Posts Plugin for WordPress, Blogger...