Showing posts with label Filling. Show all posts

Thursday, February 14, 2013

Cherry Vanilla Love Monsters (aka Whoopie Pies)


Pin It!


Let me just tell you one more time. I love holidays! Seriously, there might not be anything better than cutesy themed dessert and containers filled with festive sprinkles and sharing some goodies with friends! These Love Monsters don't take too long to bake or assemble and they're just so cute, who wouldn't wanna get bitten by the love bug today? Happy Valentine's Day!


Cherry Vanilla Love Monsters [click to print]
Makes about 36 whoopie pies

For the cake
  • 1/2 c. unsalted butter, softened
  • 1/2 c. granulated sugar
  • 1/2 c. brown sugar
  • 2 eggs, large
  • 1/2 c. milk
  • 1 tsp. vanilla extract
  • 2-1/4 c. flour
  • 1-1/2 tsp. baking powder
  • 1/2 tsp. salt
  • 1 tsp. baking soda
  • 1 pkg. candy eyes (I used Wilton Candy Eyes)
  • Sprinkles
For the filling
  • 1 c. unsalted butter, softened
  • 2 c. powdered sugar
  • 1 jar (7.5oz) marshmallow fluff
  • 1 c. cherry vanilla compote (or pie filling)
  • 2 tsp. vanilla extract
  • 1/4 tsp. salt
1) Preheat oven to 375 F. Line baking sheet with parchment paper or coat with nonstick cooking spray and set aside. 

2) In bowl of stand mixer, cream butter and sugars until creamy. Add eggs, one at a time, incorporating well between each addition. Beat in milk and vanilla. In separate bowl, whisk together flour, powder, salt and soda; gradually add to batter in about three additions. Beat until just combined. 

3) Scoop heaping teaspoons of batter onto prepared baking sheet, spacing about 2 inches apart. Add candy eyes to half of the cookies, placing eyes about 1/3 of the way towards the center of the cookie (otherwise the eyes melt when they bake). Bake one sheet of cookies at a time for about 10 minutes or until edges are just barely golden. Allow to cool on baking sheet about 5 minutes before removing to wire rack to cool completely. 

4) For the filling, beat butter and sugar until well combined and fluffy, about 3-4 minutes. Add fluff, vanilla and salt. Stir in pie filling, mixing until just combined. Spread filling on half the cookies and sandwich with the eyeball cookie halves. Fill small dish with sprinkles and roll edge of assembled whoopie pies in sprinkles to coat. 

Source: Adapted from Just Baked

Thursday, July 19, 2012

Cherry Limeade Cupcakes


Pin It!

I never even saw a Sonic in my life until I hung out with my AZ cousins one summer. Sure, I'd seen commercials, but I never went to one.


But, Rachel and Sarah were convinced that Cherry Limeade is the absolutely best drink in the world and you can only get it from Sonic. So of course we made a pit stop there one night.


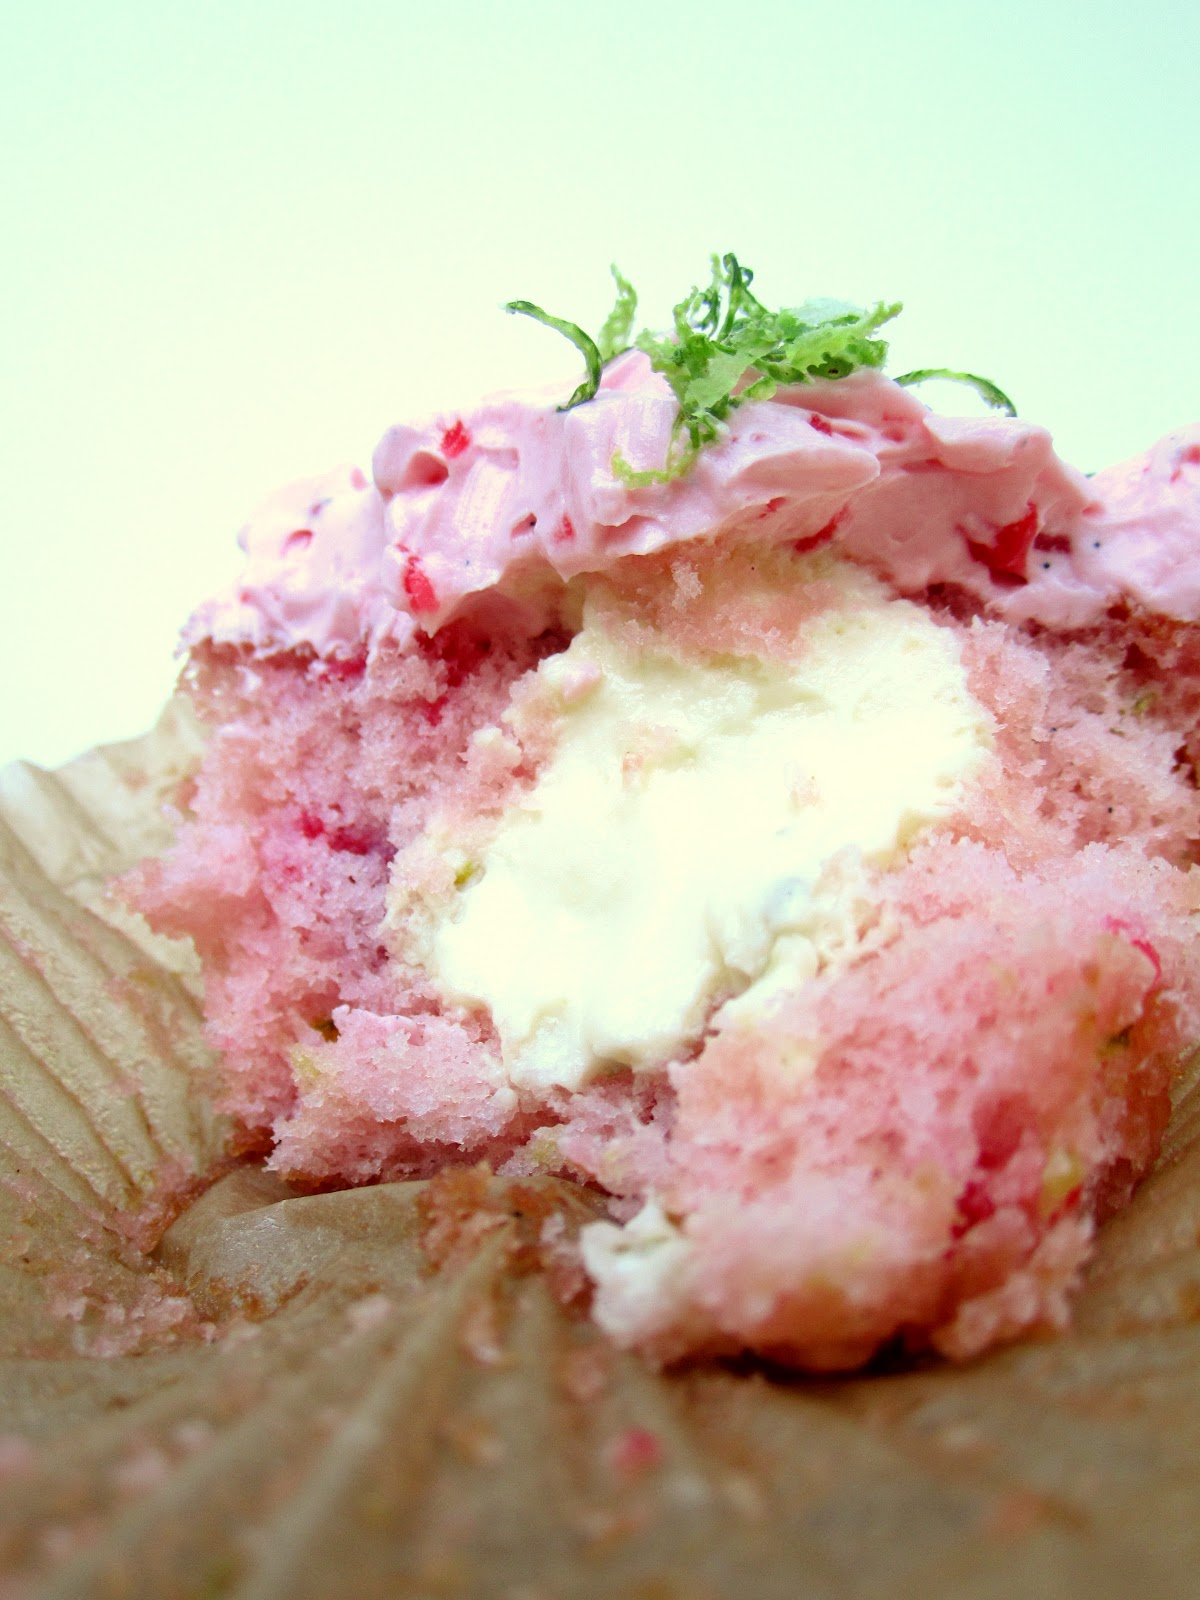
They were right, Cherry Limeade is pretty good, but I wanted a stronger lime flavor and maybe in more of a desserty combination. Oh, yeah, it's cupcake time!


I love the flecks of neon red chopped maraschino cherries in the cupcakes and frosting. And the lime curd flavored filling really packs a refreshing punch!


Aren't cherries and lime a great summer combination?


Cherry Limeade Cupcakes [click to print]
Makes about 2 dozen


For the cupcakes
  • 2 c. flour
  • 1 tsp. baking powder
  • 1/2 tsp. salt
  • 1/4 tsp. baking soda
  • zest from 1 lime (about 1-1/2 T.)
  • 1/2 c. whole milk
  • 1-1/2 tsp. lime juice
  • 1/4 c. maraschino cherry juice
  • 1 tsp. vanilla
  • 1-1/2 c. sugar 
  • 1/2 c. unsalted butter, softened
  • 4 egg whites
  • 1/2 c. maraschino cherries, chopped
For the filling
For the buttercream
  • 4 c. vanilla buttercream (French Buttercream is a great choice))
  • remaining maraschino juice and cherries, chopped (from 16 oz. jar; about 1/2 c. juice and 1/3 c. chopped cherries)
Preheat oven to 350 F. Line cupcake tin or coat generously with nonstick cooking spray; the kind with flour in it would be great for these.

Whisk together flour, powder, salt, soda and zest; set aside. In another bowl, whisk together buttermilk, cherry juice and vanilla and set aside. 

Cream sugar and butter in mixing bowl until light and fluffy. Add egg whites, one at a time, incorporating well between each addition. Alternately add flour and buttermilk mixture, begging and ending with flour and beating between each addition until just combined. Stir in chopped cherries. 

Scoop batter into prepared cupcake tin, filling each liner about 2/3 full. Bake 15-18 minutes or until top springs back when lightly touched. When cool enough to handle, transfer cupcakes to wire rack to cool completely.

For the filling, beat cream on medium high speed until stiff peaks form. Gently fold in curd until evenly combined. Scoop filling into pastry bag fitted with large plain decorating tip. To fill cupcakes, poke tip into top of cupcake, about 1/2 inch deep, and squeeze small amount of filling. You'll see the top of the cupcake rise slightly.

For buttercream, whip vanilla buttercream and chopped cherries/juice in mixing bowl until fluffy and cherries are well distributed. Generously frost each cupcake and dig in!

Source: Cupcakes adapted from Gimme Some Oven

Thursday, May 24, 2012

Dark Chocolate Whoopie Pies with Chocolate Chip Cookie Butter Filling


Pin It!


Ever have one of those days (or weeks) where you just need to curl up on your bed with a fluffy pillow and a big fat spoonful of cookie dough and watch a couple episodes of The Biggest Loser or The Next Food Network Star? Yeah, I totally understand. Life's been a little rough around here, lately.


But good things have been happening, yes. Jars of cookie butter. Mountains of whoopie pies. Discovering the existence of white chocolate cocoa powder (what!). Getting a new position at work. All very good and exciting!


But other life issues have been stressing me out, so it was a lucky thing that I got these whoopie pies out of the house before I finished them off on my own! It was very tempting. And to you skinny minnies who eat two cookies and moan about overdoing it, you have no idea who you're dealing with.


The whoopie shells are nice and soft and moist and not overly sweet, striking a perfect balance with the thick layer of cookie butter stuffed between them. Yummers!

Dark Chocolate Whoopie Pies with Chocolate Chip Cookie Butter Filling [click to print]
Makes about 24 pies
  • 1-2/3 c. flour
  • 1/2 c. cocoa powder
  • 2 T. plus 1-1/2 tsp. black onyx cocoa powder*
  • 1-1/2 tsp. baking soda
  • 1/2 tsp. salt
  • 1/2 c. unsalted butter, softened
  • 1 c. brown sugar
  • 1 egg
  • 1 tsp. vanilla
  • 1 c. sour cream
  • 1-1/2 c. Chocolate Chip Cookie Butter
*I realize normal people don't have black onyx in their pantry (or bookshelf shoved back behind their dining room table, in my case), so you can use 2/3 c. total cocoa powder instead of the combination of cocoa and black onyx, they just won't be as dark.

Preheat oven to 375 F. Line baking sheet with parchment paper or coat generously with nonstick cooking spray; set aside.

Whisk together flour, cocoas, soda and salt; set aside. In another bowl, cream butter and sugar until fluffy, about 5 minutes. Add egg and vanilla, beating until completely incorporated. Alternately add flour mixture and sour cream in about 3 additions, beginning and ending with flour. Continue mixing until just combined.

Scoop tablespoons of batter onto prepared sheet, spacing each batter blob two inches apart. Bake about 10 minutes or until cake springs back when lightly pressed.

Allow cakes to cool about five minutes on baking sheet before transferring to wire rack to cool completely. Spread flat side of half of cakes with cookie butter and sandwich with remaining cakes.

Source: Adapted from The Novice Chef

Thursday, May 17, 2012

Lime Zested Curd


Pin It!

I think I'm about over my fear of the dreaded curd. While I still think curd is kind of a gross word, this stuff is so good! I love how this stuff really enhances and delici-fies the tangy flavor of citrus fruit. 


The first thing you're gonna do, is cream the butter and sugar. Then beat in the eggs. I know it's a little nontraditional as far as curd-making goes, but trust me. This is by the far the easiest way to make sure your little eggies don't cook in nasty clumps when you start heating the mixture. Then you'll add the lime juice...and it's okay if it looks kind of curdled after you beat in the eggs---take a breath and don't worry so much!


Then you're gonna whisk the mixture continuously in your makeshift double boiler until it turns fabulously smooth. No straining required!


Stir in the zest and you have some of the best stuff on the planet just waiting for you to eat up! Need some ideas besides consuming curd by the spoonful? How about these tasty treats: 
  • Serve on scones
  • Sandwich a dollop between two butter cookies
  • Swap out buttercream for curd between cake layers
  • Swirl some into cheesecake
  • Save a cup for Coconut Lime Semifreddo (recipe coming soon, I promise!)


Lime Zested Curd [click to print]
Makes about 2 cups
  • 6 T. unsalted butter
  • 1/3 c. sugar
  • 2 eggs
  • 2 egg yolks
  • 1/2 c. lime juice
  • 1/8 tsp. salt
  • 1 T. lime zest
In medium size, heat proof mixing bowl, cream butter and sugar until light and fluffy. Add eggs and yolks, one at a time, incorporating well between each addition. Beat in lime juice, eggs and salt until well combined; don't worry if it looks kind of curdled right now, it will smooth out as it cooks.

Place bowl over simmering pot of water, but don't let the water touch the bottom of the bowl. Whisk mixture over low heat until the butter melts and the texture smooths out. Increase heat to medium, whisking constantly to prevent scorching. The mixture will begin to thicken and you may see a few slow, fat bubbles appearing; that's okay, but if there are a lot, it's boiling and you should immediately reduce heat. 

The curd is done when it coats the back of a spoon and your finger leaves a clear path when drawn through. Pour into clean bowl and press a piece of plastic wrap against surface of curd. Store in the refrigerator for 7-10 days or in the freezer for a couple months. 

Source: Adapted from One Perfect Bite

Tuesday, March 6, 2012

Homemade Hostess Cupcakes


Pin It!

I'd be lying if I told you I remember downing cellophane wrapped packages of Hostess cupcakes in my elementary school cafeteria. Or if I said I rummaged through our kitchen cabinets when my mom was at work to sneak a chocolatey treat. I mostly remember being fascinated by their delicate white swirls across the middle of a deep, smooth chocolate frosting staring at me from the aisles of the gas station mini market. 


But please don't doubt my credibility here! I have ever eaten these little guys. Every time I do, though, I wish for a little richer, less greasy cupcake with a bigger blob of fluffy white cream filling. Thanks to some great bakers and my crowd of ever ready taste testers, these homemade Hostess cupcakes fit the bill!


Hostess Cupcakes [click to print]
Makes about 1 dozen


For the Cupcakes:

  • 1/2 c. plus 2 T. flour
  • 1/3 c. cocoa powder
  • 1/2 tsp. baking powder
  • 1/4 tsp. baking soda
  • 1/8 tsp. salt
  • 2 eggs, large
  • 1/3 c. unsalted butter, softened
  • 1/2 c. plus 2 T. sugar
  • 2 T. buttermilk
  • 1 tsp. vanilla extract

For the Creamy Filling:

  • 1/2 c. milk
  • 2-1/2 T. flour
  • 1/2 c. shortening
  • 1/2 c. sugar
  • 1/4 tsp. salt
  • 1/2 tsp. vanilla
  • 2 c. powdered sugar

For the Ganache Frosting:

  • 1/3 c. heavy whipping cream
  • 1 T. unsalted butter, softened
  • 6 oz. dark chocolate, chips or chunked

Preheat oven to 350 F. Line cupcake tin with liners and set aside.


Whisk together flour, cocoa, powder, soda and salt; set aside. Combine butter and sugar in mixer bowl and cream until light and fluffy. Add eggs, one at a time, incorporating well between each addition. Add dry ingredients and continue mixing until mostly combined, then add buttermilk and vanilla. Mix on low speed an additional 30 seconds.

Scoop batter into cupcake liners, filling about 2/3 full. Bake at 350  F for 13-15 mminutes. Allow cupcakes to cool completely before filling.

In small saucepan, gradually blend milk into flour, whisking until there aren't any lumps. Cook on medium low heat, stirring constantly, until the mixture turns to a thick paste. Be careful, though, because it will seem like nothing's happening and then all of a sudden it's really thick and can burn easily. Allow mixture to cool to lukewarm.

Meanwhile, cream shortening, sugar and salt in mixer. Add warm paste and continue beating until light and fluffy. Add vanilla. Mix in powdered sugar in about three additions.

Scoop filling into pastry bag fitted with large tip. If you have a fancy cupcake filling tip, use that one, but I used a Wilton #12 tip and it worked just perfectly. Poke tip about 1/2" into top of cupcake and squeeze in a small amount of filling. You'll know you squeezed enough when you see the top of the cupcake rise a little bit. Remove tip and fill remaining cupcakes. If the filling oozes a little, just scrape it off.


To make the frosting, place chocolate in deep bowl and set aside. In small saucepan, heat cream and butter until simmering, but not boiling. Pour over chocolate and allow to sit about 5 minutes. Stir mixture until smooth and evenly combined. Dip the top of each cupcake in ganache and allow to set about 10 minutes in refrigerator. Repeat 1-2 times or until desired thickness is reached.

Change tip on pastry bag to a fine, plain point; I used Wilton #3. Pipe swirls across the top of each cupcake. Refrigerate about 10 minutes to set.


Source: Cupcakes and frosting adapted from Culinary in the Country; Filling from my Great Grandmother Mattie Foote

Thursday, September 15, 2011

Blueberry Filling and Lemon Zested Buttercream


Pin It!
I love comments and requests! So this one's for you, my dear "Anonymous" (Mom, is that you?).

By Christmas last year, I'd already been bit by the baking bug. Okay, fine. I was bit, stung and severely infected by that baking bug long before then, I guess I was just finally admitting it to myself. In any case, I got this great book that has some tricky recipes and techniques with several pages of easier, more basic baking staples at the end. And in case you forgot how much everyone loves the basic-fresh-blueberry filling-lemon-zested-buttercream-lemony-cake, just look at these guys, they're so happy!


You know you need these.

Fresh Blueberry Filling   [click to print]
1/4 c. sugar
1/8 tsp. salt
1/2 c. water
2 T. cornstarch
3 c. fresh or frozen blueberries (the original recipe says to chop the berries, but I left mine whole since they were just little guys)

Combine sugar, salt and water in a pot over low heat; stir until the sugar and salt are dissolved. Add cornstarch and blueberries, stirring continuously, and cook until thickened, about 10 minutes. Remove from heat and allow to cool. The mixture will get a little thicker as it cools.


Lemon Zested Buttercream   [click to print]
4 c. powdered sugar
1/2 c. butter, unsalted and softened
1/4 c. lemon juice
1/2 tsp. lemon extract
2-3 T. milk
1/4 c. lemon zest

Cream the sugar, butter, juice and extract. Slowly add milk, a tsp at a time, until you reach the desired consistency. (If you get it too thin, add a little extra powdered sugar.) Add lemon zest and mix until well combined.
Related Posts Plugin for WordPress, Blogger...