Saturday, December 31, 2011

New Year's Chocolate Confetti Cookies


Pin It!

New Year's 2012 is almost here! I'm planning our Happy New Year's event at my parents' house this year and just knew confetti had to be involved. I mean, really, how can you possible have a party without confetti? You can't. But I love eating a lot more than vacuuming, so I decided on these chocolate kissed confetti cookies! It combines so many delicious things...chocolate, hershey kisses, sprinkles. Bring it on 2012!


Chocolate Kiss Confetti Cookies [click to print]
Makes about 30 cookies

2/3 c. unsalted butter, softened
1/2 c. brown sugar
1 tsp. vanilla
1 egg
1-1/4 c. flour
1/4 c. cocoa powder
1/4 tsp. baking soda
1/4 tsp. salt
1 c. sprinkles (rainbow, chocolate or round confetti!)
30 Hershey Kisses, unwrapped

Whisk together flour, cocoa, soda and salt; set aside. Cream butter and sugar. Add vanilla and egg, mixing until combined. Add dry ingredients in about 3 additions. Continue mixing until well incorporated. Batter should be thick enough to roll into balls, if not, chill for an hour.


Line cookie sheet with parchment paper or coat with nonstick cooking spray. Shape dough into 1" balls and roll in sprinkles. Place dough on cookie sheet about 2" apart. Bake at 375 for 7-8 minutes.


When done baking, immediately press a kiss on the center of each cookie. Place on wire rack to cool.

Source: Adapted from The Curvy Carrot

Thursday, December 29, 2011

Golden Sparkle Cookies


Pin It!
I was sitting here, thinking about the coming new year and I kept thinking: Shiny! Glitter! Sparkles! It may have something to do with my bright red pj's with shiny gold stripes running through them, but mostly I think it's the fact that those things signify New Year's perfectly. Send out the old and ring in the new shiny somethings!


These golden sparkle cookies will shimmer and shine right along with your party shoes as you ring in the New Year! They are also great to dress up a dessert table at a wedding reception or other fancy event where sparkles are required.


Golden Sparkle Cookies [click to print]
Makes about 3-1/2 dozen cookies

2-3/4 c. flour
1 tsp. baking soda
1 tsp. nutmeg
1/2 tsp. salt
1/2 c. unsalted butter, softened
1 c. sugar
1 eggs
2 tsp. vanilla
1/2 c. sour cream
3/4 to 1 c. coarse gold sprinkles (I used about 3/4 of a 5.25 oz bottle of Wilton Gold Pearlized Sprinkles)

Whisk together flour, soda, nutmeg and salt; set aside. Cream butter and sugar together in large mixing bowl. Add eggs and vanilla; beat until well combined. Add sour cream and mix well. With mixer on low speed, add flour mixture in about 3 additions and continue beating until well combined. Cover and chill for 1 hour.

Line baking sheet with parchment paper or coat with nonstick cooking spray. Shape dough into 1" balls and roll in sprinkles. Place on baking sheet about 2" apart; lightly press the end of a glass on dough ball to flatten slightly.

Bake at 375 for 5-6 minutes; cookies will not look done, but this is how they'll stay nice and soft so resist the urge to bake longer! Leave cookies on the tray for about a minute, then remove to wire rack to cool.

Source: Adapted from Peppermint Plum

Tuesday, December 27, 2011

Gingerbread House Cookies


Pin It!
Every year near the holidays, my elementary school would host a gingerbread house decorating night in the cafeteria. My mom and all the PTO ladies would hand out baggies of royal icing and we'd set out our extensive array of colorful candies and get to work. My siblings and I were ambitious little artists/mess-makers so our graham cracker mansions were constructed with only royal icing for glue, none of that hot glue stuff that our friends Kate and Kelsey tried to pull! However, their house was always standing at the end of the evening and ours undoubtedly had a few collapsed roofs, fallen turrets and tears.

Hard at work, squeezing that bag!
The only sad thing about graham cracker houses is that they don't taste as good as real gingerbread and they get stale just sitting around on the mantel for weeks on end. I would much rather have something I can sink my teeth into, without the added sugar rush and expense of mountains of candy decorations.


So when I heard that my brother and his cute family were coming for a visit this Christmas, I just had to make these cookies for my nieces to decorate! They are quite the budding artists, after all. Not only do these cookies taste delicious, but they don't take too long to prepare and they are a great project for kids and (a little) less messy than your traditional graham cracker house. We put all the white icing in plastic squeeze bottles and it was much easier for little hands to manage. If we had another bottle we would have put the red in one, too, so plan ahead a little better than me!

This cookie artwork was eaten by Santa!
Store these cookies, undecorated or extravagant, in an airtight container and they'll stay nice and soft for several days...if they last that long!

And a little help from cousin Sarah!
Gingerbread House Cookies [click to print]
Makes about 4 dozen cookies

3/4 c. butter, softened
1 c. sugar
1 c. molasses
1/4 c. sour cream
1 egg
4 c. flour
1 tsp. salt
1-1/2 tsp. baking powder
1/2 tsp. baking soda
2 tsp. cinnamon
2 tsp. cloves
2 tsp. ginger
1 tsp. nutmeg

Whisk together dry ingredients and set aside. Cream together butter and sugar. Add molasses, sour cream and egg; beat until well blended. Gradually add dry ingredients in about 3 additions. Cover and chill at least 1 hour.


Roll out dough between two sheets of wax paper. Use a cookie cutter to cut out house shapes or create your own. I made mine out of a piece of wax paper and used a pizza cutter, smoothing out any cutter nicks with my finger. Line cookie sheet with parchment paper. Place cookies 2 inches apart. Bake at 350 for about 10 minutes. Allow to cool on wire racks.

Source: Adapted from Meet the Dubiens

Royal Icing [click to print]
2 egg whites, large
2 tsp. vanilla
1/2 tsp. brown food coloring
3 c. powdered sugar

Beat egg whites, vanilla and food coloring until frothy. Add powdered sugar and continue beating on low until smooth. The mixture should be kind of thick, but pipeable, at this point. Scoop about 1/3 of the icing into a squeeze bottle or piping bag and set aside. Add water to remaining icing, about 1/2 tsp. at a time, until it is flooding consistency. If you make it too thin, just mix in a little more powdered sugar. Pour icing in another squeeze bottle (a piping bag will be much trickier, but still possible, for this consistency) and set aside.


Using the thicker icing, outline each house shape and allow to harden about 10 minutes. Using the thinner icing, flood each shape to fill in the outlines and allow to harden a few hours. Be careful not to get any water on them as they harden or they'll have lighter colored spots.

Once the cookies are well set, let your decorators go to work!

Source: Adapted from Joy of Cooking

Saturday, December 24, 2011

Christmas Coal Candy


Pin It!
I grew up in the city, but close enough to Dutch country that threats of the Belsnickel still haunt me at Christmas. The Belsnickel dresses in fur, wears a mask with a long tongue and visits naughty children to scare and threaten them into behaving. (Check out Pennsylvania Dutch Night Before Christmas if you want the whole story!) But when those bad kids just refuse to be good, Santa Claus surprises them with a bag of coal instead of shiny new toys on Christmas morning.


But coal candy is for everyone! This traditional Spanish hard candy has a slightly crumbly texture when you crunch it. The traditional Spanish version is lemony, but I wanted something a little more Christmas-flavored, so I went with peppermint extract. This makes a great stocking stuffer or party favor!

Coal Candy (Dolce Carbon) [click to print]
1 egg white
1-1/2 c. powdered sugar, divided
2 tsp. black food coloring
1/2 tsp. peppermint extract
3 c. granulated sugar
1/4 c. water

In medium bowl, whisk together egg white, 1 c. powdered sugar, food coloring and extract. Gradually whisk in remaining 1/2 c. powdered sugar. The mixture should be thick and stiff and drop off the whisk in globby clumps. If it's too thin and runny, add more powdered sugar, a little at a time. Set aside.

Line 8x8 baking dish (about 2 inches deep) with parchment paper and set aside. Combine water and sugar in pot and stir together, mashing it until it's about the consistency of wet sand. Insert candy thermometer and heat until it reaches 258-260 degrees. Stir the whole time; the mixture will look kind of grainy and weird, so don't worry. When it's around 245-250, it may start browning, but that's okay. The mixture should stay grainy and not liquid.

At 258-260, remove from heat and add egg white mixture to pot and stir. (It might foam, so be careful!) When mixture is well mixed, pour into pan and allow to stand until hardened and cooled. Break into pieces; I used a hammer and screwdriver, it's definitely hard candy!

Source: Adapted from Sprinkle Bakes via Flagrante Delicia

Thursday, December 22, 2011

Chocolate Sugar Cookies


Pin It!
I enjoy a sugar cookie every now and then, but chocolate? Yummers! These cookies look great with a little bit of bright frosting to outline their shapes! If you take them out of the oven before they look completely done, they'll stay nice and soft, plus they have a rich chocolate flavor that you're gonna love!


Chocolate Sugar Cookies [click to print]
Makes about 2-1/2 dozen

2-1/4 c flour
1 c cocoa powder
1/4 tsp salt
1 c butter, unsalted
1-1/4 c. sugar
1 egg
1/4 c. sour cream
1 tsp vanilla

Whisk together flour, cocoa and salt; set aside. Combine butter and sugar in separate bowl and beat until just barely combined. With mixer on low speed, add egg, vanilla and sour cream. Scrape sides of bowl as needed.

Scoop dough onto large sheet of wax paper. Cover with another sheet of wax paper and roll out about 1/4" thick. Place entire thing on baking sheet and chill at least one hour.

Remove top sheet of wax paper. Press cookie cutters into dough to create desired shapes. If dough is too sticky (to cutters or bottom layer of wax paper), dust with a little cocoa powder. Place cutouts on cookie sheet, about 1/2" apart, and refrigerate 30 minutes; this will help cookies maintain sharper edges.

Bake at 350 for 8-10 minutes.

Source: Adapted from Sprinkle Bakes

Tuesday, December 20, 2011

Chocolate Peppermint Crunch Cookies


Pin It!
I used to not like chocolate. Gasp! I know I was weird, as my sweet siblings were always quick to point out. Over the years, though, my tastes have become more refined and I do enjoy a big mouthful of chocolate every now and then. Okay, fine. I enjoy chocolate just about all the time.

These cookies are on the sweeter side but they are nice and chewy with a crisp edge. Plus they really dress up a plate of cookies with their fancy candy cane flecks . So, here's to you, chocolate and peppermint, you dear winter flavor combination of joy!

Chocolate Peppermint Crunch Cookies [click to print]
Makes about 4 dozen


2 c flour
2 T cocoa powder
2 tsp baking powder
1/2 tsp salt
2 c sugar
1/4 c butter, melted
1/2 c chocolate chips, melted
4 eggs, large
2 tsp vanilla
6 candy canes, crushed

Whisk together flour, baking powder, salt and cocoa; set aside.

Combine sugar, butter and chocolate in large mixing bowl and beat on medium speed until combined. Add eggs, one at a time, incorporating between each addition. Add vanilla. Scrape sides of bowl as needed.

On low speed, add dry ingredients. Scrape sides of bowl once. Continue mixing until just incorporated, about 2 to 3 minutes. Cover with plastic wrap and refrigerate at least 2 hours.

Line cookie sheet with parchment paper and pour crushed candy canes into a small bowl. Using a small cookie scoop or large spoon, scoop dough in 1 to 1-1/2 inch balls. Roll in candy and place on cookie sheet about 2 inches apart.

Bake at 350 for 10 minutes.


Adapted from Two Peas and Their Pod

Tuesday, December 13, 2011

Baked Apples


Pin It!
During the fall, I become obsessed with everything apple, as you may have noticed. So when I saw some beautiful baked apples on Cherry Tea Cakes, I just knew I had to try them!


Baked Apples   [click to print]
Makes 4 baked apples

For the crust: 
1-1/4 c. flour
1 tsp. sugar
1/2 tsp. salt
1/4 tsp. nutmeg
1 stick (8 oz.) butter, unsalted and cold
1/4 c. water, ice cold

For the appley part: 
4 apples (I used honeycrisp)
1/2 c. brown sugar
2 tsp. cinnamon
1/2 tsp. nutmeg
1 tsp. cloves

Whisk together flour, sugar and salt in large bowl. Cube butter in 1/2" pieces and add to flour mixture. Using a pastry cutter, work butter into flour mixture until it forms crumbles about the size of peas. Slowly drizzle water over butter mixture. Use a rubber spatula to gather dough, working around the edges. When dough begins to clump together, use fingers to gently knead together a few times until it forms one mound. Place dough on plastic wrap and flatten to about 1/2". Wrap tightly and refrigerate until firm, about 30 minutes.

Core apples; if you don't have a corer, stab your vegetable peeler in a circle around the core and then push it out. Peel apples. Slice horizontally into 1/4" slabs. In a small bowl, whisk together sugar, cinnamon, nutmeg and cloves. Remove pie crust dough from refrigerator and separate into four balls. Roll each ball out between two pieces of plastic wrap to about 1/8" thickness. Chill about 10 minutes.

Sprinkle about 1/2 tsp. sugar mixture in center of dough. Set your first apple slice (bottom piece) on sugar and cover with 1/2 to 1 tsp. sugar mixture. Layer next slice on top and sprinkle with 1/2 to 1 tsp. sugar mixture; continue alternating apple slices and sugar mixture until your apple is reassembled on the dough. Sprinkle about 1/2 tsp. sugar on top of apple. Stuff center of apple with about 2 tsp. sugar mixture. Gently pull edges of dough to wrap entire apple. Trim off any excess dough.

Bake at 375 for 45-60 minutes.

Source: Adapted from Cherry Tea Cakes

Thursday, December 8, 2011

Praline Sauce


Pin It!
This stuff is amazingly easy and so delicious I had to make a special trip to the grocery store for ice cream so I could eat more than just a finger taste. So good.


Praline Sauce [click to print]
1 stick (4 oz) butter
1 c. light brown sugar
1-1/2 tsp. vanilla extract
pinch of nutmeg (less than 1/8 tsp)
1 c. pecans, coarsely chopped

Melt butter in saucepan over medium heat. Whisk in sugar, stirring continuously until melted and just boiling, about 5-7 minutes. Add vanilla, nutmeg and pecans. Stir until smooth.

Source: Adapted from Kevin and Amanda

Tuesday, December 6, 2011

Cheddar Apple Crostata


Pin It!

Okay, fine. This is the last apple recipe you'll get from me for the season. Probably. It's just that I love apples and they are the perfect blend of sweetness and fruit and crunch and freshness! Apples are the embodiment of Fall.


Cheddar Apple Crostata   [click to print]
For the Crust: Use your favorite pie crust recipe, or buy some, but just for the record, I think I'm in love with Smitten Kitchen's All Butter Pie Crust. It's really fast and easy to make and make a really good flaky crust. You'll need one disc of dough for this recipe.

Roll dough out between two pieces of plastic wrap to form a 13-14" circle, about 1/8" thick. Gently press 1/2 to 3/4c. shredded cheddar cheese around outer 1-1/2 to 2" of dough. Return to refrigerator to chill while you prepare filling.


For the Filling: 
2 tart apples, such as Granny Smith
2 sweet apples, such as Honeycrisp
1/2 c. sugar
2 T. flour
2 T. lemon juice
1/2 tsp. cinnamon
1/4 c. coarse cinnamon sugar (4 T. cinnamon, 1/2 tsp. cinnamon)
1/4 c. apricot preserves, warmed


Peel and slice apples to 1/4-1/2" thick wedges. Combine apples, sugar, flour, lemon juice and cinnamon in bowl. Stir until apples are evenly coated. Spread apple mixture over dough (and try to keep the juicy party of the filling about 1/4" from cheese to make the next step easier). Fold cheesy edges in to form a crust. Sprinkle with cinnamon sugar. Bake at 375 for about 25 minutes or until apples are tender and crust is golden brown. Allow to cool about 20 minutes; lightly brush apples with apricot preserves.


Source: Adapted from Martha Stewart

Saturday, December 3, 2011

Spiced and Sugared Walnuts (Crockpot or Otherwise)


Pin It!

I always thought that toasted and sugared nuts were something street vendors sold in the olden days, until one day. I was walking through the mall with one of my roomies, just doing some Christmas shopping, and she said, "I wish we could get some toasted nuts" and I just chuckled "Yeah" and she said "No, really. Don't you always get nuts from those little booth guys in the mall during the holidays?" and I said "What? I didn't think that was real." And another false belief was destroyed.

We never did find our toasted nuts. I've tried making them before, but I often forget things under the broiler and bad, smokey things happen when you do that. Here's a forgetful-friendly recipe for crockpot spiced and sugared walnuts, but you can do them in the oven, too, if you promise not to forget about those darling walnuts.


Spiced and Sugared Walnuts (Crockpot or Otherwise)   [click to print]
2 c. walnuts
1/2 c. brown sugar
1/4 c. (1/2 stick) butter
1/2 tsp. vanilla
1-1/2 tsp. cinnamon
1/8 tsp. cayenne pepper (optional)

Preheat crockpot about 15 minutes on high. Combine walnuts, sugar, butter and vanilla in crockpot. Stir until sugar is completely moistened and nuts are evenly coated. Cover and cook on high 15 minutes. Stir. Reduce heat to low and cook for 2 hours, stirring each hour. Spread nuts on wax paper. Whisk together spices and sift over nuts. Allow to cool to room temperature and enjoy!


Source: Adapted from About.com's Southern Food

Thursday, December 1, 2011

Cinnamon Banana Bread


Pin It!

Every year at Christmas, my family exchanges names. A few years ago, my sister in law, Breezi Queen of Scrapbooking and Blogger Extraordinaire, made this really cute cookbook for me. The entire book, including each and every page, is covered in plastic in an effort to protect itself from this above-averagely-messy baker. One of my all time favorite recipes from this book is "Betty's Banana Bread." I'm not sure exactly who Miss Betty is, but she's related somehow and made (makes?) awesome banana bread. Here's my version of this easy sweet bread!
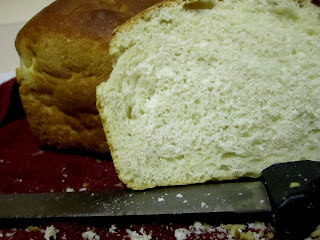

Cinnamon Banana Bread   [click to print]
1 c. sugar
1/3 c. butter, softened
2 eggs
3-4 bananas, really really ripe and black
1/3 c. water
1-1/2 tsp. vanilla extract
1-2/3 c. flour
1 tsp. baking soda
1/2 tsp. salt
1/4 tsp. baking powder
1 T. cinnamon

Mash bananas well. Whisk in water and vanilla. Set aside. In a separate bowl, whisk together flour, soda, salt, powder and cinnamon; set aside. Cream together sugar and butter until pale yellow and fluffy-ish. Add eggs one at a time, incorporating well between each addition. With mixer on low speed, add half of dry mixture, then all of banana mixture, then the rest of dry mixture; this should only take about a minute. Generously coat loaf pan with nonstick cooking spray. Pour batter in pan. Generously sprinkle cinnamon sugar over top of batter; this will give the bread a nice crisp crust. Bake at 350 for 55-60 minutes or until toothpick comes out clean.

Sugar Crusted Pumpkin Bread


Pin It!

For some reason, the winter season forces visions of sweet bread or quick bread or whatever you wanna call it to run through my mind way faster than any of those dancing little sugar plums. You think I'm kidding. But seriously, I think my mom originally started baking sweet bread at the holidays because it seemed like it would disappear more slowly than any of those darling Christmas cookies, but she was wrong. 


I started working on this recipe last year and couldn't get it quite right until I just now. This bread is so perfectly moist and has a bit stronger hit of ginger than most pumpkin bread and is so ridiculously delicious!

Sugar Crusted Pumpkin Bread [click to print]
Makes one loaf

For the topping: 
  • 1/4 c. flour
  • 1/4 c. brown sugar
  • 1/4 tsp. cinnamon
  • 2 T. butter, cold, cut into 1/4" cubes
For the bread: 
  • 1 c. (about half of a 15oz. can) pumpkin puree
  • 1/4 c. whole milk
  • 1 T. vanilla extract
  • 1-3/4 c. flour
  • 1 tsp. baking soda
  • 1/4 tsp. baking powder
  • 1/2 tsp. salt
  • 2 tsp. ground cinnamon
  • 1/2 tsp. ground ginger
  • 1/2 tsp. ground cloves
  • 3/4 c. sugar
  • 1/3 c. butter, softened
  • 2 eggs
1) Prepare topping by whisking together flour, sugar and cinnamon. Cut in cold butter until mixture forms crumbles about the size of peas. Set aside.

2) Preheat oven to 350 F. Line 9x4 loaf pan with parchment paper, allowing a few inches of overhang on either side, or generously coat with nonstick cooking spray and set aside.

3) Whisk together pumpkin, milk and vanilla; set aside. In separate bowl, whisk together flour, soda, powder, salt and spices; set aside.

4) In bowl of stand mixer, cream butter and sugar. Add eggs, one at a time, incorporating well between each addition. With mixer on low, alternately add flour and milk mixtures, beginning and ending with flour. Pour batter into prepared pan and top with streusel mixture.

5) Bake 50-55 minutes or until toothpick inserted in center comes out clean. Allow to cool in pan about 12 minutes, then lift parchment to remove bread from pan. Cool on wire rack and serve with fresh whipped cream!

Source: Sugar Rush Original!

Tuesday, November 29, 2011

Pumpkin Butter


Pin It!
For some people, memories attach themselves permanently to specific places, but for me, they are so often attached to the delicate aromas wafting through the air. If you have any cinnamon memories, this one is for you. Plus, it is quite possibly the easiest recipe of your life.


Crockpot Pumpkin Butter   [click to print]
1 large can (29 oz) pumpkin puree
1 T. vanilla
3/4 c. apple cider
1 c. brown sugar
1 T. cinnamon
1-1/2 tsp. allspice
1/2 tsp. nutmeg

Combine all ingredients in crockpot and stir until combined. Cook in crockpot on low for 5 to 6 hours. This is delicious served on a slice of homemade (or store-bought is fine, too)!


Source: Adapted from Skinny Taste

Friday, November 25, 2011

Baking a Difference: Hattie's Bakery


Pin It!
How could you possibly not fall in love with a bakery that celebrated it's one year anniversary with a humongous chocolate bar? I'm not sure it's possible. Which is one of the many reasons I'm falling in love with Hattie's Bakery!

Who was the inspiration for Hattie's Bakery? 
In 1961, when Hattie Larlham brought little Alice into her home, children with developmental disabilities were not expected to live long. As Hattie’s work improved the quality of life for these children, they lived longer and thrived. Our organization has grown along with these children. The mission of Hattie Larlham, the organization, is to provide comfort, joy and achievement to people with developmental disabilities and their families. As our children grew, fulfilling this meant finding ways for people with developmental disabilities to find meaningful employment and be a part of their communities. It was this need that inspired Hattie Larlham to open The Bakery at Hattie’s Café & Gifts as well as our other social enterprises.

When and where did you get started?
We officially opened on Sept. 21, 2010 at 209 South Main Street in Akron, Ohio. The Bakery just celebrated its first anniversary by creating and sharing Akron’s biggest chocolate bar with the community.

How does a bakery make a difference? 
Employees work with job coaches to develop essential job skills. The responsibilities of each employee vary based on the individual, but range from baking, general food preparation, decorating cakes and cookies, making beverages, working the cash register, assembling gift baskets and more. These jobs equip our employees with much more than traditional work skills; they gain self-confidence and often enhance their social skills. 

There was one employee who started out very shy, making beverages. Now, she is the assistant to the bakery manager. When the manager is out of the office, she can fill gift basket orders to exact specifications. She also trains other employees in making beverages. Her personal and professional growth has been so tremendous that she now feels independent enough to get her own apartment!

What keeps people coming back for more?
One of our standout items is a German chocolate cake with frosting made of real, melted German chocolate. In addition to baked goods, the bakery has a storefront that serves ice cream, fair trade coffee and lunches featuring salads, sandwiches, wraps and more. Our employees also produce all of our gift baskets that are sold across the country and can be purchased online.

Tuesday, November 22, 2011

Chocolate Covered Cherry Cobbler


Pin It!
I'll be going home tomorrow to spend some time with my family for Thanksgiving. It's gonna be a little different this year since the only kids at home now are me and my sister. We're used to having at least two other brothers hanging around to make some noise! The holidays always make me miss my family and feel very introspective, which can be a good thing. This time, it made me think of my dad and Jeffie, my baby brother who now towers over me by at least a foot, and their almost unquenchable love for everything chocolate covered cherry. This one's for you guys!


Chocolate Covered Cherry Cobbler   [click to print]
For the Filling: 
2 c. frozen cherries, thawed
3/4 c. sugar

Combine cherries and sugar in small bowl. Heat in microwave for 1-2 minutes to just warm. Set aside. 

For the Crust: 
1/3 c. butter or margarine
3/4 c. flour
1/4 c. cocoa powder
1 c. sugar
1 tsp. baking powder
1/4 tsp. salt
1/2 c. milk

Place butter in 10x10 baking dish and set in oven while it preheats to 375. Whisk together dry ingredients in bowl. Add milk and stir to combine. Pour over melted butter in baking dish. Spoon cherry mixture over batter. Bake for 30-35 minutes or until crust looks dry and browned.


Source: Adapted from my mom's memory of her basic college days' cobbler recipe

Monday, November 21, 2011

Saturday, November 19, 2011

Pumpkin Pear Crisp


Pin It!
It seems like time moves too quickly in the Fall. I thought the summer was just coming to an end and all the sudden I'm pulling on flannel pj's and eating Cream of Wheat for breakfast. That's so not a summer thing to do.

I guess it's time I move out of denial before winter comes. This recipe is most definitely Fall and was inspired by my mom and Mama, who have made apple crisp for centuries, I think, and my good friend Bon Appetit.

Pumpkin Pear Crisp   [click to print]
For the Compote: 
2 c. sugar pumpkin or butternut squash (about 1 small), peeled and cubed in 1/4" to 1/2" pieces
4 c. pears (about 5 small), peeled and cubed in 1/2" pieces
1/4 c. maple syrup
2 T. lemon juice
1 T. brown sugar
1 T. cinnamon
1/2 tsp. cloves
1 tsp. vanilla extract

Combine all ingredients in crockpot and stir well. Cook on high for 2 hours until pumpkin/squash is just tender. Spoon into six small ramekins or other oven safe dish(es).


For the Crispy part: 
1/2 c. oats
1/2 c. walnuts, chopped
1/4 c. brown sugar
1/4 c. flour
1/4 c. butter
1 tsp. cinnamon

Combine sugar, flour, butter and cinnamon in medium bowl. Using a pastry cutter, cut in butter until small crumbles form about the size of peas. Add oats and nuts. Sprinkle over ramekins. Place on middle rack of oven and broil 15-20 minutes until nuts/oats are browned and compote is bubbly.


Source: Adapted from Bon Appetit

Thursday, November 17, 2011

Pumpkin Gingersnap Parfaits


Pin It!
The other day at work, my friend Taci mentioned that she made this pumpkin mousse a while ago that she served with some sort of multi-course fancy dinner. As my mouth started watering, I asked her for the recipe, which she happily shared, and my mind started going and just wouldn't quit. Then I had a brilliant idea. Layers of pumpkin mousse, fresh whipped cream and gingersnaps...parfait, anyone? Mais, oui!

Parfait is french for perfect. Not a bad choice to describe that light dessert, the marriage between fluffy whipped cream, rich filling and crunchy topping. This dessert is perfect for a no-baking kind of day. Delicious, fragrant, (tastes) very light and simple. The dreamy descriptive words could go on and on.

Pumpkin Gingersnap Parfait   [click to print]
For the pumpkin mousse: 
1 can (15 oz.) pumpkin puree
1/2 c. cream cheese
1/2 c. sugar
2 tsp. cinnamon
1/4 tsp. nutmeg
1 tsp. allspice
1-1/2 tsp. vanilla extract

Combine all ingredients in medium mixing bowl and beat until well combined. Set aside.

For the whipping cream: 
1 c. heavy whipping cream
2 T. powdered sugar
1 tsp. vanilla extract

Combine all ingredients in mixing bowl and beat on high speed until cream is fluffy and forms stiff peaks. If it starts to look at all curdled or clumpy, stop! You're going to overmix and it turn your cream into butter!


To assemble:
2 c. crushed gingersnaps (about 3 dozen small cookies)

Divide half of pumpkin mixture into four cups. Spoon about half of gingersnaps over pumpkin. Cover with whipped cream, reserved about 1/4 cup. Spoon remaining gingersnaps over whipped cream. Divide remaining pumpkin between cups to create the top layer. Garnish with a sprinkle of gingersnaps, a dollop of whipped cream and a whole gingersnap cookie.

Source: Inspired by my friend Taci and The Gourmand Mom

Tuesday, November 15, 2011

Grape and Apple Pie for Two


Pin It!
Wait! Don't get wierded out by the grapes! I thought it was kind of strange, too, when I heard of grape pie, but this is actually good! Black grapes tint the pie filling a beautiful shade of purple and give tart apples a unique and subtle sweetness. Plus, there's more than a full serving of fruit per pie! It's pretty much healthy.


These mini pies are baked in two small ramekins and are just the perfect size to cuddle up with on a chilly fall morning! If there are a lot of cuddlers in your home, you may want to double or triple the filling recipe below to make more to share.


Grape and Apple Pie for Two   [click to print]
For the pie crust, I'm in love with Smitten Kitchen's All Butter Pie Crust. I thought that was the worst part of making a pie until I tried this recipe. Turns out homemade pie crust really is easy! But anyway, if you do use that recipe, you'll have a lot of extra dough. My recommendation is to scrunch up those scraps and turn them into Caramel Apple Pie Bites. Or if you're wishing for something a little different, try a Cranberry Pear Crostata or a bunch of Pie Crust Fries (recipes coming later this week, so get excited!)

For the Filling:
2-1/4 c. tart apples (such as Pink Lady or Gala), peeled and thinly sliced
2/3 c. seedless black grapes, halved
1/3 c. sugar

Combine ingredients in saucepan and heat over med-low heat until fruit is translucent, about 30 minutes, stirring occasionally to keep sugars from burning. Divide mixture into ramekins and set aside.


For the Crust:
Roll dough to about 1/8 inch thick. Cut circles about 1/2 inch wider than ramekins (so if your ramekins are 3" wide, cut dough 3-1/2" wide). Pierce the top of each dough circle a few times with a knife; these holes will allow steam to escape while they bake. Place dough circle on top of filled ramekin and gently press dough down over edges of ramekins to seal. Sprinkle with coarse sugar crystals if desired and bake at 350 for 25-30 minutes or until crust is golden brown.


Source: Adapted from Bon Appetit

Monday, November 14, 2011

Sweet Sixteen: Apples


Pin It!
These mouthwatering apple desserts make me wish Fall would hang around forever! Just take a look at these pictures and try not to run to the store for some ingredients!

Celebration Cake
Celebration Cake
[Better Homes and Gardens]
Caramel Apple Cheesecake Bars
[The Girl Who Ate Everything]
Individual Apple Charlottes Recipe
Individual Apple Charlottes
[Fine Cooking]
Apple Pie Pancakes
[Desserts for Breakfast]
Baked Apples with Granola
[Eat Better America]
Amish Apple Dumplings
[Midwest Living]
Cheddar Apple Hand Pies
[Desserts for Breakfast]
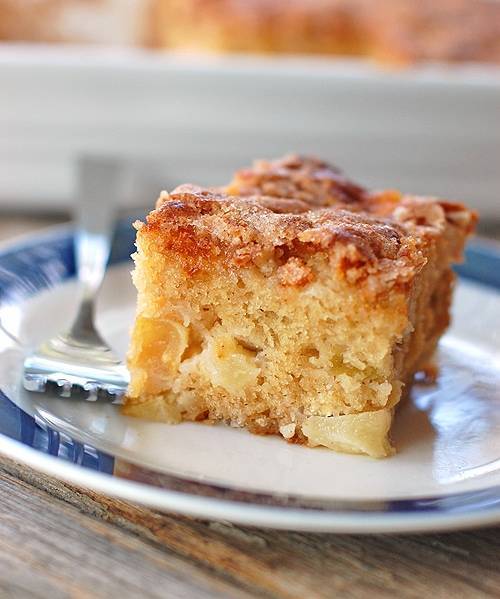
Post image for Cinnamon Sugar Apple Cake
Cinnamon Sugar Apple Cake
[Pinch of Yum]
Sticky Apple-Cinnamon Rolls
Sticky Apple Cinnamon Rolls
[Midwest Living]
Best Ever Individual Apple Crisp
[The Kitchen Prescription]
Caramel Apple Bread Pudding
[Our Best Bites]
img_8226-2.jpg
Russian Grandmother's Apple Pie Cake
[Brown Eyed Baker]
Apple Coconut Family Cake
[Project Domestication]
Apple Fritters
[The Baking Pixie]
Apple Cupcakes with Cinnamon-Marshmallow Frosting Recipe
Apple Cupcakes with Cinnamon Marshmallow Frosting
[Eating Well]
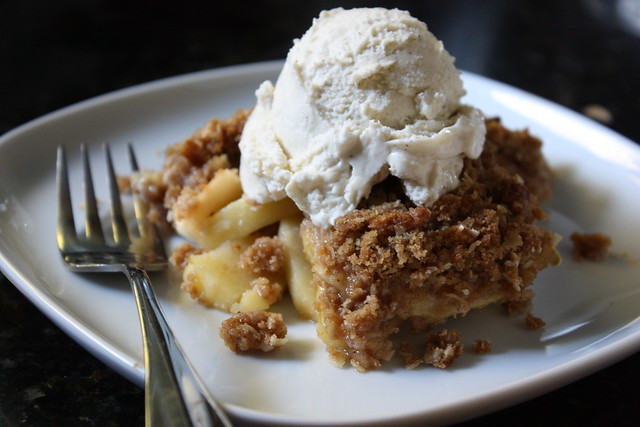
Apple Crisp
[Completely Delicious]
Related Posts Plugin for WordPress, Blogger...