Showing posts with label cookie. Show all posts

Saturday, March 9, 2013

Cranberry White Chocolate Chunk Pistachio Cookies


Pin It!

So I may or may not have gone to two or three separate cookie exchanges around Christmas last year...and these cookies just about knocked my socks off. Every single bite is packed with chewy flavor and bits of nut or berry or chocolate...so good!


And while the red and green mix-in combo looks especially gorgeous for the holidays, I've decided that these are year-round cookies. Also, I am now officially in love with pistachios.

Cranberry White Chocolate Chunk Pistachio Cookies [click to print]
  • 3/4 c. unsalted butter, softened
  • 3/4 c. brown sugar
  • 1/4 c. granulated sugar
  • 1 egg, large
  • 1-1/2 tsp. vanilla extract
  • 2 c. cake flour*
  • 1 tsp. baking soda
  • 1/2 tsp. salt
  • 1/2 c. pistachios, shelled (and salted is great, too!)
  • 1/2 c. white chocolate chunks
  • 1/2 c. dried cranberries
*Note: If you don't have cake flour on hand, substitute 2 c. all-purpose flour plus 2 tsp. cornstarch.

1) Line cookie sheet with parchment paper and set aside. 

2) Cream butter and sugars until well combined. Beat in egg and vanilla, scraping sides of bowl as needed. In separate bowl, whisk together flour, soda and salt; with mixer on low speed, gradually beat in flour mixture in about 2-3 additions. Stir in pistachios, chocolate and cranberries. 

3) Cover dough with plastic wrap and chill for at least 30 minutes or up to 3 days. 

4) Preheat oven to 350 F. Drop dough by heaping tablespoons onto prepared cookie sheet. Bake 9-10 minutes or until the edges are just golden brown. Allow cookies to set on pan about 1-2 minutes before transferring to a wire rack to cool completely.

Source: Adapted from my friend Jordan's recipe files!

Thursday, February 14, 2013

Cherry Vanilla Love Monsters (aka Whoopie Pies)


Pin It!


Let me just tell you one more time. I love holidays! Seriously, there might not be anything better than cutesy themed dessert and containers filled with festive sprinkles and sharing some goodies with friends! These Love Monsters don't take too long to bake or assemble and they're just so cute, who wouldn't wanna get bitten by the love bug today? Happy Valentine's Day!


Cherry Vanilla Love Monsters [click to print]
Makes about 36 whoopie pies

For the cake
  • 1/2 c. unsalted butter, softened
  • 1/2 c. granulated sugar
  • 1/2 c. brown sugar
  • 2 eggs, large
  • 1/2 c. milk
  • 1 tsp. vanilla extract
  • 2-1/4 c. flour
  • 1-1/2 tsp. baking powder
  • 1/2 tsp. salt
  • 1 tsp. baking soda
  • 1 pkg. candy eyes (I used Wilton Candy Eyes)
  • Sprinkles
For the filling
  • 1 c. unsalted butter, softened
  • 2 c. powdered sugar
  • 1 jar (7.5oz) marshmallow fluff
  • 1 c. cherry vanilla compote (or pie filling)
  • 2 tsp. vanilla extract
  • 1/4 tsp. salt
1) Preheat oven to 375 F. Line baking sheet with parchment paper or coat with nonstick cooking spray and set aside. 

2) In bowl of stand mixer, cream butter and sugars until creamy. Add eggs, one at a time, incorporating well between each addition. Beat in milk and vanilla. In separate bowl, whisk together flour, powder, salt and soda; gradually add to batter in about three additions. Beat until just combined. 

3) Scoop heaping teaspoons of batter onto prepared baking sheet, spacing about 2 inches apart. Add candy eyes to half of the cookies, placing eyes about 1/3 of the way towards the center of the cookie (otherwise the eyes melt when they bake). Bake one sheet of cookies at a time for about 10 minutes or until edges are just barely golden. Allow to cool on baking sheet about 5 minutes before removing to wire rack to cool completely. 

4) For the filling, beat butter and sugar until well combined and fluffy, about 3-4 minutes. Add fluff, vanilla and salt. Stir in pie filling, mixing until just combined. Spread filling on half the cookies and sandwich with the eyeball cookie halves. Fill small dish with sprinkles and roll edge of assembled whoopie pies in sprinkles to coat. 

Source: Adapted from Just Baked

Wednesday, November 21, 2012

Coconut Macaroons


Pin It!

We're gearing up for another round of The Biggest Loser at work. Last time we did it, I totally won! I've kept most of the weight off and even got in good enough shape to run a half marathon last fall! That was a great feeling. 

So maybe it's the wishful thought of running in the warm sunshine, slathered with a nice layer of Banana Boat, or craving whatever treat my dad says sounds kind of good, but I've had coconut on the brain! And these macaroons are surprisingly low in fat, although the sugar might get you if you indulge too many times. And the best part is, they really aren't that hard and they taste so good! Totally worth running that extra block.


Coconut Macaroons [click to print]
Makes about 2 dozen
  • 3 egg whites
  • 1-1/4 c. sugar
  • 14 oz. bag shredded coconut
  • 1 to 2 c. dark chocolate chips
1) Whisk together egg whites and sugar in heat proof bowl. Create a double boiler by placing bowl over pot with about an inch of boiling water. Whisk continuously until sugar dissolves. (Hint: Listen for the gritty, sandy sound to disappear and you're good to go!)

2) In large bowl, pour about half of egg white mixture over coconut. Stir well to completely distribute wet ingredients. Slowly add more egg white mixture, about a tablespoon or two at a time, until the coconut is wet enough to just hold together when scooped. You may not need all the egg whites, so stir well between each addition!

3) Pack mixture into cookie scoop or press firmly into ball about 2 T. in size. Place on cookie sheet, lined with parchment paper, and bake at 350 F for 10-15 minutes or until just barely golden. The cookies will be very fragile at this point. Carefully slide the entire sheet of parchment paper off the baking sheet and allow to cool completely.

4) In small bowl, microwave chocolate in 10 second intervals, stirring between each nuke. If the chocolate is still too thick after completely melted, add a teaspoon of butter or shortening and stir until incorporated. Dip macaroons into chocolate, wiping against edge of bowl to scrape off excess chocolate, and place on parchment paper to set.

Source: Adapated from L'Academie de Cuisine

Thursday, September 13, 2012

Big Fat Chocolate Chip Cookies


Pin It!

It started when I flipped through some old recipe cards and found one my friend gave me for her famous chocolate chip cookies my freshman year at BYU. Then I was surfing through recipes and blogs and came across 52 Kitchen Adventures' Chocolate Chip Cookie Challenge (deadline to contribute is tomorrow!). And then I was over at another friend's house whipping out a batch of choux pastry and she pulled out a giant Costco bag of chocolate chips and said I could have them, she didn't know what to do with that many chocolate chips.


Seriously? I got this.


I have dreamed for years about the biggest, fattest, chewiest with a hint of crisp crust around the edges, beautiful chocolate chip cookies for years. I know, I may have a problem.


Also, these make excellent ice cream sandwiches.

Big Fat Chewy Chocolate Chip Cookies [click to print]
makes about 16 cookies
  • 3/4 c. unsalted butter 
  • 2 c. plus 2 T. flour
  • 1/2 tsp. baking soda
  • 1/2 tsp. salt
  • 1 c. dark brown sugar, packed
  • 1/2 c. sugar
  • 1 egg, whole
  • 1 egg yolk
  • 2 tsp. vanilla extract
  • 1 c. mini semisweet chocolate chips
1) Preheat oven to 325 F and line cookie sheet with parchment paper or coat generously with nonstick cooking spray. 

2) Over medium low heat, melt butter and continue heating, stirring occasionally, until browned. It will start off really bubbly and loud and then quiet down. Pay close attention at this point and watch the butter; as soon as it turns a beautiful amber color and starts smelling like caramel, remove from heat. There will be little brown bits at the bottom of the pan and that's good, so stop worrying. 

3) Whisk together flour, soda and salt; set aside. Combine sugars and browned butter in mixing bowl and beat until well incorporated, about 1 to 2 minutes. Add egg, yolk and vanilla; continue beating until smooth again, about 30 seconds. 

4) Slowly add flour mixture and beat until just combined. Stir in chocolate chips. Chill at least 30 min. (Don't skip the chilling part like I did on the first pan, or you'll get flat cookies and that's no bueno.)

5) Scoop dough onto prepared pan and bake 15-20 minutes. Edges of cookies should be set and firm to touch while centers are puffy and soft still. Allow cookies to cool on pan about 10 minutes before removing to wire rack. 

Source: Adapted from America's Test Kitchen

Monday, May 7, 2012

Sweet Sixteen: Mom You Rock!


Pin It!
Mother's Day is just around the corner, and doesn't Mom deserve the best? If your Mom is anything like mine, she deserves a million cakes, a thousand brownies, a jillion scoops of homemade ice cream and a vat overflowing with cookie dough. (Although she'll probably only get one or two of those things for real...sorry, mom.) So in case you're looking for something to whip up for that special lady, take a look at this week's roundup!


(Left to Right, Top to Bottom)

Friday, April 27, 2012

S'more Bars


Pin It!


I was chattin it up with a friend last week about my sudden urge to buy a tent. And go camping. On the beach. And that, of course, reminded me how bad I'm pretty much always craving s'mores.


Unfortunately, I don't have a grill and I'm kind of scared of flaming gas stovetops. So my best option was to whip up a fat pan full of s'mores!


These bars have a nice thick layer of homemade graham cracker, smothered in a thick layer of marshmallow and coated with creamy ganache. The only thing they're missing is a little charcoal stuck in the mallows. But maybe that's not such a bad thing...


S'more Bars [click to print]
Makes about 25 squares


For graham cracker crust
  • 1-1/3 c. flour
  • 1/2 c. brown sugar
  • 1 tsp. baking soda
  • 1/2 tsp. salt
  • 1/2 tsp. cinnamon
  • 1/2 c. unsalted butter
  • 2 T. plus 2 tsp. honey
  • 2-1/2 T. whole milk
  • 1 T. vanilla extract
For marshmallow fluff
  • 2 egg whites
  • 1-1/3 c. light corn syrup
  • 2 tsp. vanilla extract
  • 1/2 tsp. salt
  • 1-1/3c. powdered sugar
For the chocolate layer
  • 2 c. milk chocolate chips
  • 1/2 c. heavy cream
Preheat oven to 350 F. Line 9x9 or 8x8 pan with parchment paper or generously coat with nonstick cooking spray and set aside.

Whisk together flour, sugar, soda, salt and cinnamon in bowl of stand mixer. Fit mixer with paddle attachment and beating on low speed, add butter. Continue beating until mixture looks like coarse meal.

In a separate bowl, whisk together honey, milk and vanilla. With mixer still on low speed, add to flour mixture and continue beating until just combined. Press dough evenly into bottom of pan.

Bake 20-25 minutes or until lightly browned. It should be a little firm to the touch. And it will smell amazing. Allow graham cracker crust to cool in pan on wire rack while you prepare marshmallow layer.

In large bowl, whisk egg whites until frothy. Add syrup, vanilla and salt. Beat with mixer on high speed until thickened (about 10 minutes). Reduce mixer to low speed and beat in powdered sugar. Add vanilla and mix until combined. Spread marshmallow fluff over graham layer. If you spray a spatula with cooking spray it's a little easier to spread.

Place chocolate chips in medium bowl and set aside. In a small saucepan, bring cream to a simmer over low heat. Pour hot cream over chocolate and allow to stand for 1-2 minutes. Stir or whisk mixture until chocolate is completely melted and texture is even. Pour over marshmallow layer and spread evenly. Allow to set in fridge until firm.

Source: Base adapted from Cherry Tea Cakes; Marshmallow adapted from 6 Bittersweets

Monday, April 16, 2012

Sweet Sixteen: Earth Day


Pin It!
Earth Day is one of those holidays that you usually forget about until you're surrounded by a bunch of over-excited elementary school children screaming and running and digging holes all over the place to plant new flowers. Oh, man. I loved 4th grade. This week's roundup of tasty treats is sure to please the kid in all of us!


(Left to Right, Top to Bottom)

Monday, February 20, 2012

Tuesday, February 7, 2012

Almond Swirl Sugar Cookies


Pin It!
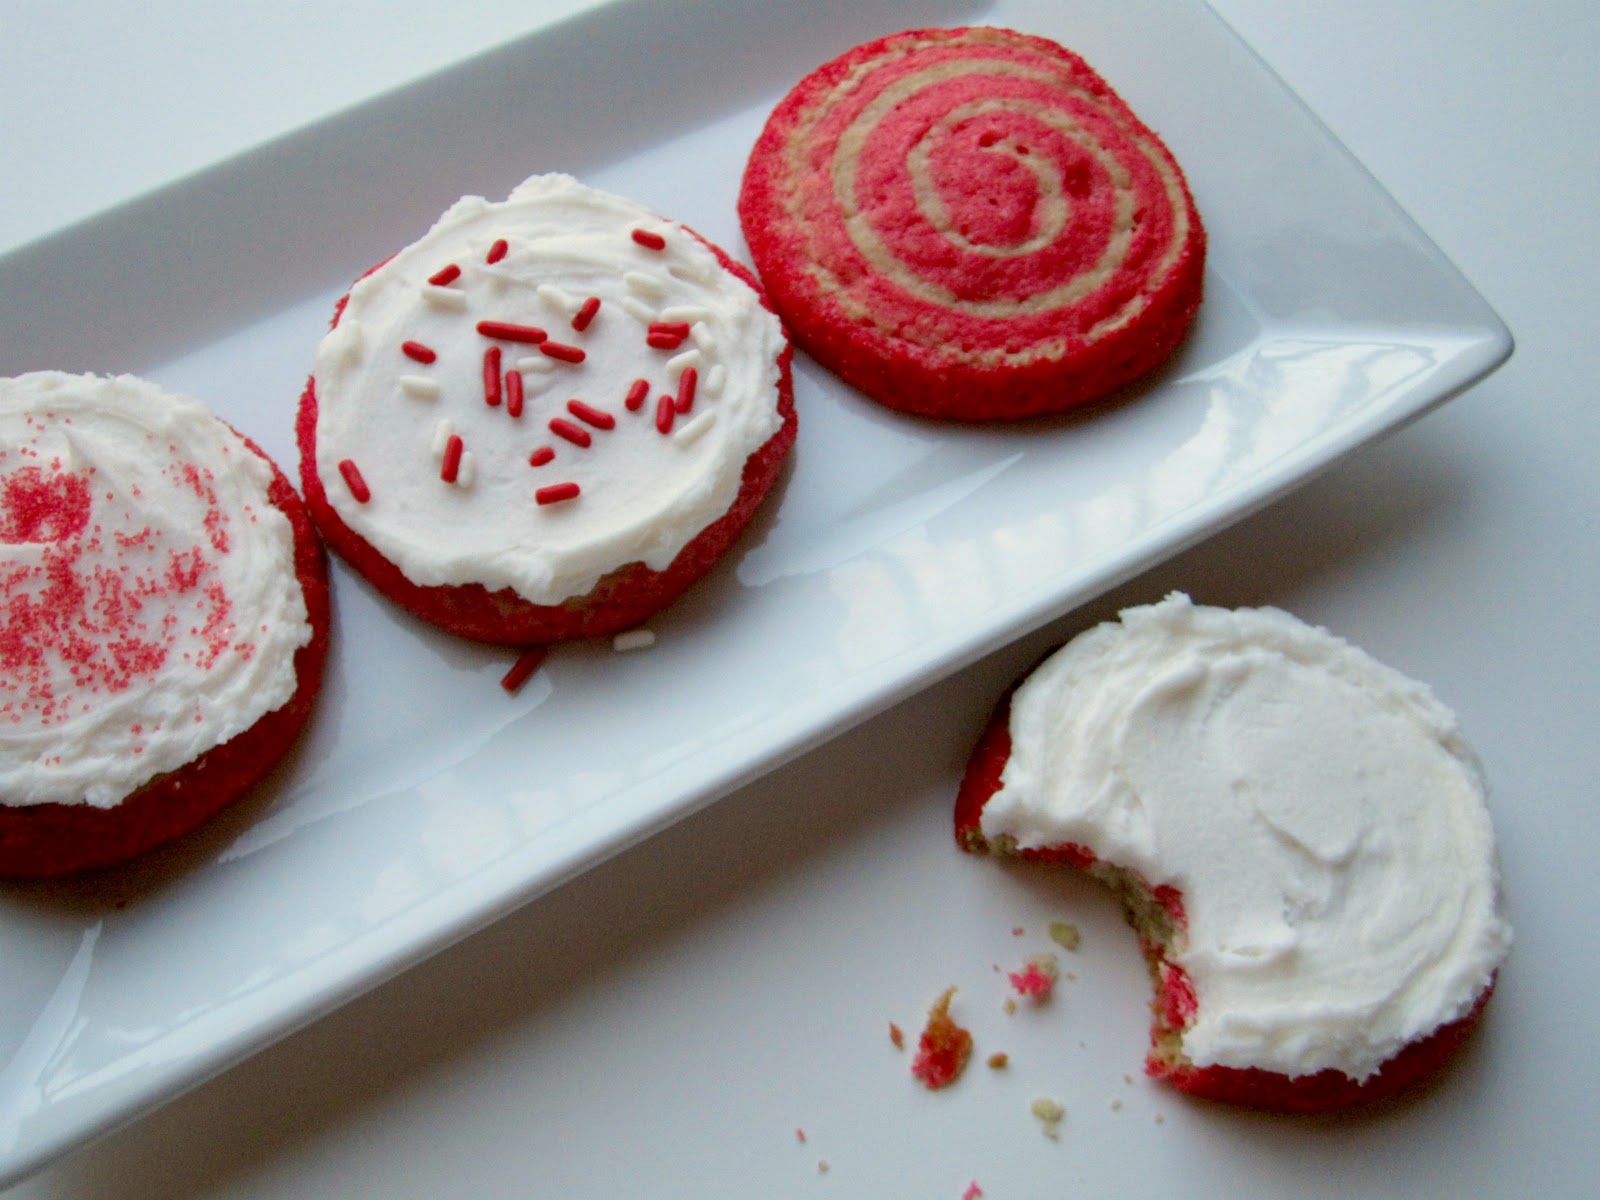
I admit it, I've eaten my fair share of those store bought sugar cookies. You know the kind. Perfect cookie circles taunting you with thick, rich frosting. I was always disappointed, though, by that cookie. Even though it's soft, it's also dry and crumbly. Not my favorite. 


The secret in this recipe is sour cream. It keeps these cookies nice and soft and moist. 
Just change up your choice of food coloring and sprinkles to make these cookies perfect for any holiday!


Almond Swirl Sugar Cookies [click to print]
Makes about 3 dozen cookies


2-3/4 c. flour
1 tsp. baking soda
1 tsp. nutmeg
1/2 tsp. salt
1/2 c. unsalted butter, softened
1 c. sugar
1 eggs
2 tsp. vanilla extract
1 tsp. almond extract
1/2 c. sour cream
10-15 drops red food coloring

Whisk together flour, soda, nutmeg and salt; set aside. Cream butter and sugar. Add eggs and vanilla. Add sour cream and extract. Add dry ingredients and mix until well combined. Scoop about half of dough into separate bowl and set aside. Add food coloring to remaining dough and mix well.

Press each half of dough onto a separate piece of parchment paper, flattening to a rectangle about 1/4 inch thick. Slide parchment and dough onto baking sheets and chill about 30 minutes.


Remove chilled dough slabs from refrigerator. Run a rolling pin over each slab to even out the surface. Peel parchment off red dough and stack directly on top of white dough. Use a pizza cutter or knife to trim edges to make even rectangle. Beginning at one end, tightly roll dough like a cinnamon roll. If there's an open space in the center, gently press and rock the dough back on forth on the counter until it seals as shown below.

Generously coat outside with red sugar sprinkles. Cover entire dough roll with plastic wrap and refrigerate about 30 minutes. Preheat oven to 375.


Remove dough from plastic wrap and slice cookies about 1/4 to 1/3 inch thick. Place on baking sheet lined with parchment paper about 2 inches apart. Bake at 375 for 6-8 minutes. They won't look done! They should still be pale but puffy in the center and look just a tiny bit wet still. Allow to cool about 5 minutes on baking sheet, then move to wire rack to complete cooling.

These cookies taste great with thick buttercream frosting!


Source: Adapted from Peppermint Plum

Tuesday, January 24, 2012

Heath Bar Blondies


Pin It!


My brother told me that the secret ingredients to every delicious recipe is lots of butter and lots of sugar. Well if that's true, and I'm pretty sure it is since my brother rarely lies about anything so important as dessert, then this recipe nailed it. And, yes, it's totally worth going for a run in the middle of winter just so you can indulge in these caramel scented heath bar blondies. Yummers!
 

Heath Bar Blondies [click to print]
Makes about 16-2x2" brownies


1/2 c. unsalted butter
1 c. brown sugar
1-1/4 c. flour
1-1/4 tsp. baking powder
1/2 tsp. salt
2 eggs
1 tsp. vanilla
1/2 c. walnuts, chopped
1/2 c. heath bar toffee bits

Line 8x8 pan with parchment paper or coat well with nonstick cooking spray. Preheat oven to 350.

First you're gonna brown that butter. And don't you dare use margarine or even think about skipping this step! Brown butter gives these blondies a tasty caramel flavor. So, put butter in saucepan and heat on low until it turns a light brown, caramel color. It will bubbly a lot and be noisy for a little bit, then watch carefully because butter can burn very quickly. Once it's browned, pour into mixing bowl and allow to cool about 10 minutes.


Whisk together flour, powder and salt; set aside. Add sugar and beat until combined. It will look kind of like wet sand at this point. Add vanilla. Add eggs, one at a time, incorporating well between each addition. Add flour mixture in two additions, mixing about 20 seconds between each addition.

Stir in nuts and heath bits. Pour into pan and bake 25-30 minutes.


Source: Adapted from my mom's Blonde Brownies

Thursday, January 19, 2012

Confetti Fortune Cookies


Pin It!

Traditionally, on Chinese New Year's Eve, families gather together to share an elaborate feast of fancy foods and delicacies. It's a time to forgive and forget, to move on and to wish happiness to everyone in the coming year through personally designed fortune cookies. Okay, so that last part might not be exactly true, but seriously. What better way could there possibly be to ring in The Year of the Dragon than with homemade Confetti Fortune Cookies? None, that's what. So get ready for some good fortune!


 Confetti Fortune Cookies [click to print]
Makes about 24 cookies


1 c. flour
1/4 tsp. cinnamon
1/8 tsp. salt
5 T. unsalted butter
3 T. heavy whipping cream
1 tsp. vanilla extract
4 egg whites
1 c. sugar
2 T. nonpareil sprinkles

Before you start baking, print or write your custom fortunes or resolutions on 3x1/2" paper strips. We did funny fortunes on one side, courtesy of Smosh, and space on the back for everyone to write their own resolution for the new year.


Whisk together flour, cinnamon and salt; set aside. Melt butter in small microwave-safe bowl; stir in cream and vanilla. Set aside to cool to room temperature. Combine egg whites and sugar in mixing bowl. Beat on medium speed about 1-2 minutes until smooth. On low speed, add flour mixture. Beat in butter mixture. Continue mixing until smooth. Stir in sprinkles.


Line baking sheet with parchment paper or generously coat with nonstick cooking spray. Drop heaping teaspoons of batter on baking sheet, spacing them about 4" apart. Use the back of a spoon to spread the batter into a circle about 3" wide, leaving at least 1" between cookies.


Bake at 400 for 4-6 minutes, or until the cookie looks dry and the edges are just barely turning golden. Working quickly, remove one cookie with a spatula and turn over onto a dry dishtowel. Place fortune in center, fold cookie in half and pinch at the top to form a loose semicircle.


With the cookie pinched, gently fold over the rim of a mug or muffin tin and pull the tips of the cookie together.


Place folded cookie in muffin tin to hold shape until firm. Repeat with remaining cookies.


Source: Adapted from Cooking With My Kid

Monday, January 9, 2012

Thursday, January 5, 2012

Snowball Cookies


Pin It!
It started flurrying yesterday and my sister immediately starting yelling "No! NO! I hate snow!" A few minutes later, it stopped. I guess the weather gods are liking her better than me right now, because I always love a good sledding hill or snowball fight! Oh, well. I'm sure more snow is on the way at some point.


 For now I'll just have to make do with these edible snowball cookies and a mug of hot chocolate! [Update 01/09/2012: I was invited to post these cookies on Sweet as Sugar Cookies! How fun!]


Snowball Cookies [click to print]
Makes about 30 cookies


1 c. unsalted butter, softened
1/2 c. sugar
1 tsp. vanilla extract
2-1/4 c. flour
1 c. pecans or walnuts, chopped
1/4 tsp. salt
1 c. powdered sugar (for rolling)

Cream butter and sugar until fluffy. Add vanilla. Whisk together flour, nuts and salt; mix until just combined.

Line baking sheet with parchment paper or coat with nonstick cooking spray. Scoop cookie dough by the tablespoon (or use my favorite OXO cookie scoop!) and roll into balls. Place on baking sheet about 1" apart. Bake at 350 for 15 minutes.

Allow cookies to cool on sheet until you can handle them with bare hands, about 10 minutes. Pour powdered sugar in a small bowl and gently roll cookies in powdered sugar. Place on wire rack until completely cooled. Roll in powdered sugar again. You can store them in an airtight container for up to 3 days or freeze for up to a month.


Source: Adapted from My Baking Addiction

Tuesday, December 20, 2011

Chocolate Peppermint Crunch Cookies


Pin It!
I used to not like chocolate. Gasp! I know I was weird, as my sweet siblings were always quick to point out. Over the years, though, my tastes have become more refined and I do enjoy a big mouthful of chocolate every now and then. Okay, fine. I enjoy chocolate just about all the time.

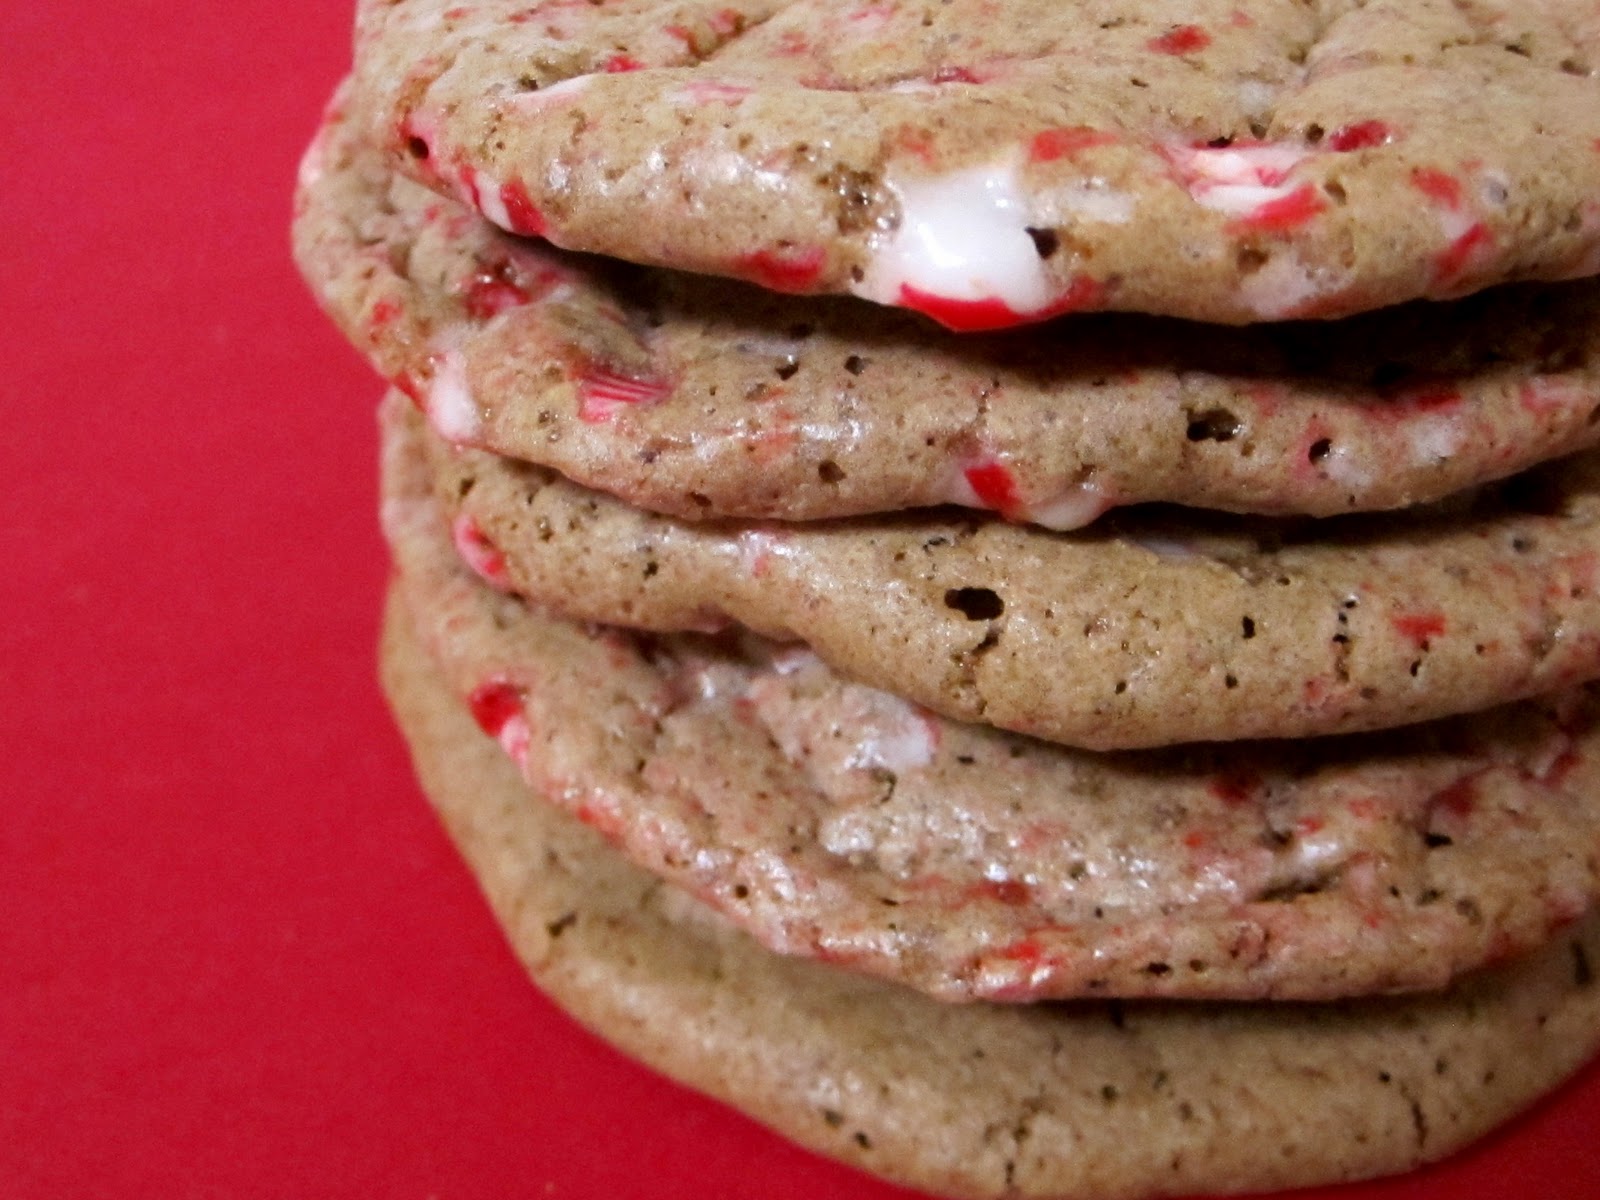
These cookies are on the sweeter side but they are nice and chewy with a crisp edge. Plus they really dress up a plate of cookies with their fancy candy cane flecks . So, here's to you, chocolate and peppermint, you dear winter flavor combination of joy!

Chocolate Peppermint Crunch Cookies [click to print]
Makes about 4 dozen


2 c flour
2 T cocoa powder
2 tsp baking powder
1/2 tsp salt
2 c sugar
1/4 c butter, melted
1/2 c chocolate chips, melted
4 eggs, large
2 tsp vanilla
6 candy canes, crushed

Whisk together flour, baking powder, salt and cocoa; set aside.

Combine sugar, butter and chocolate in large mixing bowl and beat on medium speed until combined. Add eggs, one at a time, incorporating between each addition. Add vanilla. Scrape sides of bowl as needed.

On low speed, add dry ingredients. Scrape sides of bowl once. Continue mixing until just incorporated, about 2 to 3 minutes. Cover with plastic wrap and refrigerate at least 2 hours.

Line cookie sheet with parchment paper and pour crushed candy canes into a small bowl. Using a small cookie scoop or large spoon, scoop dough in 1 to 1-1/2 inch balls. Roll in candy and place on cookie sheet about 2 inches apart.

Bake at 350 for 10 minutes.


Adapted from Two Peas and Their Pod

Wednesday, October 5, 2011

Creepy Crawly Cookies


Pin It!
I can't believe September is over already and we're already into the holiday season! And yes, Halloween most definitely counts as part of that. I'm so excited! I already know what I'm gonna be for Halloween, but I can't tell yet. Shh, it's a secret! 

But since I'm sure you're dying to know, here's a hint: I have a history of awesome. Two years ago, I was being eaten by a snake. Then last year, I was a Tornado. And that's my sister being a cute flower.


So while you wait with baited breath to find out how I will be cleverly disguised this year, get excited with some Halloween deliciousness!

I decided to start off this sugar-filled season with one of my all-time favorite treats. Gummie cookies. You may recognize them as no-bakes, but in my house they were always Gummie Cookies. My mom's gramma always made them and everyone called her "Gummie", hence the name. These aren't just any ordinary Gummie Cookies, though. These are creepy, crawly Halloween Gummie Cookies. Oh, yeah, these are spiders!


Before you make the cookies, you'll want to make the spider legs...you'll need a few packs of Pocky Sticks, found in the Asian/Ethnic section of the grocery store or online, and 1/2 bag of chocolate chips. Each box of pocky sticks makes about 6 spiders, each spider having 8 legs. Melt the chocolate chips in the microwave in 15 second intervals, stirring between nukes. Once the chocolate chips are melted, put them in a ziploc sandwich baggy and snip off a small corner. This is your glue. Cut pocky sticks diagonally in half and glue together with a dab of melted chocolate. Allow legs to harden.


Gummie Cookies   [click to print]

1/2 c. butter (or margarine)

1/2 tsp. vanilla

1/2 c. peanut butter
4 T. cocoa*
2 c. sugar
1/2 c. milk
3-1/2 c. oatmeal (quick)

Melt margarine. Add all but oatmeal. Stirring constantly, bring to a boil and boil for 1 minute. Stir in oatmeal. Drop on wax paper (or cookie sheet). *Note: If you prefer plain peanut butter gummie cookies, my personal fave, just leave out the cocoa powder!

While cookies are still warm and soft, insert 8 previously assembled appendages into each body and chill. Add eyeballs; you can use candy eyes or little dots of brightly colored frosting. Here I opted for the frosting peepers. Eat up before they crawl away!

Source: Inspired by Not Martha


Related Posts Plugin for WordPress, Blogger...