Saturday, August 3, 2013

Time to go...


Pin It!
I know, I haven't been posting as regularly as I should. But let's be honest. Sometimes you take on new projects and get busy with life and something's gotta change. And then there comes that day in every blogger's life, where they realize that their blog looks like, well, a blog. And it's time to move on. And so it is with me...


I have a real website! Woohoo! Scared you for a minute, didn't I? Check out my new digs over at Metro Gallery DC! Exclamation point, exclamation point, exclamation point!!!!!! And, even better than before, I'm expanding my horizons to include all the arts while remaining true to those most dear to my heart: The Pastry Arts. Hope to see you there!

Wednesday, May 29, 2013

A Bear Claw for Dad


Pin It!

BearClaw1
Happy Birthday, Dad! I miss you like crazy today. I wish the rest of the world would have a chance to meet you. I wish my future family would get to know you. I wish I had more time to build an even deeper relationship with you. But for now, I guess we'll get by on the sweet memories we made while you were with us. 
BearClaw2
Dad, you and Mom always encouraged me to be my best and do everything I ever wanted. For your love and support, I'll be forever grateful. My next few recipes are for you, Dad. Because, just like you, I find joy as I make things for the people I love, thinking about how happy it will make them. I can see you now, rubbing your hands together with excitement as I describe whatever I've got baking away, with you practically purring as you take the first bite. 
Bear Claw
So, Dad. I miss you and I love you and I can never forget you.
And Happy Birthday!

Wednesday, May 22, 2013

Ginger Carrot Cake


Pin It!

It's finally been feeling like spring and I'm loving it! The sunshine is beautiful, the trees are ultra green and gigantic full blooms are showing up all over the place. Now, if only I had a window to view all this during the workday...but maybe I wouldn't actually do much work if that were the case.


But window or not, I think you'd all agree that if the seasons were a cake, it would totally be packed with carrots. And some ginger. Because it's like a little surprise inside and adds a new dimension to that regular old carrot thing.


I used a vanilla German buttercream to frost this cake and it tasted delicious, although it is really flavorful and moist on its own. Please try it!

(And invite me over.)

Ginger Carrot Cake [click to print]
Makes one 9x13" cake or two 9" layers

For the cake
  • 1 c. unsalted butter, softened
  • 1-1/2 c. sugar
  • 4 eggs
  • 2 tsp. vanilla extract
  • 2-1/2 c. flour
  • 1 T. baking powder
  • 1 tsp. baking soda
  • 1 tsp. salt
  • 1 tsp. ground ginger
  • 1/4 tsp. white pepper
  • 2/3 c. whole milk
  • 4 c. carrots, shredded or pulsed in food processor to approx. same size
  • 1/2 c. crystallized ginger, finely chopped
For the buttercream
  • 2 c. whole milk
  • 1-1/4 c. granulated sugar
  • 1 T. cornstarch
  • 1/4 tsp. salt 
  • 2 eggs
  • 2 egg yolks
  • 2 tsp. vanilla bean paste (OR seeds from 2 bean pods)
  • 2 c. unsalted butter, softened
1) Preheat oven to 350 F. Line 9x13 pan with parchment paper or coat generously with nonstick cooking spray; set aside. 

2) In bowl of stand mixer, cream butter and sugar. Add eggs, one at a time, incorporating well between each addition. In medium bowl, whisk together flour, powder, soda, salt and ground ginger; set aside. Cream butter and sugar in mixing bowl. Add eggs and vanilla, continuing to mix until well incorporated. If your batter looks a little curdled at this point, it's okay, just keep going with the next steps!

3) In separate bowl, whisk together flour, powder, soda, salt, ground ginger and pepper. With mixer on low speed, alternately add flour mixture and milk to batter in about 3 additions, beginning and ending with flour mixture.

4) Stir in chopped ginger and carrots until evenly distributed. Pour batter in prepared pan and bake for 30-35 minutes or until top is golden and springs back when touched lightly. Allow to cool completely in pan.

5) Frost as desired and enjoy!

Source: Adapted from Sweetapolita

Thursday, May 2, 2013

Strawberry Lemon Roulade


Pin It!

I have two things to tell you. First, I totally ran out of flour. Like not even a teaspoon left in the bottom of my 5 gallon bucket. And second, I have an even better excuse for why I've been apparently slacking in my blog posting duties. But I can't tell you what that second excuse is yet because it's a surprise!


So, in the meantime, I hope you'll accept my humble apologies in the form of Lemon Berry Pavlova. If you've ever tasted such a thing before, you'll know this is more than acceptable. The mousse is flavored with sweet lemon curd and is so thick and creamy but feels so light and fluffy all at the same time. And the meringue base has a beautifully shiny shell and a bit of chewiness when you bite into it. So good.


P.S. If you need to apologize to me for any reason while lemons and berries are in season, feel free to bring this little guy on over!


Strawberry Lemon Roulade [click to print]
Makes one roll
  • 4 eggs, separated
  • 1/2 c. sugar
  • 1 tsp. vanilla extract
  • 3-1/2 oz. cake flour
For assembly
  • 1-1/2 to 2 c. lemon curd
  • 2 c. sliced strawberries
1) Preheat oven to 375 F and line jelly roll pan with parchment paper; set aside. 

2) In bowl of stand mixer, whip egg whites with a pinch of sugar. When whites begin holding soft peaks, gradually whip in sugar. Continue whipping until medium-stiff peaks form. In separate bowl, break up yolks with a fork and mix into whites with vanilla. 

3) Fold in flour mixture in about 3 additions. Pour batter into pan and spread evenly. Drag thumb around perimeter of baking sheet to create a small gap between batter and edge of pan. These last two steps will help prevent the edges from cooking too fast or from cooking unevenly. 

4) Bake 10-12 minutes. Surface of cake should appear dry and spring back when touched lightly. If edges start browning before it is done cooking, reduce temperature. Immediately remove cake, still attached to parchment paper, from pan and allow to cool completely on wire rack. 

4) When cool, remove parchment paper and evenly spread a thin layer of lemon curd across surface. Press berry slices into lemon curd. With the long edge of the cake in front of you, carefully roll the cake up. Tightly wrap rolled cake with plastic wrap. Store in refrigerator at least 1 hour or until ready to serve. 

Source: Roulade adapted from L'Academie de Cuisine

Tuesday, April 16, 2013

Apple Bread


Pin It!


Apples just might be the best fruit of my life. I know they're stereotypically a Fall fruit, but who am I to judge? There are a million different kinds and they're crisp and juicy and beautiful and they smell divine. Plus, they're always in the store and they always look good. So I always have tons on hand.


Really, it's not that I can't eat a 5lb bag of apples on my own, it's just that I occasionally need something a little more dessert-like. This apple bread is so moist and fragrant and packed with fresh fruit. And since it feels like Fall outside right now, despite the fact that it's actually April, I feel perfectly justified in making a loaf or two of warm sweet bread. Enjoy!

Apple Bread [click to print]
Makes one loaf
  • 1 large granny smith apple
  • 1 c. sugar
  • 1/3 c. unsalted butter, softened
  • 2 eggs
  • 1/3 c. water
  • 1 tsp. vanilla extract
  • 1-2/3 c. flour
  • 2 tsp. cinnamon
  • 1 tsp. baking soda
  • 1/2 tsp. salt
  • 1/4 tsp. baking powder
1) Preheat oven to 350 F. Line loaf pan with parchment paper or coat generously with nonstick cooking spray and set aside.

2) Use cheese grater to shred apple, with or without skin. You should have about 1 cup.

3) Combine sugar, butter and eggs in mixing bowl and mix well. Beat in shredded apple, water and vanilla. Whisk together flour, cinnamon, soda, salt and powder; add to apple mixture, stirring until just combined.

4) Pour batter into prepared pan and bake 50-60 minutes or until the top is browned and springs back when lightly touched. Allow to cool in pan about 5 minutes, then remove to wire rack to cool completely.

5) To serve, spoon 1 to 2 teaspoons of caramel sauce into depression in center of warm mini bundts (or drizzle over top of cupcakes) and enjoy!

Source: Adapted from Aunt Betty

Tuesday, April 9, 2013

Banana Bread Truffles


Pin It!

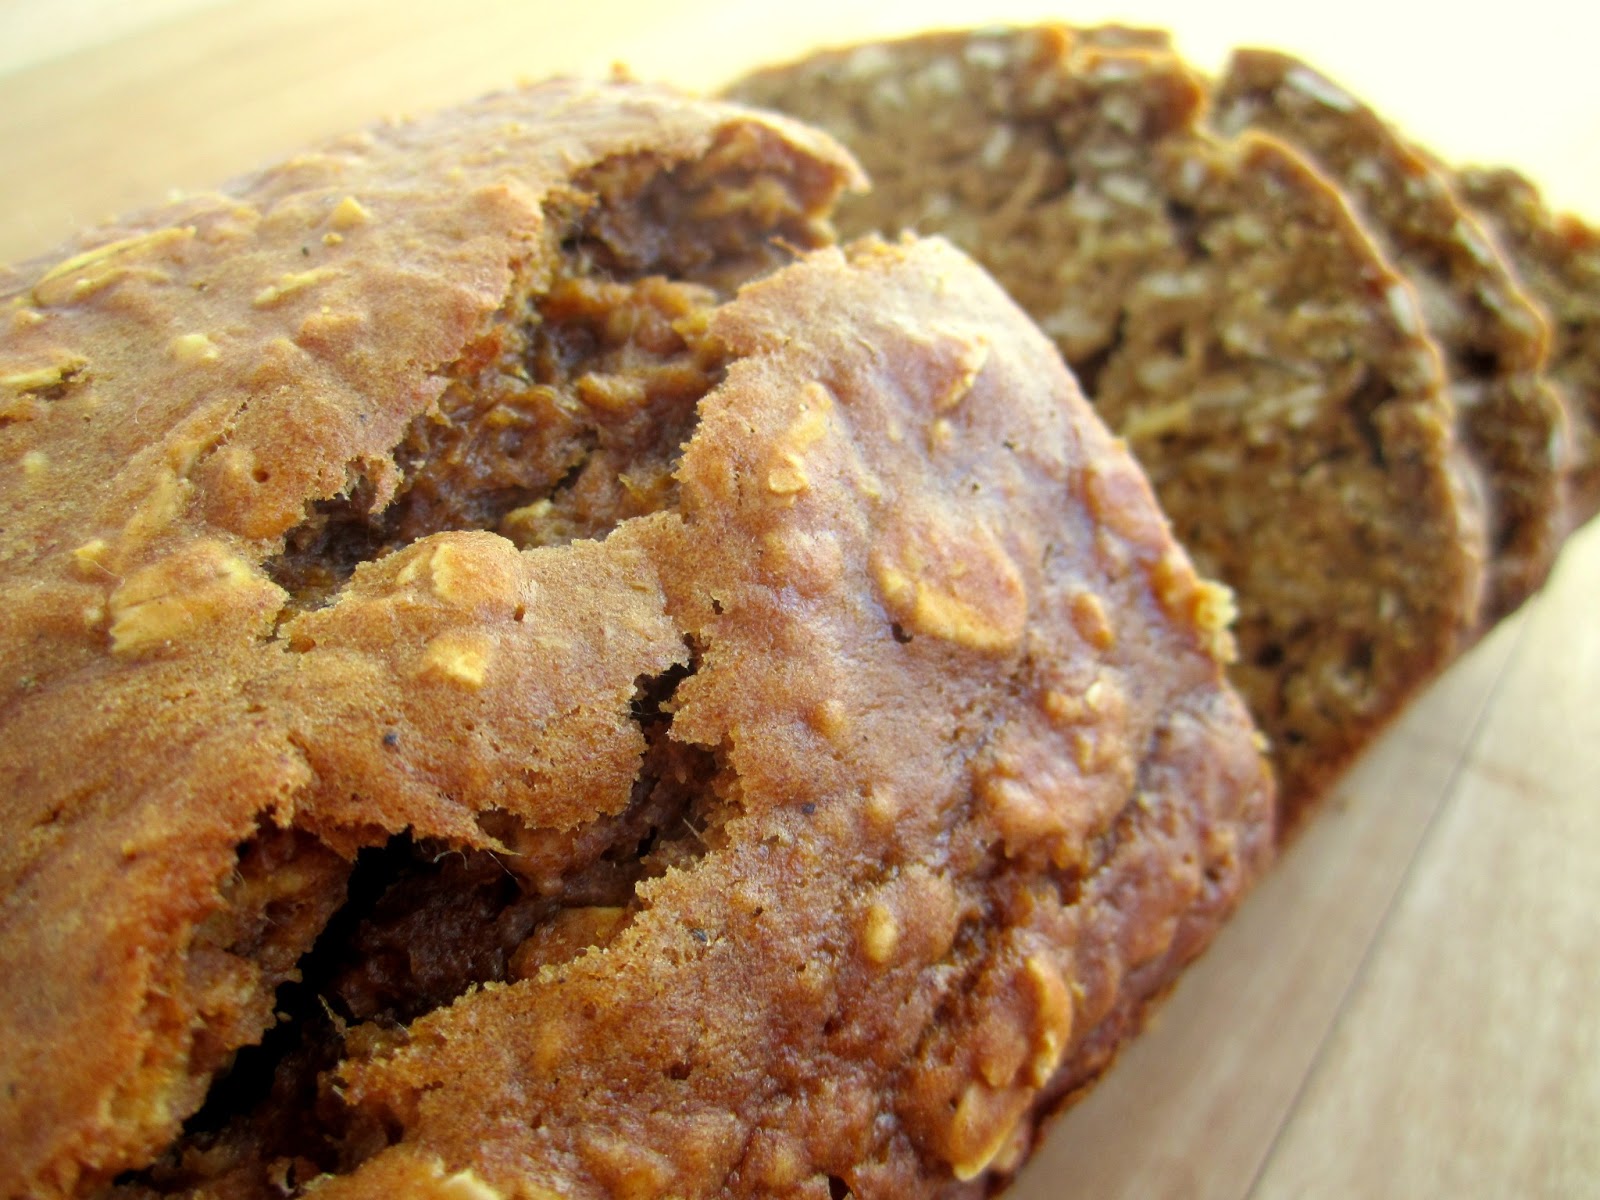
Sometimes I buy too many bananas. And sometimes I forget about them and then realize they're all brown and spotty and have to bake up something tasty. My mom told me the other day that I should move beyond the dark chocolate and try some new ideas...I may or may not have a slight dark-chocolate-addiction at the moment. And sometimes I also have very limited self-control


So bite-size truffles seemed like the perfect dessert! I can eat a few and, hopefully, share most of them! And you're gonna love the banana filling--it's pretty much an extremely moist banana bread combined with a brown butter (anyone else going weak at the knees?) glaze and smothered in dark chocolate and topped with toasted walnuts. Seriously delicious.

Banana Bread Truffles [click to print]
Makes about 5 dozen

  • 1 c. sugar
  • 1/3 c. unsalted butter, softened
  • 2 eggs
  • 3-4 bananas, mashed (about 1 c.)
  • 1/3 c. water
  • 1-1/2 tsp. vanilla extract
  • 1-2/3 c. flour
  • 1 tsp. cinnamon
  • 1 tsp. baking soda
  • 1/2 tsp. salt
  • 1/4 tsp. baking powder
For brown butter glaze
  • 1/4 c. browned butter
  • 1-1/2 c. powdered sugar
  • 3 T. milk or water
For dipping
  • 2 pkgs. (12 oz) dark chocolate chips
  • 1/2 c. walnuts, chopped and toasted
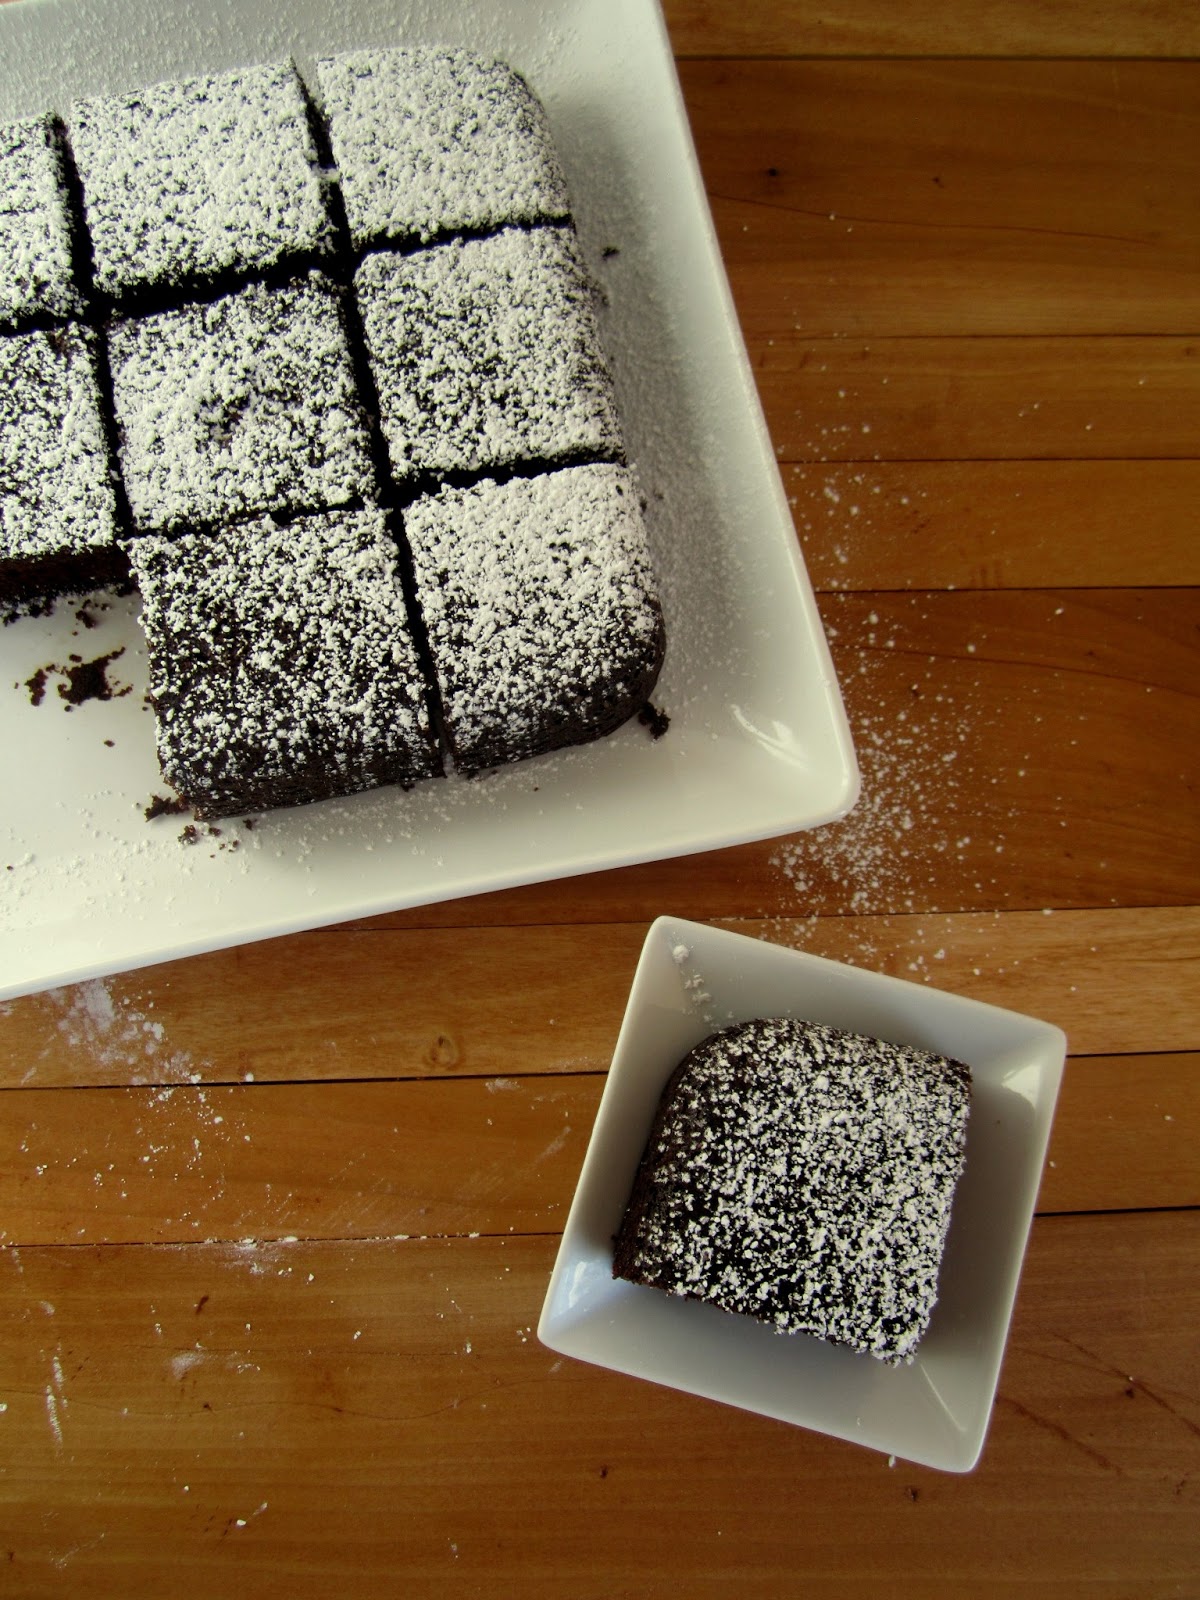
1) Preheat oven to 350 F. Line 8x8 baking dish with parchment paper or coat generously with nonstick -cooking spray; set aside. 

2) In bowl of stand mixer, cream sugar and butter. Add eggs, one at a time, incorporating well between each addition. Stir in bananas, water and vanilla. 

3) In separate bowl, whisk together flour, cinnamon, soda, salt and powder. With mixer on low speed, gradually add to banana mixture in about 3 additions. Pour batter in prepared dish and bake 30-40 minutes or until top springs back. Allow to cool completely in pan. 

4) For glaze, heat butter in small saucepan over medium heat until it turns a golden brown color. Remove from heat and allow to cool to room temperature. Stir butter and milk/water into powdered sugar until well combined and no lumps of powdered sugar remain. 

5) When bread is completely cool, crumble with a fork or your fingers into pea size crumbs. Pour glaze over crumbs and stir until evenly moistened. Using a cookie scoop or spoon, scoop 2 or 3 teaspoons of truffle filling at a time onto lined cookie sheet. 

6) In deep bowl, melt chocolate at 30 second intervals in the microwave, stirring well between each nuke. Using a fork, dip each filling in melted chocolate, gently tapping fork on edge of bowl to get off excess chocolate. Place on cookie sheet, top with a sprinkle of chopped nuts and allow to set. Note: If your filling doesn't hold together very well while dipping, chill in freezer about 15 minutes before dipping. 

Source: Inspired by Vanilla Kitchen

Thursday, April 4, 2013

Chewy Cookie Butter Granola


Pin It!


Sometimes failure turns into a beautiful thing.

I mean, take the 80s, for instance. Mismatched earrings, stirrup pants, gigantic bangs...there are a few things that I am definitely not sad to see go. But on the other hand, I find myself owning and wearing an increasing amount of neon that just doesn't get old! It's like I'm walking around in multicolored bits of sunshine!


Which leads perfectly into my next comment. The sun is shining and it should feel like spring out there! But instead it's freezing cold and I'm a little sad. So, I decided to attempt (yet again) a batch of chewy granola bars...which turned into a complete and utter fail since they didn't seem to have any desire to remain in anything slightly resembling a bar shape.

So, I gave my crumbles a few tweaks and voila! Chewy granola! This stuff is a perfect ice cream topper, yogurt mix-in or whatever...just eat some!

Chewy Cookie Butter Granola [click to print]
  • 1/4 c. butter, melted
  • 1/4 c. agave nectar
  • 1/4 c. brown sugar
  • 1/2 c. Speculoos Cookie Butter
  • 1/2 tsp. vanilla extract
  • 1/8 tsp. salt
  • 2 c. quick oats (not rolled)
  • 1 c. unsweetened puffed rice cereal
  • 3/4 c. cinnamon chips
1) For thicker bars, line 8" square pan with parchment paper or 9" square pan for thinner bars. In large bowl, combine oats and cereal; set aside. 

2) In saucepan, stir together butter, agave and sugar, stirring over low heat until sugar dissolves. Increase heat to medium-high until mixture begins bubbling. Reduce to low heat and allow to cook 2 minutes. Remove from heat and stir in cookie butter, vanilla and salt. Pour cookie butter mixture over dry ingredients and stir immediately to evenly coat, making sure there aren't any dry pieces.

4) In separate bowl, melt 1/2 c.cinnamon chips in 30 second intervals, stirring well between each nuke, until smooth. Stir into oatmeal mixture. Spread mixture onto prepared pan and sprinkle remaining cinnamon chips over mixture. Refrigerate until firm.

Source: Adapted from Bakerita

Saturday, March 30, 2013

Peep S'mores


Pin It!

It seems like the holidays come earlier and earlier every year, which is kind of depressing when the stores are rushing me through life! I kind of prefer a leisurely pace. But I would never hold it against our dear retailers for rushing to get those brightly colored Easter Peeps on the shelves!


I know, some of you are rolling your eyes and wondering how in the world I could love something that is basically an animal-shaped piece of sugar coated in neon sugar with eyeballs. I ask you, how could you not?! But if you're going to hold onto your Peep-hatred, just think of the children! Would it really be Easter for them without a small overdose of sugary goodness? I think not.

Happy Easter!

Peep S'mores [click to print]
Makes 6-7 individual servings

  • 1 pkg mini graham cracker crusts (I used Keebler Ready Crust Minis)
  • 1 brownie recipe (the kind for an 8" or 9" pan)
  • 12-14 mini Hershey bars
  • 6-7 Peeps
1) Prepare brownie batter and preheat oven as instructed in recipe or on box/pouch. Scoop about 3 Tablespoons of batter into each crust and bake for 18-22 minutes. Note, time will vary based on recipe used, so stick a toothpick in the center to check doneness and when it comes out clean, you're good!

2) Lay two mini chocolate bars across top of mini brownie and allow chocolate to melt. If the brownies are too cool to melt the chocolate, place them in a warm oven for 2 or 3 minutes until the chocolate is shiny and soft. 

3) Top chocolate with a Peep and serve warm! Or cold, they're still fudgy and rich and delicious the next day...if they last that long! 

Tuesday, March 26, 2013

Chocolate Yogurt Cake


Pin It!

I made this cake for the first time a while ago, but it somehow disappeared before I ever got a chance to take pictures. Hm. I guess that just goes to show that it really is perfect for snacking.


This cake has a beautiful dark chocolate color and is very moist, thanks to the yogurt, and, on top of that, it's really fast and easy to make!

Chocolate Yogurt Cake [click to print]
Makes one 8" square cake
  • 6 T. unsalted butter, softened
  • 1/3 c. granulated sugar
  • 1/3 c. dark brown sugar
  • 1 egg
  • 2/3 c. vanilla yogurt
  • 1 tsp. vanilla extract
  • 3/4 c. plus 2 T. flour
  • 1/4 c. plus 2 T. cocoa powder
  • 3/4 tsp. baking soda
  • 1/8 tsp. salt
1) Preheat oven to 350 F. Line bottom of 8" square baking pan with parchment paper or coat generously with nonstick cooking spray; set aside. 

2) In bowl of stand mixer, combine butter and sugars. Cream until well combined. Add egg and vanilla; mix until completely incorporated. Stir in yogurt and milk. 

3) In separate bowl, whisk together flour, cocoa and salt. Gradually add to batter in about 3 additions, mixing until just blended. Pour batter into prepared pan and bake 20-25 minutes or until cake pulls away from sides of pan just slight and top of cake springs back when lightly touched.

4) Allow cake to cool about 10 minutes in pan before removing to serving dish. Dust with powdered sugar and serve warm. (P.S. This is still good cold, but who doesn't love warm cake?!)

Tuesday, March 19, 2013

Choco-nana Crunch Bread


Pin It!

I'll be honest. I was a little skeptical about the success-ability of another version of the old banana bread. But with spotty bananas, a new bag of granola and a hankering for chocolate, what else was I supposed to do? I obviously had no choice.


With dark chocolate morsels and clusters of crunchy granola packed into every bite, this stuff is like a dream. The banana flavor isn't really strong, so don't worry about being overwhelmed by fruitiness. And even more good news, even after a couple days this bread is still awesomely moist.

Choco-Nana Crunch Bread [click to print]
Makes one loaf
  • 1/2 c. applesauce
  • 1 c. sugar
  • 2 eggs
  • 2-1/2 c. flour
  • 1/4 c. plus 2 T. cocoa powder
  • 1-1/2 tsp. baking powder
  • 1 tsp. baking soda
  • 1/2 tsp. salt
  • 3 medium bananas, mashed (about 1 c.)
  • 1 c. whole milk
  • 2 tsp. vanilla extract
  • 1 c. granola (I used some Open Nature Dark Chocolate Hazelnut Heaven)
  • 1/2 c. dark chocolate chips
1) Preheat oven to 350 F. Generously coat 9x5 loaf pan with nonstick cooking spray and set aside. 

2) In bowl of stand mixer, beat applesauce, sugar and eggs until smooth. In separate bowl, whisk together flour, cocoa, powder, soda and salt. In another bowl, whisk together bananas, milk and vanilla. Beat in half of flour mixture, then all of banana mixture, then remaining flour mixture, stirring until well combined. Stir in granola and chocolate chips.

3) Pour batter into prepared pan and bake 60-75 minutes or until top springs back lightly when touched. Cool about 10 minutes in pan before removing to wire rack to cool completely. 

Tuesday, March 12, 2013

Sour Cream Peppermint Petits Fours


Pin It!

I somehow survived DC's Snowquester last week and made the treacherous journey to and from work. I know, you're impressed. But instead of getting all cozy and sipping hot chocolate once I finally got home, I grabbed a few sticks of butter and got baking.


When it's cold and slushy outside, something about peppermint just warms me up from the inside out! These cute little petits fours are the perfect size for an individual serving. Nothing looks more elegant than a mini bundt dusted with a light coating of powdered sugar. But what? Your mom didn't give you this cute little pan from Nordicware? You can bake these as cupcakes, too, they just won't look as fancy.

Sour Cream Peppermint Petits Fours [click to print]
Makes 16 mini bundts or regular cupcakes (I used the Nordicware Mini Bundt pan)
  • 1/2 c. unsalted butter, softened
  • 1 c. sugar
  • 1/4 c. sour cream
  • 2 eggs, large
  • 1 tsp. vanilla extract
  • 1 tsp. peppermint extract
  • 1-1/4 c. flour
  • 1/4 tsp. baking soda
  • 1 tsp. baking powder
  • 1/4 tsp. salt
1) Preheat oven to 350 F. Generously coat mini bundt pan with nonstick cooking spray---use the kind with flour! Seriously, I can't tell you how big of a difference this makes.

2) Combine butter and sugar in mixing bowl and beat until well combined. Add sour cream, eggs, vanilla and peppermint extracts and mix well. In separate bowl, whisk together remaining ingredients and stir into batter until just combined.

3) Spoon batter into prepared pan and bake for 12-15 minutes or until top is slightly golden and springs back when touched lightly. Allow to cool completely. Dust with powdered sugar to serve.

Source: Adapted from The Sweet Art

Saturday, March 9, 2013

Cranberry White Chocolate Chunk Pistachio Cookies


Pin It!

So I may or may not have gone to two or three separate cookie exchanges around Christmas last year...and these cookies just about knocked my socks off. Every single bite is packed with chewy flavor and bits of nut or berry or chocolate...so good!


And while the red and green mix-in combo looks especially gorgeous for the holidays, I've decided that these are year-round cookies. Also, I am now officially in love with pistachios.

Cranberry White Chocolate Chunk Pistachio Cookies [click to print]
  • 3/4 c. unsalted butter, softened
  • 3/4 c. brown sugar
  • 1/4 c. granulated sugar
  • 1 egg, large
  • 1-1/2 tsp. vanilla extract
  • 2 c. cake flour*
  • 1 tsp. baking soda
  • 1/2 tsp. salt
  • 1/2 c. pistachios, shelled (and salted is great, too!)
  • 1/2 c. white chocolate chunks
  • 1/2 c. dried cranberries
*Note: If you don't have cake flour on hand, substitute 2 c. all-purpose flour plus 2 tsp. cornstarch.

1) Line cookie sheet with parchment paper and set aside. 

2) Cream butter and sugars until well combined. Beat in egg and vanilla, scraping sides of bowl as needed. In separate bowl, whisk together flour, soda and salt; with mixer on low speed, gradually beat in flour mixture in about 2-3 additions. Stir in pistachios, chocolate and cranberries. 

3) Cover dough with plastic wrap and chill for at least 30 minutes or up to 3 days. 

4) Preheat oven to 350 F. Drop dough by heaping tablespoons onto prepared cookie sheet. Bake 9-10 minutes or until the edges are just golden brown. Allow cookies to set on pan about 1-2 minutes before transferring to a wire rack to cool completely.

Source: Adapted from my friend Jordan's recipe files!

Tuesday, February 19, 2013

Pumpkin Banana Oat Bread


Pin It!


I did it again. I bought more bananas than I could possibly eat before they turned all spotty and mushy. And since my mom isn't here to eat my brown bananas (I promise I don't force them on her, she actually enjoys them!), I did the only logical thing: feed my banana bread addiction with another sweet variety!


I know it's not technically pumpkin season, but that lonely can of pumpkin puree in my pantry has been staring me down for months. Plus, it's stinkin cold outside and I had to scrape frost off my windshield this morning and I worked out for nearly a full hour this afternoon and all I want is something warm and cozy to stuff in my mouth. There. Now I feel justified.

Pumpkin Banana Oat Bread (no butter or oil added!) [click to print]
Makes one loaf
  • 1-1/4 c. flour
  • 1/2 c. sugar
  • 1/2 tsp. salt
  • 1/2 tsp. baking soda
  • 1/4 tsp. baking powder
  • 2 tsp. pumpkin pie spice
  • 1 c. old fashioned oats
  • 2/3 c. pumpkin puree
  • 1 medium, very ripe banana, mashed (about 1/3 c.)
  • 2 eggs, beaten
  • 1 tsp. vanilla extract
1) Preheat oven to 350 F. Line 9x4 loaf pan with parchment paper, allowing at least 2" overhang on each side of pan, or generously coat with nonstick cooking spray. 

2) In bowl of stand mixer, whisk together all dry ingredients, including sugar, spices and oats. Beat in remaining ingredients and mix until well combined. 

3) Pour batter into pan and bake 50-60 minutes or until top springs back when touched lightly. Allow to cool in pan about 10 minutes, then remove to wire rack to cool completely. To serve, dust with powdered sugar. 

Thursday, February 14, 2013

Cherry Vanilla Love Monsters (aka Whoopie Pies)


Pin It!


Let me just tell you one more time. I love holidays! Seriously, there might not be anything better than cutesy themed dessert and containers filled with festive sprinkles and sharing some goodies with friends! These Love Monsters don't take too long to bake or assemble and they're just so cute, who wouldn't wanna get bitten by the love bug today? Happy Valentine's Day!


Cherry Vanilla Love Monsters [click to print]
Makes about 36 whoopie pies

For the cake
  • 1/2 c. unsalted butter, softened
  • 1/2 c. granulated sugar
  • 1/2 c. brown sugar
  • 2 eggs, large
  • 1/2 c. milk
  • 1 tsp. vanilla extract
  • 2-1/4 c. flour
  • 1-1/2 tsp. baking powder
  • 1/2 tsp. salt
  • 1 tsp. baking soda
  • 1 pkg. candy eyes (I used Wilton Candy Eyes)
  • Sprinkles
For the filling
  • 1 c. unsalted butter, softened
  • 2 c. powdered sugar
  • 1 jar (7.5oz) marshmallow fluff
  • 1 c. cherry vanilla compote (or pie filling)
  • 2 tsp. vanilla extract
  • 1/4 tsp. salt
1) Preheat oven to 375 F. Line baking sheet with parchment paper or coat with nonstick cooking spray and set aside. 

2) In bowl of stand mixer, cream butter and sugars until creamy. Add eggs, one at a time, incorporating well between each addition. Beat in milk and vanilla. In separate bowl, whisk together flour, powder, salt and soda; gradually add to batter in about three additions. Beat until just combined. 

3) Scoop heaping teaspoons of batter onto prepared baking sheet, spacing about 2 inches apart. Add candy eyes to half of the cookies, placing eyes about 1/3 of the way towards the center of the cookie (otherwise the eyes melt when they bake). Bake one sheet of cookies at a time for about 10 minutes or until edges are just barely golden. Allow to cool on baking sheet about 5 minutes before removing to wire rack to cool completely. 

4) For the filling, beat butter and sugar until well combined and fluffy, about 3-4 minutes. Add fluff, vanilla and salt. Stir in pie filling, mixing until just combined. Spread filling on half the cookies and sandwich with the eyeball cookie halves. Fill small dish with sprinkles and roll edge of assembled whoopie pies in sprinkles to coat. 

Source: Adapted from Just Baked

Wednesday, February 6, 2013

Snake Butter Cookies


Pin It!

It's that wonderful time of year again...time to huddle under piles of cozy blankets with the frigid wind whirling outside, to make chili and, perhaps most importantly, time to watch some Kung Fu Panda and eat snake cookies. It's most definitely time to celebrate The Year of the Snake! Happy Chinese New Year!


These are a classic butter cookie and have such a rich flavor and make me go weak at the knees when you snap off a bite. Also, these are great make-ahead cookies. So whip up a batch and freeze the already-baked cookies in a zip bag for about 1 month!

Snake Butter Cookies [click to print]
Makes about 3 dozen cookies
  • 1/2 c. butter, softened
  • 1/4 c. sugar
  • 1 large egg, beaten
  • 1/2 tsp. vanilla extract
  • 1-1/4 c. flour
  • red nonpareils
  • green sanding sugar (optional)
1) Preheat oven to 350 F. Line baking sheet with parchment paper and set aside. 

2) In mixing bowl, beat butter until smooth and gradually add sugar. Slowly add egg and vanilla, continuing to beat mixture until well combined. Add a small scoop of flour and stir until mixture just starts pulling together. Add remaining flour all at once and mix until just combined. 

3) Scoop dough into large pastry bag fitted with #3 star tip. If the dough is too firm and you can't pipe it, return dough to mixer and, in separate bowl, beat another egg. Add a tiny tiny bit of egg (about 1/2 tsp. at a time), mixing completely between each addition, until the dough is soft enough to squeeze through the piping tip. Once you have the right consistency, pipe dough directly on parchment in an S-shape about 2-3 inches long, spacing cookies about 1 inch apart. Gently press two red nonpareils in place for eyes. Sprinkle with colored sugar as desired.

4) Refrigerate cookies about 5 minutes to firm. Bake 8-11 minutes or until edges are just golden. Allow cookies to cool completely on baking sheet.

Source: Adapted from L'Academie de Cuisine

Wednesday, January 23, 2013

Microwave Salted Butter Caramel


Pin It!

I'm not gonna lie to you. Every once in a while, I eat cheap store cookies. I'm not talking Oreos, here. I mean those really cheap $2 giant store brand packs that are so full of artificial ingredients that you can practically feel your body getting preserved with each bite. And yet, I still give in. But when you're craving something fast and good, you can't beat homemade. I don't think I need to convince you of that.


I'm sure at this point your eyes are rolling around in your head, totally unconvinced that something so delicious as homemade caramel could actually be fast and easy. But it's true, my dear friends! Take 10 minutes and give this a try. You, and everyone around you, won't be sorry!

Microwave Salted Butter Caramels [click to print]
Makes about 3 dozen caramels
  • 1/2 c. granulated sugar
  • 1/2 c. brown sugar
  • 1/2 c. corn syrup
  • 1/2 c. sweetened condensed milk
  • 1/4 c. salted butter, melted
  • 1/4 tsp. salt
  • 1 tsp. vanilla
  • 1/4 to 1/2 tsp. coarse salt
1) Line square pan with parchment paper, allowing at least 2" overhang on each side of pan. For normal caramels, use 8x8" pan, or 6x6 for thicker caramels. If you're going to sub foil for parchment, be sure to coat foil surface very generously with nonstick cooking spray.

2) In a large microwave safe bowl (emphasis on the large...this mixture will bubble up a lot as it's cooking so you'll want a bowl with taller sides), stir together sugars, syrup, milk, salt and butter until well combined.

3) Microwave on high for 6-8 minutes, stirring every 2 minutes for first six minutes, then each minute thereafter. For soft, chewy caramels, microwave 6-7 minutes. For firmer caramels (still chewy!) that hold their shape well, microwave 8 minutes.

3) Stir in vanilla and pour into pan. Sprinkle lightly with coarse salt and allow to cool until firm or place in refrigerator for about 1 hour. Remove caramel slab from pan by lifting parchment overhang. Use a sharp knife to cut caramel into small pieces and wrap in parchment paper or plastic wrap to store.

Source: Adapted from The Yummy Life

Wednesday, January 16, 2013

Chocolate Peppermint Sugar Cookie Bars


Pin It!

I went for a run after work today wearing my hot pink jacket. Normally, hearing the radio announce that it is a bitter 33 degrees outside would keep me cozied up inside, but I found determination and got my rear in gear.


And then I baked. Mostly because I've been stressed and baking seems to help, but also because the second I stopped running I got really cold and then found out that my heater was broken. Boo.


So here's to a well-earned pan of chocolate and peppermint deliciousness! These bar cookies are fast and easy and very moist. If you're not big on frosting, first of all, I feel sorry for you, and second of all, you can skip it and you'll probably be survive.

Chocolate Peppermint Cookie Bars [click to print]

For cookies: 
  • 1-1/2 c. flour
  • 1/3 c. cocoa powder
  • 1/2 tsp. salt
  • 1/4 tsp. baking powder
  • 1/2 c. unsalted butter, softened
  • 1/2 c. granulated sugar
  • 1/4 c. brown sugar
  • 1 egg, large
  • 1 tsp. vanilla extract
  • 1/2 c. peppermint bark, coarsely chopped
For frosting: 
  • 1 c. unsalted butter, softened
  • 4 c. powdered sugar
  • 1/4 tsp. salt
  • 3-4 T. heavy cream
  • 1 tsp. peppermint extract
  • 1 tsp. vanilla extract
  • gel food coloring (optional)
1) Preheat oven to 350 F. Line 9x13 cake pan with parchment paper, allowing about 2" overhang on each side of pan, or coat with nonstick cooking spray, and set aside. 

2) Whisk together flour, cocoa, salt and powder; set aside. In mixing bowl, beat butter, sugars, egg and vanilla until well combined. Gradually add flower mixture, in about three additions, and continue mixing until smooth.

3) Press dough into prepared sheet pan and sprinkle peppermint bark over top of dough. Bake for 13-15 minutes or until the cookie surface is no longer shiny and the edges look dry. Allow cookies to cool in pan about 10 minutes. Pulling on parchment overhang, lift cookies from pan and allow to cool completely on wire rack. 

4) For frosting, whip butter in stand mixer until smooth. Add about half the powdered sugar and 2 T. cream. Add remaining powdered sugar and gradually add cream, mixing well between each addition until desired consistency is reached. You want it to form soft peaks. Add extracts and food coloring then frost cookies when completely cool. Cut into bars and serve!

Source: Adapted from Mountain Mama Cooks

Wednesday, January 2, 2013

Thick and Chewy Brown Butter Oatmeal Cookies


Pin It!

Unfortunately for my waist line, I have the bad habit of feeding my feelings with delicious (and occasionally average) desserts. My family has been struggling with some sad, hard things lately, so cookies are kind of a staple.


Last month when I was home for a visit, my mom reminded me how much she loved my Big Fat Chocolate Chip Cookies, made with a generous serving of brown butter, and gently suggested that an oatmeal cookie version would probably be one of the tastiest things in the world.


Oh, mom. You are right again!

Thick and Chewy Brown Butter Oatmeal Cookies [click to print]
Makes a lot...I let some ravenous friends/family start devouring before I counted...I'll update you when I have more self control!
  • 1 c. unsalted butter
  • 1 c. brown sugar, packed
  • 1 c. granulated sugar
  • 2 eggs, large, lightly beaten
  • 3 c. old-fashioned oats
  • 1-1/2 c. flour
  • 1/2 tsp. baking powder
  • 1/2 tsp. salt
  • 1/2 tsp. nutmeg
  • 1/4 tsp. cinnamon
1) Preheat oven to 350 F. Line baking sheet with parchment paper or coat with nonstick cooking spray and set aside. 

2) Brown the butter. To do this, heat butter in saucepan over low heat, stirring continuously, until the butter turns a golden brown color. It's totally normal for it to hiss and bubble a lot in the first few minutes, but then it will calm down and look a little frothy on the surface. Watch closely at this point, and keep heating until the butter turns a dark gold color. This will take about 15-20 minutes. Remove from heat and allow to cool to room temperature.

3) Combine butter and sugars in mixing bowl and cream until well combined. Slowly add eggs, in about two additions, mixing well between each addition. Whisk together remaining ingredients and slowly add in about three to four additions, scraping sides as needed. 

4) Scoop dough by heaping teaspoons onto baking sheet, spacing about 1-1/2" apart. Bake 7-8 minutes or until tops of cookies are no longer shiny. Or...you can go for gigantic cookies and scoop by 1/4 c. dough but you'll definitely be baking them longer, so keep an eye on them until the tops aren't shiny and the edges are just barely set. Allow to cool on baking sheet about 1-2 minutes before transferring to a wire rack to cool. 

Source: Adapted from Tracey's Culinary Adventures
Related Posts Plugin for WordPress, Blogger...