Tuesday, April 16, 2013

Apple Bread


Pin It!


Apples just might be the best fruit of my life. I know they're stereotypically a Fall fruit, but who am I to judge? There are a million different kinds and they're crisp and juicy and beautiful and they smell divine. Plus, they're always in the store and they always look good. So I always have tons on hand.


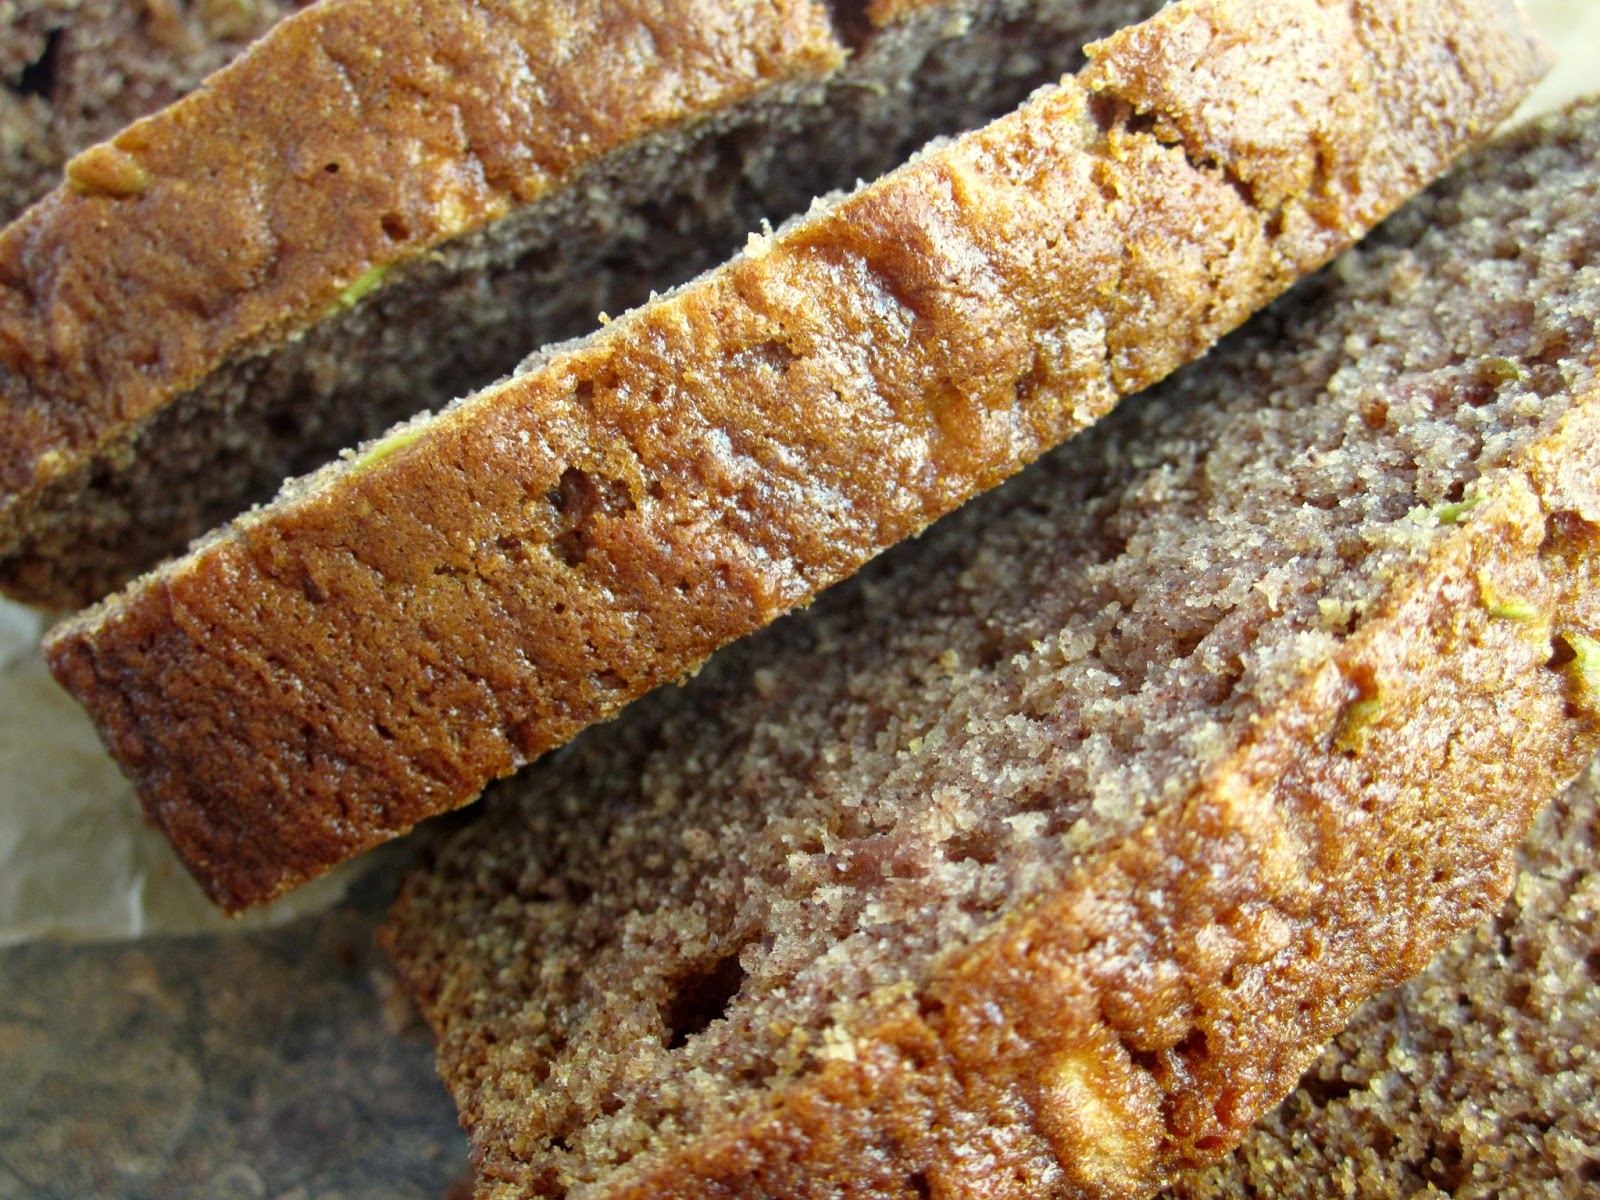
Really, it's not that I can't eat a 5lb bag of apples on my own, it's just that I occasionally need something a little more dessert-like. This apple bread is so moist and fragrant and packed with fresh fruit. And since it feels like Fall outside right now, despite the fact that it's actually April, I feel perfectly justified in making a loaf or two of warm sweet bread. Enjoy!

Apple Bread [click to print]
Makes one loaf
  • 1 large granny smith apple
  • 1 c. sugar
  • 1/3 c. unsalted butter, softened
  • 2 eggs
  • 1/3 c. water
  • 1 tsp. vanilla extract
  • 1-2/3 c. flour
  • 2 tsp. cinnamon
  • 1 tsp. baking soda
  • 1/2 tsp. salt
  • 1/4 tsp. baking powder
1) Preheat oven to 350 F. Line loaf pan with parchment paper or coat generously with nonstick cooking spray and set aside.

2) Use cheese grater to shred apple, with or without skin. You should have about 1 cup.

3) Combine sugar, butter and eggs in mixing bowl and mix well. Beat in shredded apple, water and vanilla. Whisk together flour, cinnamon, soda, salt and powder; add to apple mixture, stirring until just combined.

4) Pour batter into prepared pan and bake 50-60 minutes or until the top is browned and springs back when lightly touched. Allow to cool in pan about 5 minutes, then remove to wire rack to cool completely.

5) To serve, spoon 1 to 2 teaspoons of caramel sauce into depression in center of warm mini bundts (or drizzle over top of cupcakes) and enjoy!

Source: Adapted from Aunt Betty

Tuesday, April 9, 2013

Banana Bread Truffles


Pin It!

Sometimes I buy too many bananas. And sometimes I forget about them and then realize they're all brown and spotty and have to bake up something tasty. My mom told me the other day that I should move beyond the dark chocolate and try some new ideas...I may or may not have a slight dark-chocolate-addiction at the moment. And sometimes I also have very limited self-control


So bite-size truffles seemed like the perfect dessert! I can eat a few and, hopefully, share most of them! And you're gonna love the banana filling--it's pretty much an extremely moist banana bread combined with a brown butter (anyone else going weak at the knees?) glaze and smothered in dark chocolate and topped with toasted walnuts. Seriously delicious.

Banana Bread Truffles [click to print]
Makes about 5 dozen

  • 1 c. sugar
  • 1/3 c. unsalted butter, softened
  • 2 eggs
  • 3-4 bananas, mashed (about 1 c.)
  • 1/3 c. water
  • 1-1/2 tsp. vanilla extract
  • 1-2/3 c. flour
  • 1 tsp. cinnamon
  • 1 tsp. baking soda
  • 1/2 tsp. salt
  • 1/4 tsp. baking powder
For brown butter glaze
  • 1/4 c. browned butter
  • 1-1/2 c. powdered sugar
  • 3 T. milk or water
For dipping
  • 2 pkgs. (12 oz) dark chocolate chips
  • 1/2 c. walnuts, chopped and toasted
1) Preheat oven to 350 F. Line 8x8 baking dish with parchment paper or coat generously with nonstick -cooking spray; set aside. 

2) In bowl of stand mixer, cream sugar and butter. Add eggs, one at a time, incorporating well between each addition. Stir in bananas, water and vanilla. 

3) In separate bowl, whisk together flour, cinnamon, soda, salt and powder. With mixer on low speed, gradually add to banana mixture in about 3 additions. Pour batter in prepared dish and bake 30-40 minutes or until top springs back. Allow to cool completely in pan. 

4) For glaze, heat butter in small saucepan over medium heat until it turns a golden brown color. Remove from heat and allow to cool to room temperature. Stir butter and milk/water into powdered sugar until well combined and no lumps of powdered sugar remain. 

5) When bread is completely cool, crumble with a fork or your fingers into pea size crumbs. Pour glaze over crumbs and stir until evenly moistened. Using a cookie scoop or spoon, scoop 2 or 3 teaspoons of truffle filling at a time onto lined cookie sheet. 

6) In deep bowl, melt chocolate at 30 second intervals in the microwave, stirring well between each nuke. Using a fork, dip each filling in melted chocolate, gently tapping fork on edge of bowl to get off excess chocolate. Place on cookie sheet, top with a sprinkle of chopped nuts and allow to set. Note: If your filling doesn't hold together very well while dipping, chill in freezer about 15 minutes before dipping. 

Source: Inspired by Vanilla Kitchen

Thursday, April 4, 2013

Chewy Cookie Butter Granola


Pin It!


Sometimes failure turns into a beautiful thing.

I mean, take the 80s, for instance. Mismatched earrings, stirrup pants, gigantic bangs...there are a few things that I am definitely not sad to see go. But on the other hand, I find myself owning and wearing an increasing amount of neon that just doesn't get old! It's like I'm walking around in multicolored bits of sunshine!


Which leads perfectly into my next comment. The sun is shining and it should feel like spring out there! But instead it's freezing cold and I'm a little sad. So, I decided to attempt (yet again) a batch of chewy granola bars...which turned into a complete and utter fail since they didn't seem to have any desire to remain in anything slightly resembling a bar shape.

So, I gave my crumbles a few tweaks and voila! Chewy granola! This stuff is a perfect ice cream topper, yogurt mix-in or whatever...just eat some!

Chewy Cookie Butter Granola [click to print]
  • 1/4 c. butter, melted
  • 1/4 c. agave nectar
  • 1/4 c. brown sugar
  • 1/2 c. Speculoos Cookie Butter
  • 1/2 tsp. vanilla extract
  • 1/8 tsp. salt
  • 2 c. quick oats (not rolled)
  • 1 c. unsweetened puffed rice cereal
  • 3/4 c. cinnamon chips
1) For thicker bars, line 8" square pan with parchment paper or 9" square pan for thinner bars. In large bowl, combine oats and cereal; set aside. 

2) In saucepan, stir together butter, agave and sugar, stirring over low heat until sugar dissolves. Increase heat to medium-high until mixture begins bubbling. Reduce to low heat and allow to cook 2 minutes. Remove from heat and stir in cookie butter, vanilla and salt. Pour cookie butter mixture over dry ingredients and stir immediately to evenly coat, making sure there aren't any dry pieces.

4) In separate bowl, melt 1/2 c.cinnamon chips in 30 second intervals, stirring well between each nuke, until smooth. Stir into oatmeal mixture. Spread mixture onto prepared pan and sprinkle remaining cinnamon chips over mixture. Refrigerate until firm.

Source: Adapted from Bakerita

Saturday, March 30, 2013

Peep S'mores


Pin It!

It seems like the holidays come earlier and earlier every year, which is kind of depressing when the stores are rushing me through life! I kind of prefer a leisurely pace. But I would never hold it against our dear retailers for rushing to get those brightly colored Easter Peeps on the shelves!


I know, some of you are rolling your eyes and wondering how in the world I could love something that is basically an animal-shaped piece of sugar coated in neon sugar with eyeballs. I ask you, how could you not?! But if you're going to hold onto your Peep-hatred, just think of the children! Would it really be Easter for them without a small overdose of sugary goodness? I think not.

Happy Easter!

Peep S'mores [click to print]
Makes 6-7 individual servings

  • 1 pkg mini graham cracker crusts (I used Keebler Ready Crust Minis)
  • 1 brownie recipe (the kind for an 8" or 9" pan)
  • 12-14 mini Hershey bars
  • 6-7 Peeps
1) Prepare brownie batter and preheat oven as instructed in recipe or on box/pouch. Scoop about 3 Tablespoons of batter into each crust and bake for 18-22 minutes. Note, time will vary based on recipe used, so stick a toothpick in the center to check doneness and when it comes out clean, you're good!

2) Lay two mini chocolate bars across top of mini brownie and allow chocolate to melt. If the brownies are too cool to melt the chocolate, place them in a warm oven for 2 or 3 minutes until the chocolate is shiny and soft. 

3) Top chocolate with a Peep and serve warm! Or cold, they're still fudgy and rich and delicious the next day...if they last that long! 

Tuesday, March 26, 2013

Chocolate Yogurt Cake


Pin It!

I made this cake for the first time a while ago, but it somehow disappeared before I ever got a chance to take pictures. Hm. I guess that just goes to show that it really is perfect for snacking.


This cake has a beautiful dark chocolate color and is very moist, thanks to the yogurt, and, on top of that, it's really fast and easy to make!

Chocolate Yogurt Cake [click to print]
Makes one 8" square cake
  • 6 T. unsalted butter, softened
  • 1/3 c. granulated sugar
  • 1/3 c. dark brown sugar
  • 1 egg
  • 2/3 c. vanilla yogurt
  • 1 tsp. vanilla extract
  • 3/4 c. plus 2 T. flour
  • 1/4 c. plus 2 T. cocoa powder
  • 3/4 tsp. baking soda
  • 1/8 tsp. salt
1) Preheat oven to 350 F. Line bottom of 8" square baking pan with parchment paper or coat generously with nonstick cooking spray; set aside. 

2) In bowl of stand mixer, combine butter and sugars. Cream until well combined. Add egg and vanilla; mix until completely incorporated. Stir in yogurt and milk. 

3) In separate bowl, whisk together flour, cocoa and salt. Gradually add to batter in about 3 additions, mixing until just blended. Pour batter into prepared pan and bake 20-25 minutes or until cake pulls away from sides of pan just slight and top of cake springs back when lightly touched.

4) Allow cake to cool about 10 minutes in pan before removing to serving dish. Dust with powdered sugar and serve warm. (P.S. This is still good cold, but who doesn't love warm cake?!)

Related Posts Plugin for WordPress, Blogger...