Showing posts with label Lemon. Show all posts

Tuesday, August 7, 2012

Lemon Poppyseed Yogurt Bread


Pin It!
Every morning when I open my fridge, sitting right beside that head of cauliflower and bag of carrots, is a giant tub of vanilla yogurt just staring me down. Like it has any business looking at me like that. I've eaten most of it with chopped fresh fruit or mixed up in a smoothie, but I need more variety!


So sweet bread it is.


These cute little mini loaves are practically healthy, packed with fresh lemon juice, yogurt and olive oil. And they're so soft and moist with a gentle lemon flavor with the glaze giving them a nice, tangy punch. Mmm!


Serve this bread up for a lovely brunch sometime. And please invite me. 

Lemon Poppyseed Yogurt Bread [click to print]
makes 4 mini loaves OR 1 regular loaf


For the bread
  • 1-1/2 c. flour
  • 2 tsp. baking powder
  • 1/2 tsp. salt
  • 1-1/4 c. vanilla yogurt
  • 1 c. sugar
  • 3 eggs
  • 2 T. lemon zest
  • 1 tsp. vanilla extract
  • 1/4 tsp. lemon extract
  • 1/2 c. olive oil
  • 2 T. poppy seeds
For the glaze
  • 1/2 c. lemon juice
  • 1/4 c. sugar
  • 1 T. honey
Preheat oven to 350 F and coat mini loaf pans with nonstick cooking spray. 

Whisk together flour, powder and salt; set aside. In separate bowl, whisk together yogurt, sugar, eggs, zest and extracts. Whisk in oil and seeds. Pour into loaf pans. Bake 20-25 minutes or until edges are golden and top springs back when touched lightly. Allow to cool. 

For the glaze, combine juice, sugar and honey in small saucepan. Heat on medium low until sugar is dissolved. Bring mixture to a boil and then reduce to a simmer for 7-8 minutes or until slightly thickened. Allow to cool slightly then pour over loaves and serve. 

Source: Adapted from Novice Baker

Tuesday, May 1, 2012

Lemon Rolls with Creamy Vanilla Bean Icing


Pin It!

I always wondered what in the world people did with lemon curd. I mean, besides those crazies who eat it by the spoonful or slathered on toast. It's delicious, don't get me wrong, but it's also very tart and almost overpoweringly lemony. But finally I had it. Lemon rolls!


These little guys are like rolls of sunshine, smothered beneath heaping mounds of creamy icing and just bursting with flavor. Oh, man, I want some now!


Plus, if you're looking for a unique Mother's Day brunch idea, these rolls are it! They're light and fluffy and delicious...pretty much perfect for our dear mom.

Lemon Rolls with Creamy Vanilla Bean Icing [click to print]
Makes about 13 rolls


For the rolls
  • 2-1/2 c. flour
  • 2-1/4 tsp. yeast (OR one 0.25oz packet) 
  • 2 tsp. sugar
  • 1/2 tsp. salt
  • 1 T. butter, melted
  • 1/4 tsp. lemon extract
  • 1/2 c. whole milk plus 1 T. separated
  • 2 egg yolks, large
  • 1 c. lemon curd (try this recipe for Lemon Silk! or you can use store-bought)
For the icing
  • 3 c. powdered sugar
  • 1/4 c. unsalted butter, softened
  • 1 tsp. vanilla bean paste (OR extract)
  • 1/8 tsp. salt
  • 1/4 c. plus 1-2 T. whole milk
In stand mixer bowl, whisk together flour, yeast, sugar and salt. In small bowl, whisk together butter, extract and 1/2 c. milk. Add milk mixture and yolks to flour mixture and beat on low with dough hook until combined. 

Gradually add remaining tablespoon of milk, if needed, until mixture is fully combined. Continue beating on medium-high speed for 5 minutes. Cover with damp cloth and allow to rise in warm place until doubled in size. 

Preheat oven to 400 F and line 7x11 pan with parchment paper, allowing about 3 to 5 inches of paper to overhang edges, or coat generously with nonstick cooking spray; set aside. If you don't have 7x11, you can squeeze the rolls into an 8x8 or spread out in 9x13. It will be okay. 

Punch down dough and roll out into a rectangle about 1/4" thick and approximately 8x15". Generously spread lemon curd over entire surface of dough, leaving about a half inch border uncovered. Beginning at the edge farthest from you, roll up dough to form a long lemon snake. Cut into 1" slices and place in baking pan. 

Allow to rise another 30 minutes. Bake for 10 minutes. Cover top of pan loosely with a piece of foil and return to oven for about 15 minutes or until done. If you used cooking spray, carefully tip rolls onto large serving plate or cookie sheet and allow to cool. If you used parchment paper, allow to cool in pan about 10 minutes then lift edges of parchment and allow to cool on wire rack. 

Prepare icing by combining sugar, butter, vanilla and salt in mixing bowl. Add 1/4 c. milk and mix on low speed to combine. Gradually add additional milk to reach desired consistency. Spread over slightly warm rolls and devour. Oh. My. Lemony-Goodness.

Source: Adapted from My Custard Pie

Thursday, April 19, 2012

Lemon Silk (aka Fool-Proof Lemon Curd)


Pin It!

Doesn't "curd" just sound kind of gross? I mean, really. Who wants to take a big bite of curd or slather a thick layer of curd on a fresh piece of bread or stir a spoonful of curd into perfectly good whipped cream? Ugh. Lemon Silk just sounds so much more appealing than Lemon Curd, right?

Lemon Silk is kind of like deliciously glorified homemade pudding. It has a really strong lemon flavor, so you better like lemon if you're gonna make this stuff. Rather than just eating it straight, I suggest making a batch of Lemon Rolls with Vanilla Bean Icing (recipe coming very soon!).


It can be kind of tricky to get a perfectly smooth texture using the traditional double-boiler-egg-whisking method. After you cook it you usually have to strain out any lumps or bits of cooked egg. This is a much easier, fail-proof way to get a good, creamy batch of lemon silk without any of that ickiness.


Lemon Silk (aka Fool-Proof Lemon Curd) [click to print]
Makes about 2 cups
  • 6 T. unsalted butter, cubed 
  • 1/3 c. sugar
  • 2 eggs, large
  • 2 egg yolks, large
  • 1/2 c. lemon juice
  • 1/8 tsp. salt
In medium size, heat proof mixing bowl, cream butter and sugar until fluffy. Add eggs and yolks, one at a time, incorporating well between each addition. Beat in lemon juice, eggs and salt until well combined; don't worry if it looks kind of curdled right now, it will smooth out as you cook it. 
Place bowl over simmering pot of water, but don't let the water touch the bottom of the bowl. Whisk mixture over low heat until the butter melts and the texture smooths out. Increase heat to medium, whisking constantly to prevent scorching. The mixture will begin to thicken and you may see a few slow, fat bubble appearing; that's okay, but if there are a lot, it's boiling and you should immediately reduce heat. 
The curd is done when it coats the back of a spoon and your finger leaves a clear path when drawn through. Pour into clean bowl and press a piece of plastic wrap against surface of curd. Store in the refrigerator for 7-10 days or in the freezer for a couple months. 

Source: Adapted from David Lebovitz and Fine Cooking

Thursday, March 22, 2012

Lemon Ombre Cake with Vanilla Swiss Meringue Buttercream


Pin It!
So we're doing some major renovations at work and I am currently homeless...aka my desk got tossed and I'm now relegated to one of the overly cramped nursing stations or a single bookshelf. No, not a single bookshelf, but a single shelf on a bookshelf! But even though this sounds pretty much awful, at least I get to hang out by windows now! Can I just say, I love sunshine!


And then, last week, it was warm enough that I sat outside beneath my favorite tree while being berated by an angry squirrel for a solid three minutes (that's practically an eternity in squirrel time), enjoying some fresh, mulch-scented air. Ah, Spring!


This has got to be the best way to celebrate the very first third day (yeah, I didn't get my act together that early) of my absolute favorite season of all (besides Fall...and now that I think about it, I do quite enjoy Summer, too...and Winter, in moderation, of course). Nothing like a slice of light lemon cake smothered in a fluffy Swiss Meringue Buttercream!


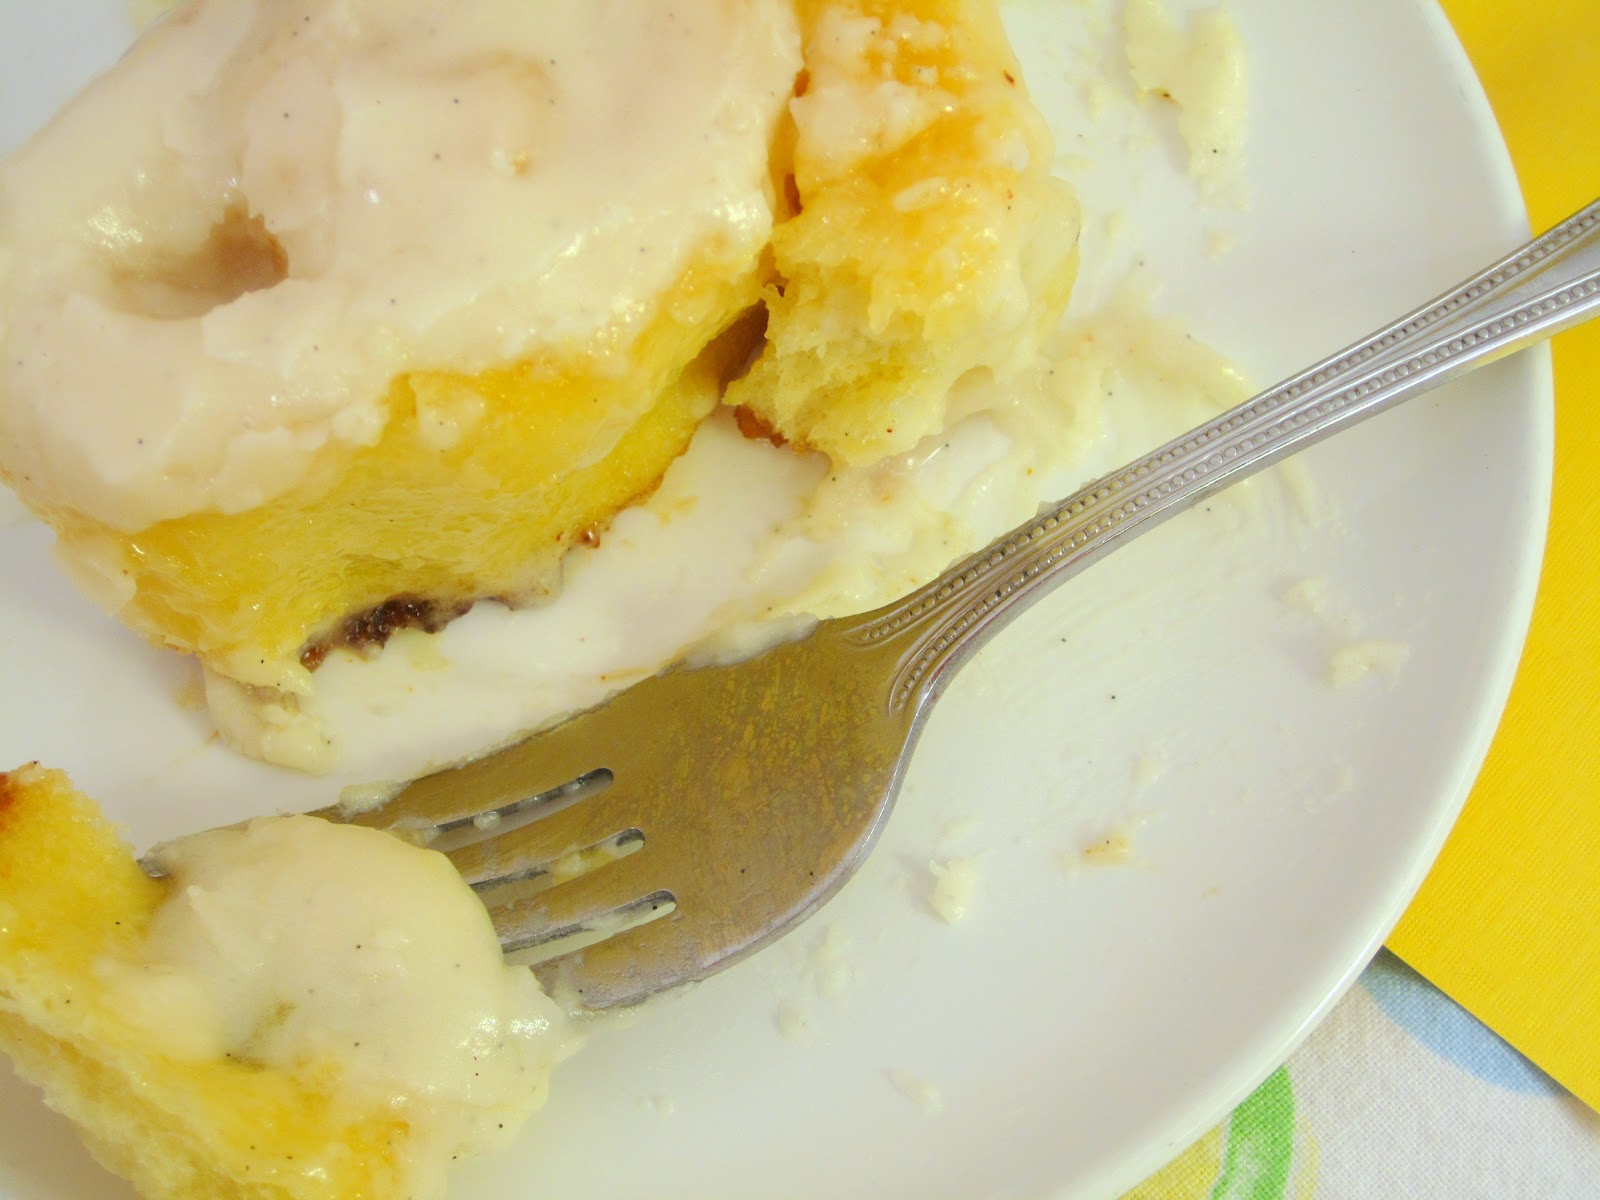
The really fun part about this cake is that it's an ombre, which means with each additional layer, the color intensifies. The yellow gradation, although it's apparently a little harder to distinguish than something dark like purple, made this little guy look like it was bursting with sunshine the second I cut into it!

Lemon Ombre Cake [click to print]
Makes four 6" layers
  • 2 c. plus 2 T. flour
  • 1 tsp. baking powder
  • 1/2 tsp. baking soda
  • 1/2 tsp. salt
  • 1 c. buttermilk
  • 1 tsp. vanilla extract
  • 1/2 tsp. lemon extract
  • 1-1/2 c. sugar
  • 1/2 c. unsalted butter, softened
  • 3 large eggs
  • 2 T. lemon zest (about 2 lemons)
  • yellow food coloring
Preheat oven to 350 F. Line cake pans with parchment paper or coat generously with nonstick cooking spray.

Whisk together dry ingredients and set aside. In separate bowl, whisk together buttermilk and extracts; set aside.

Cream butter and sugar in mixing bowl until well blended, about 5 minutes. Add eggs, one at a time, incorporating well between each addition. Alternately add flour and buttermilk mixture, beginning and ending with dry ingredients. Stir in zest.

Pour 1/4 batter into one pan. Add a few drops of food coloring to batter and stir to distribute evenly. Pour about 1/3 of remaining batter in second pan. Add a few more drops of food coloring and stir to distribute. Pour half in next pan. Add another squirt of food coloring and stir. Pour remaining batter in last pan.

Bake for 25-30 minutes until center springs back when lightly touched. Allow to cool completely before frosting.

Vanilla Swiss Meringue Buttercream 
Makes about 8 cups
  • 10 egg whites (about 1 cup)
  • 2 c. sugar, granulated not powdered!
  • 2 c. unsalted butter, softened
  • 1/4 tsp. salt
  • 1 T. vanilla extract
You're going to need a double boiler for this recipe, but if you don't have one, don't worry! I don't either. We'll use our makeshift double boilers together. All you need is a pot filled with about 2 or 3 cups of water, and a heat safe bowl (like ceramic, glass or metal) that sits comfortably on top of your pot. You don't want the bowl to sit too deep and touch the water or you'll cook your eggs and that's just nasty in meringue. Ew. 

So, now that you have your set up ready...

In bowl (not on the heat yet), whisk together egg whites and sugar until well combined. And before you have a cow from the fact that we're using egg whites here, yes, I mean you, Dad and Mama, use a candy thermometer to make sure your mixture reaches 160 F and you'll be fine. 

Anyway, when water is simmering, place bowl on pot/double boiler and heat, whisking continuously, until the sugar melts completely. Test this by rubbing a little bit of the mixture between your fingers and feeling for any grittiness. If it's still gritty, keep heating. 

Once smooth, remove from double boiler and whisk in salt. Pour mixture into bowl of stand mixer and mix on high speed with whisk attachment. If you don't have a stand mixer, a handheld is no problem. I just get bored standing around holding a mixer. Once the mixture comes to room temperature, about 10-15 minutes, you'll have a beautiful meringue that you can eat just as is, but we're making this into a buttercream, so press on!

Change to paddle attachment, if you have one, and add butter to the meringue, about 2 Tablespoons at a time. Make sure each chunk is fully incorporated before adding the next bit. Continue adding butter until all chunks are fully incorporated and mixture is smooth and creamy. 

At this point, you may be getting nervous because your buttercream is looking a little strange, but don't give up! If it's runny or soupy...stick the whole bowl in the fridge for about 10-15 minutes to firm up and then continue whipping. If it's curdled and sick...just keep mixing! It will smooth out and look delicious again. 
Once the buttercream is nice and smooth, add extract and mix to combine. 

Source: Cake adapted from Serious Eats; Swiss Meringue Buttercream adapted from Whisk-Kid

To Assemble
Center the yellowest layer on your cake plate and frost top with a thin layer of buttercream. Continue adding layers and buttercream until fully stacked. Frost sides of cake. Add copious amounts of sprinkles on top, adding extra as necessary. 

Tuesday, March 20, 2012

White Pepper and Ginger Lemon Cake


Pin It!

A year or so ago I made a mango cake with cayenne pepper and loved the little kick. Then when I went home for a visit, my little bro's wife Zaikea whipped up a batch of zippy white pepper Amish cookies. Of the ten or so cookies that I inhaled, I'd say they were delicious.


So when I found this recipe for Maida Heater (a fancy pants pastry chef)'s White Pepper and Ginger Lemon Cake, I knew I had to give it a try. Plus, lemons are the perfect summer fruit! Just look at that ooey, gooey glaze...oh my goodness, I think I'm making myself drool. Trust me, if you like a little heat (sorry, Stacie), you're gonna love it!


White Pepper and Ginger Lemon Cake with Ginger Glaze [click to print]
Makes one 12-cup bundt cake

For the cake

  • Few tablespoons coarse sugar
  • 3 c. flour
  • 2 tsp. white pepper
  • 1 tsp. baking powder
  • 1/2 tsp. baking soda
  • 1/2 tsp. salt
  • 2 T. lemon juice
  • 5 T. lemon zest (about 3 small lemons)
  • 1-1/2 T. (4-1/2 tsp.) ginger paste (or grated fresh ginger)
  • 1/2 tsp. lemon extract
  • 1 c. unsalted butter, softened
  • 1-1/2 c. sugar
  • 3 eggs
  • 1 c. buttermilk

For the Glaze: 

  • 2 c. powdered sugar
  • 1 T. unsalted butter, softened
  • 1 tsp. ginger paste (or fresh ground ginger)
  • 1/8 tsp. salt
  • 3-4 T. milk

Using nonstick cooking spray with flour included, generously coat bundt pan. Sprinkle coarse sugar in pan to lightly coat; set aside. Preheat oven to 350.


Whisk together flour, pepper, powder, soda and salt; set aside. In small bowl, whisk together juice, zest, ginger and extract; set aside.

In large mixing bowl, cream butter and sugar on low speed until pale and fluffy. Add eggs one at a time, incorporating well between each addition. Alternately add dry ingredients (about 3 additions) and buttermilk (about 2 additions). Stir in lemon mixture. Pour batter in bundt pan. Firmly tap pan on counter about 3 times to tap out any large air bubbles that may have been trapped when batter was poured into pan.


Bake at 350 for 55-60 minutes. Allow cake to cool in pan on wire rack for about 15 minutes. To remove from bundt pan, place wire rack over top of pan and invert, tapping gently on the sides to release, if necessary. Allow to cool completely on wire rack.

For the glaze, combine sugar, butter, zest, ginger and salt in mixing bowl. With mixer on low, add 3 Tablespoons milk. Slowly add additional milk, one teaspoon at a time until you reach desired consistency. Pour over cake and allow to set.

Source: Cake adapted from Sauce and Sensibility; Glaze is all Sugar Rush!

Monday, January 9, 2012

Thursday, September 15, 2011

Blueberry Filling and Lemon Zested Buttercream


Pin It!
I love comments and requests! So this one's for you, my dear "Anonymous" (Mom, is that you?).

By Christmas last year, I'd already been bit by the baking bug. Okay, fine. I was bit, stung and severely infected by that baking bug long before then, I guess I was just finally admitting it to myself. In any case, I got this great book that has some tricky recipes and techniques with several pages of easier, more basic baking staples at the end. And in case you forgot how much everyone loves the basic-fresh-blueberry filling-lemon-zested-buttercream-lemony-cake, just look at these guys, they're so happy!


You know you need these.

Fresh Blueberry Filling   [click to print]
1/4 c. sugar
1/8 tsp. salt
1/2 c. water
2 T. cornstarch
3 c. fresh or frozen blueberries (the original recipe says to chop the berries, but I left mine whole since they were just little guys)

Combine sugar, salt and water in a pot over low heat; stir until the sugar and salt are dissolved. Add cornstarch and blueberries, stirring continuously, and cook until thickened, about 10 minutes. Remove from heat and allow to cool. The mixture will get a little thicker as it cools.


Lemon Zested Buttercream   [click to print]
4 c. powdered sugar
1/2 c. butter, unsalted and softened
1/4 c. lemon juice
1/2 tsp. lemon extract
2-3 T. milk
1/4 c. lemon zest

Cream the sugar, butter, juice and extract. Slowly add milk, a tsp at a time, until you reach the desired consistency. (If you get it too thin, add a little extra powdered sugar.) Add lemon zest and mix until well combined.

Wednesday, September 14, 2011

Summer Bliss


Pin It!
I can't believe that summer has come and gone already! A week past Labor Day and the pools are all closed, it's getting dark earlier and the beach is no longer calling my name (quite as loudly).

But on the bright side, we still have the humidity! Okay, maybe I'm not so excited about humidity and the favors it does for my wavy/frizzy hair, but there are still a few summer flavors that we can enjoy!


Blueberry Lemonade   [click to print]

1 c. butter, unsalted and room temp
2 c. sugar
1/4 c. lemon zest
5 eggs

3 c. flour
2 T. potato starch*
1 T. baking powder
1/2 tsp. salt

1 c. whole milk
1/4 c. lemon juice
1 tsp. vanilla

Combine butter, sugar and zest in mixing bowl and cream until fluffy. Add eggs one at a time, mixing until combined between each addition. Whisk dry ingredients together in separate bowl; set aside. Whisk liquid ingredients together in separate bowl.

Alternately add the dry and wet ingredients to the butter mixture in five additions, beginning and ending with dry. Continue mixing for about 15 seconds after ingredients are combined.

Bake in single 9" round cake pan (2-1/2" deep) at 350 for 45 min. or until done.

Allow cake to cool completely and slice into two layers. Fill cake with Fresh Blueberry Filling and frost with Lemon Zested Buttercream. Garnish with extra blueberry filling and eat up!

*If you don't have potato starch, just omit it and use 3 c. cake flour instead; or you can probably get away with regular flour but your cake won't be as tender.

Source: Adapted from Annie's Eats
Related Posts Plugin for WordPress, Blogger...