Tuesday, November 29, 2011

Pumpkin Butter


Pin It!
For some people, memories attach themselves permanently to specific places, but for me, they are so often attached to the delicate aromas wafting through the air. If you have any cinnamon memories, this one is for you. Plus, it is quite possibly the easiest recipe of your life.


Crockpot Pumpkin Butter   [click to print]
1 large can (29 oz) pumpkin puree
1 T. vanilla
3/4 c. apple cider
1 c. brown sugar
1 T. cinnamon
1-1/2 tsp. allspice
1/2 tsp. nutmeg

Combine all ingredients in crockpot and stir until combined. Cook in crockpot on low for 5 to 6 hours. This is delicious served on a slice of homemade (or store-bought is fine, too)!


Source: Adapted from Skinny Taste

Friday, November 25, 2011

Baking a Difference: Hattie's Bakery


Pin It!
How could you possibly not fall in love with a bakery that celebrated it's one year anniversary with a humongous chocolate bar? I'm not sure it's possible. Which is one of the many reasons I'm falling in love with Hattie's Bakery!

Who was the inspiration for Hattie's Bakery? 
In 1961, when Hattie Larlham brought little Alice into her home, children with developmental disabilities were not expected to live long. As Hattie’s work improved the quality of life for these children, they lived longer and thrived. Our organization has grown along with these children. The mission of Hattie Larlham, the organization, is to provide comfort, joy and achievement to people with developmental disabilities and their families. As our children grew, fulfilling this meant finding ways for people with developmental disabilities to find meaningful employment and be a part of their communities. It was this need that inspired Hattie Larlham to open The Bakery at Hattie’s CafĂ© & Gifts as well as our other social enterprises.

When and where did you get started?
We officially opened on Sept. 21, 2010 at 209 South Main Street in Akron, Ohio. The Bakery just celebrated its first anniversary by creating and sharing Akron’s biggest chocolate bar with the community.

How does a bakery make a difference? 
Employees work with job coaches to develop essential job skills. The responsibilities of each employee vary based on the individual, but range from baking, general food preparation, decorating cakes and cookies, making beverages, working the cash register, assembling gift baskets and more. These jobs equip our employees with much more than traditional work skills; they gain self-confidence and often enhance their social skills. 

There was one employee who started out very shy, making beverages. Now, she is the assistant to the bakery manager. When the manager is out of the office, she can fill gift basket orders to exact specifications. She also trains other employees in making beverages. Her personal and professional growth has been so tremendous that she now feels independent enough to get her own apartment!

What keeps people coming back for more?
One of our standout items is a German chocolate cake with frosting made of real, melted German chocolate. In addition to baked goods, the bakery has a storefront that serves ice cream, fair trade coffee and lunches featuring salads, sandwiches, wraps and more. Our employees also produce all of our gift baskets that are sold across the country and can be purchased online.

Tuesday, November 22, 2011

Chocolate Covered Cherry Cobbler


Pin It!
I'll be going home tomorrow to spend some time with my family for Thanksgiving. It's gonna be a little different this year since the only kids at home now are me and my sister. We're used to having at least two other brothers hanging around to make some noise! The holidays always make me miss my family and feel very introspective, which can be a good thing. This time, it made me think of my dad and Jeffie, my baby brother who now towers over me by at least a foot, and their almost unquenchable love for everything chocolate covered cherry. This one's for you guys!


Chocolate Covered Cherry Cobbler   [click to print]
For the Filling: 
2 c. frozen cherries, thawed
3/4 c. sugar

Combine cherries and sugar in small bowl. Heat in microwave for 1-2 minutes to just warm. Set aside. 

For the Crust: 
1/3 c. butter or margarine
3/4 c. flour
1/4 c. cocoa powder
1 c. sugar
1 tsp. baking powder
1/4 tsp. salt
1/2 c. milk

Place butter in 10x10 baking dish and set in oven while it preheats to 375. Whisk together dry ingredients in bowl. Add milk and stir to combine. Pour over melted butter in baking dish. Spoon cherry mixture over batter. Bake for 30-35 minutes or until crust looks dry and browned.


Source: Adapted from my mom's memory of her basic college days' cobbler recipe

Monday, November 21, 2011

Saturday, November 19, 2011

Pumpkin Pear Crisp


Pin It!
It seems like time moves too quickly in the Fall. I thought the summer was just coming to an end and all the sudden I'm pulling on flannel pj's and eating Cream of Wheat for breakfast. That's so not a summer thing to do.

I guess it's time I move out of denial before winter comes. This recipe is most definitely Fall and was inspired by my mom and Mama, who have made apple crisp for centuries, I think, and my good friend Bon Appetit.

Pumpkin Pear Crisp   [click to print]
For the Compote: 
2 c. sugar pumpkin or butternut squash (about 1 small), peeled and cubed in 1/4" to 1/2" pieces
4 c. pears (about 5 small), peeled and cubed in 1/2" pieces
1/4 c. maple syrup
2 T. lemon juice
1 T. brown sugar
1 T. cinnamon
1/2 tsp. cloves
1 tsp. vanilla extract

Combine all ingredients in crockpot and stir well. Cook on high for 2 hours until pumpkin/squash is just tender. Spoon into six small ramekins or other oven safe dish(es).


For the Crispy part: 
1/2 c. oats
1/2 c. walnuts, chopped
1/4 c. brown sugar
1/4 c. flour
1/4 c. butter
1 tsp. cinnamon

Combine sugar, flour, butter and cinnamon in medium bowl. Using a pastry cutter, cut in butter until small crumbles form about the size of peas. Add oats and nuts. Sprinkle over ramekins. Place on middle rack of oven and broil 15-20 minutes until nuts/oats are browned and compote is bubbly.


Source: Adapted from Bon Appetit

Thursday, November 17, 2011

Pumpkin Gingersnap Parfaits


Pin It!
The other day at work, my friend Taci mentioned that she made this pumpkin mousse a while ago that she served with some sort of multi-course fancy dinner. As my mouth started watering, I asked her for the recipe, which she happily shared, and my mind started going and just wouldn't quit. Then I had a brilliant idea. Layers of pumpkin mousse, fresh whipped cream and gingersnaps...parfait, anyone? Mais, oui!

Parfait is french for perfect. Not a bad choice to describe that light dessert, the marriage between fluffy whipped cream, rich filling and crunchy topping. This dessert is perfect for a no-baking kind of day. Delicious, fragrant, (tastes) very light and simple. The dreamy descriptive words could go on and on.

Pumpkin Gingersnap Parfait   [click to print]
For the pumpkin mousse: 
1 can (15 oz.) pumpkin puree
1/2 c. cream cheese
1/2 c. sugar
2 tsp. cinnamon
1/4 tsp. nutmeg
1 tsp. allspice
1-1/2 tsp. vanilla extract

Combine all ingredients in medium mixing bowl and beat until well combined. Set aside.

For the whipping cream: 
1 c. heavy whipping cream
2 T. powdered sugar
1 tsp. vanilla extract

Combine all ingredients in mixing bowl and beat on high speed until cream is fluffy and forms stiff peaks. If it starts to look at all curdled or clumpy, stop! You're going to overmix and it turn your cream into butter!


To assemble:
2 c. crushed gingersnaps (about 3 dozen small cookies)

Divide half of pumpkin mixture into four cups. Spoon about half of gingersnaps over pumpkin. Cover with whipped cream, reserved about 1/4 cup. Spoon remaining gingersnaps over whipped cream. Divide remaining pumpkin between cups to create the top layer. Garnish with a sprinkle of gingersnaps, a dollop of whipped cream and a whole gingersnap cookie.

Source: Inspired by my friend Taci and The Gourmand Mom

Tuesday, November 15, 2011

Grape and Apple Pie for Two


Pin It!
Wait! Don't get wierded out by the grapes! I thought it was kind of strange, too, when I heard of grape pie, but this is actually good! Black grapes tint the pie filling a beautiful shade of purple and give tart apples a unique and subtle sweetness. Plus, there's more than a full serving of fruit per pie! It's pretty much healthy.


These mini pies are baked in two small ramekins and are just the perfect size to cuddle up with on a chilly fall morning! If there are a lot of cuddlers in your home, you may want to double or triple the filling recipe below to make more to share.


Grape and Apple Pie for Two   [click to print]
For the pie crust, I'm in love with Smitten Kitchen's All Butter Pie Crust. I thought that was the worst part of making a pie until I tried this recipe. Turns out homemade pie crust really is easy! But anyway, if you do use that recipe, you'll have a lot of extra dough. My recommendation is to scrunch up those scraps and turn them into Caramel Apple Pie Bites. Or if you're wishing for something a little different, try a Cranberry Pear Crostata or a bunch of Pie Crust Fries (recipes coming later this week, so get excited!)

For the Filling:
2-1/4 c. tart apples (such as Pink Lady or Gala), peeled and thinly sliced
2/3 c. seedless black grapes, halved
1/3 c. sugar

Combine ingredients in saucepan and heat over med-low heat until fruit is translucent, about 30 minutes, stirring occasionally to keep sugars from burning. Divide mixture into ramekins and set aside.


For the Crust:
Roll dough to about 1/8 inch thick. Cut circles about 1/2 inch wider than ramekins (so if your ramekins are 3" wide, cut dough 3-1/2" wide). Pierce the top of each dough circle a few times with a knife; these holes will allow steam to escape while they bake. Place dough circle on top of filled ramekin and gently press dough down over edges of ramekins to seal. Sprinkle with coarse sugar crystals if desired and bake at 350 for 25-30 minutes or until crust is golden brown.


Source: Adapted from Bon Appetit

Monday, November 14, 2011

Sweet Sixteen: Apples


Pin It!
These mouthwatering apple desserts make me wish Fall would hang around forever! Just take a look at these pictures and try not to run to the store for some ingredients!

Celebration Cake
Celebration Cake
[Better Homes and Gardens]
Caramel Apple Cheesecake Bars
[The Girl Who Ate Everything]
Individual Apple Charlottes Recipe
Individual Apple Charlottes
[Fine Cooking]
Apple Pie Pancakes
[Desserts for Breakfast]
Baked Apples with Granola
[Eat Better America]
Amish Apple Dumplings
[Midwest Living]
Cheddar Apple Hand Pies
[Desserts for Breakfast]
Post image for Cinnamon Sugar Apple Cake
Cinnamon Sugar Apple Cake
[Pinch of Yum]
Sticky Apple-Cinnamon Rolls
Sticky Apple Cinnamon Rolls
[Midwest Living]
Best Ever Individual Apple Crisp
[The Kitchen Prescription]
Caramel Apple Bread Pudding
[Our Best Bites]
img_8226-2.jpg
Russian Grandmother's Apple Pie Cake
[Brown Eyed Baker]
Apple Coconut Family Cake
[Project Domestication]
Apple Fritters
[The Baking Pixie]
Apple Cupcakes with Cinnamon-Marshmallow Frosting Recipe
Apple Cupcakes with Cinnamon Marshmallow Frosting
[Eating Well]
Apple Crisp
[Completely Delicious]

Saturday, November 12, 2011

Happy Birthday to Me!


Pin It!
It wasn't until a few years ago when I learned that lots of people make wishes when the clock reads 11:11. I thought I was entitled to wishing at 11:11 since it's my birthday, but apparently 11:11 is lucky for everyone. Woot! Even better than that, yesterday was my birthday: 11/11/11! Now I know you're jealous. To ease your  burden, please feast your eyes on this, the product(s) of my birthday weekend thus far:

I may have a problem. Or at least my waistline may have a problem if I don't get some hungry friends over here quick!

Plus, thank you to all our service members and veterans who I share my birthday with each year. You will always have a special place in my heart.

Thursday, November 10, 2011

Caramel Apple Pie Bites


Pin It!

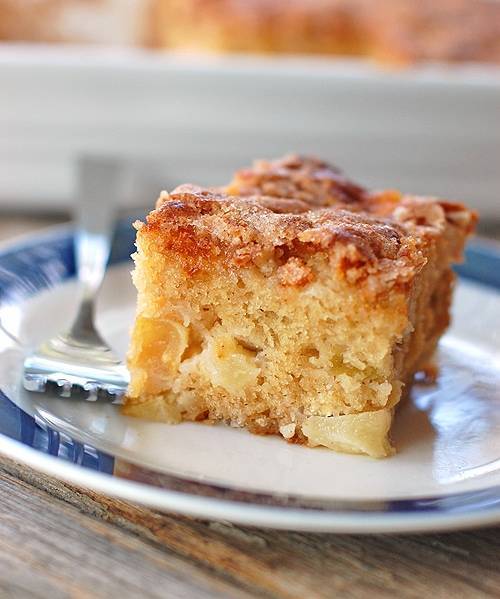
These little bites look so fancy but they're really easy to make. Trust me. Just don't leave them on your kitchen table if you plan to take them anywhere besides your stomach. Each bite fits nicely in your mouth and it's quick to grab and go!

[Hint: Don't start the caramel sauce until the mini pies are out of the oven and on the cooling rack, otherwise, it won't be soft enough to dip the pies without damaging those flaky crusts!]


Caramel Apple Pie Bites   [click to print]
For the pie crust: 
2-1/2 c. flour
1 T. sugar
1 tsp. salt
2 sticks (8 oz.) butter, cold
1/2 c. water, ice cold

Whisk flour, sugar and salt together in large mixing bowl. Cut butter into 1/2 inch pieces and add to flour mixture. Using pastry blender, cut in butter until butter pieces are about the size of peas. It doesn't have to be perfectly even at this point. Drizzle water over mixture. Use a rubber spatula to gather the dough together until the mixture starts clumping together. Gently knead dough together with your fingertips; when it forms a lumpy ball, it's done. Be careful not to overwork, the heat from your hands can make the butter melt and that's what makes the crust so flaky and good! 

Divide dough and flatten to 1/2" disk; seal in plastic wrap and refrigerate for at least 1 hour. The colder the dough, the better, though, so leave it for 2 or more hours if you can. 

Source: Recipe files of Smitten Kitchen

For the filling: 
1 c. apple butter (check out this recipe!)
2 medium apples
1/2 tsp. cinnamon
1 T. brown sugar
2 T. whole milk

Chop apples into 1/4 inch pieces and add to large saucepan. Add apple butter, cinnamon, sugar and milk. Stir to combine. Bring mixture to a boil, then reduce heat and simmer for about 25 min. or until apple pieces become soft. Remove from heat and allow to cool. 

Source: Recipe files of Sugar Rush!

For the caramel dip and walnut coating: 
8 oz. caramels (about 30 pieces)
2 tsp. apple cider
2 c. walnuts, chopped and toasted. 

Heat caramels and cider in small saucepan on med-low heat until melted. Pour into deep bowl and set aside.   Chop walnuts into small pieces and spread on wax paper. 

To assemble: 
Roll out the pie crust dough between two pieces of plastic wrap until it's no more than 1/8 inch thick. Cut 2-1/2 inch circles of dough using a floured cookie cutter, or, one of my personal favorites, the end of a plastic cup. Lightly coat mini muffin pan with nonstick spray. Set dough circles over muffin openings and gently press into muffin cup using the end of a floured spice jar.


Fill each crust with  T. apple butter. Gently scrunch overhanging dough to edges of cup. Bake at 350 for 20-25 minutes or until crust is light golden in color. Allow mini pies to cool to room temperature.


Dip half of pie in warm caramel dip, tap off any excess caramel. Roll edges in chopped, toasted walnuts on wax paper. Place on cooling rack over piece of wax paper and allow caramel to harden. If your caramel hardens too much to easily dip pies, just microwave at 15 second intervals, stirring well between each nuke, until soft and pourable.

Tuesday, November 8, 2011

Crock Pot Apple Butter


Pin It!
I love the smell of Fall. Warm jackets, crunchy leaves, crisp air, fresh, cold apples. When I was little, my family and I picked bags and bags of apples at a friend's orchard back home in Pennsylvania. I sat on the kitchen floor while my parents worked on making and canning everything appley and proceeded to take a bite out of each and every apple I could get my hands on. 


Last week when I was at the grocery store, the apples were all just staring me down. Gala, Honeycrisp, Granny Smith, McIntosh, Pink Lady, everthing! Now I have about 8000 different apple recipe ideas floating through my head, so here's the first: Apple Butter. I know, I know, it sounds like a long, tedious process, but it really isn't! This recipe will make your entire home smell like the holidays and it only takes a few minutes to throw together and a few hours in a crockpot!


Crock Pot Apple Butter   [click to print]
6 apples
2 tsp. cinnamon
1/4 tsp. nutmeg
1/4 tsp. cloves
1/2 tsp. allspice
1/4 tsp. salt
3/4 c. light brown sugar
1 c. apple cider
1 lemon peel

Peel apples and chop into pieces about 1/4 to 1/2 inch thick; add to crockpot. Add spices, salt, sugar, cider and lemon peel. Stir to combine. Cook on high for 1 to 1-1/2 hours, or until apples are bubbly. Reduce heat to low and cook for 6 to 8 hours, stirring 2 or 3 times throughout. Turn off heat and allow to cool about 1 hour. Remove lemon peel and pour mixture into food processor or blender; puree until smooth. 

Source: Adapted from Baked Bree

Thursday, November 3, 2011

Baking a Difference: Sweet Success Bakery


Pin It!
I knew I would love A Sweet Success Bakery the moment I heard Maya Aliff, Bakery Program Manager, claim, "You could say cake is my favorite food!" Plus, they serve people with mental illness and I'll always have a sweet spot in my pantry for them. So please read on to find out about the great things happening in Guilford County, North Carolina!


When and where was your bakery founded?
At Sanctuary House, a nonprofit day program for adults with mental illness diagnoses such as Schizophrenia, Bipolar Disorder, Major Depression and Schizoaffective Disorder, we focus on the development of employable skills and especially on helping our clients lead an independent life. The problem comes with the stigma of mental illness; many employers are wary about hiring an individual with a known mental illness. This is where we come in. 


At one of our annual fundraisers in 2008, I organized a bake sale. A week later, people were calling in to place orders! This was a pivotal moment for us, because at the time we were looking for an outlet to really focus on job development skills for our members. We needed a hands-on training outlet. We decided to focus on food service and our bakery was born!


What training do you provide?
Sanctuary House clients are invited to participate in every aspect of the bakery, such as baking, making icing, decorating cakes, working with fondant, washing dishes, folding boxes and menus, labeling bags, sweeping, grocery shopping, making deliveries, sitting in on wedding cake consultations. However, working at A Sweet Success is about more than gaining skills. Clients learn independence, self-confidence, teamwork, kitchen safety and sanitation and develop self-worth as they see something through to completion and take pride in their accomplishments.


What keeps people coming back for more?
Our strawberry layer cake is our most popular cake. It’s a cream cheese pound cake with homemade whipped cream and fresh strawberries between the layers with a vanilla buttercream icing. Of course, you couldn’t go wrong with the serendipity bar or our chocolate mousse!

Tuesday, November 1, 2011

Modeling Chocolate


Pin It!
I have a love-hate relationship with fondant. I love the vibrant colors, I love the shapes you can form and I love that it smooths over a cake so beautifully. But the eating part? Not so much my favorite. If you aren't sure what fondant is, just think back to the last wedding reception you went to...remember the cake? Chances are it was covered with something overly sweet and smooth that most people peeled off. Yeah, that's fondant.


Enter Modeling Chocolate. This stuff is a great alternative to fondant and is pretty easy to make, too. It can be colored just as vibrantly and sculpted and smoothed into whatever shape you want. (I haven't tried covering an entire cake with this yet, so I'm not sure how that works...) Plus, it tastes just like chocolate because it's made from chocolate!


Just to be clear...

Molding Chocolate: pure chocolate or chocolate made with vegetable solids and/or cocoa butter, like Wilton Candy Melts; this stuff is great for pouring into candy molds (get it? molding chocolate?)
Modeling Chocolate: this is chocolate mixed with syrup (in our case, corn syrup) to make it pliable


Modeling Chocolate   [click to print]
14 oz. Chocolate or Candy Melts
1/3 c. Light Corn Syrup

Melt chocolate in 15-30 second bursts in the microwave. Stir very well between each nuke, white chocolate melts very easily and also burns very easily. If you notice any graininess, it's probably already burned and you'll be better off just starting fresh.

Once the chocolate is melted and smooth, warm the corn syrup in the microwave for 45-60 seconds and add to melted chocolate. Immediately stir mixture but do not overmix! According to Chef Talk, "You will notice that as you stir, the chocolate will seize into a thick gooey mass and will clean the sides of the bowl. Look closely to make sure you don't have any streaks of unincorporated chocolate...this unincorporated chocolate will become lumpy grain later and you don't want that. The mass will seem a little oily, that's OK. But the more you stir, the oilier it gets and you don't want oil dripping off it either. It's a delicate balance."

When your done mixing, pour modeling chocolate onto large piece of plastic wrap. Flatten chocolate to about 1/4 in. thick and cover completely with plastic wrap. Refrigerate for a few hours until chocolate sets; it will be hard at this point.

To use modeling chocolate, remove from refrigerator and allow it to come to room temperature. Break off a small piece and begin kneading it in your hands. It will be crumbly and rough and seem unkneadable at first but keep going! It will get softer and smoother as you continue to work with it. If it seems lumpy, the chocolate probably wasn't melted completely before adding the syrup; just try to pick out those lumps and knead until smooth. If it's your first time making this stuff, I suggest you use pre-colored candy melts, but if you prefer custom colors, add a little powdered food coloring until you read the desired color. If the chocolate gets too soft while you're working with it, set aside to return to room temperature or stick in the fridge for a few minutes.

Source: Adapted from Wilton and ChefTalk
Related Posts Plugin for WordPress, Blogger...